Beyond the basics – HP Deskjet 950c Printer User Manual
Page 16
10
Beyond the Basics
2
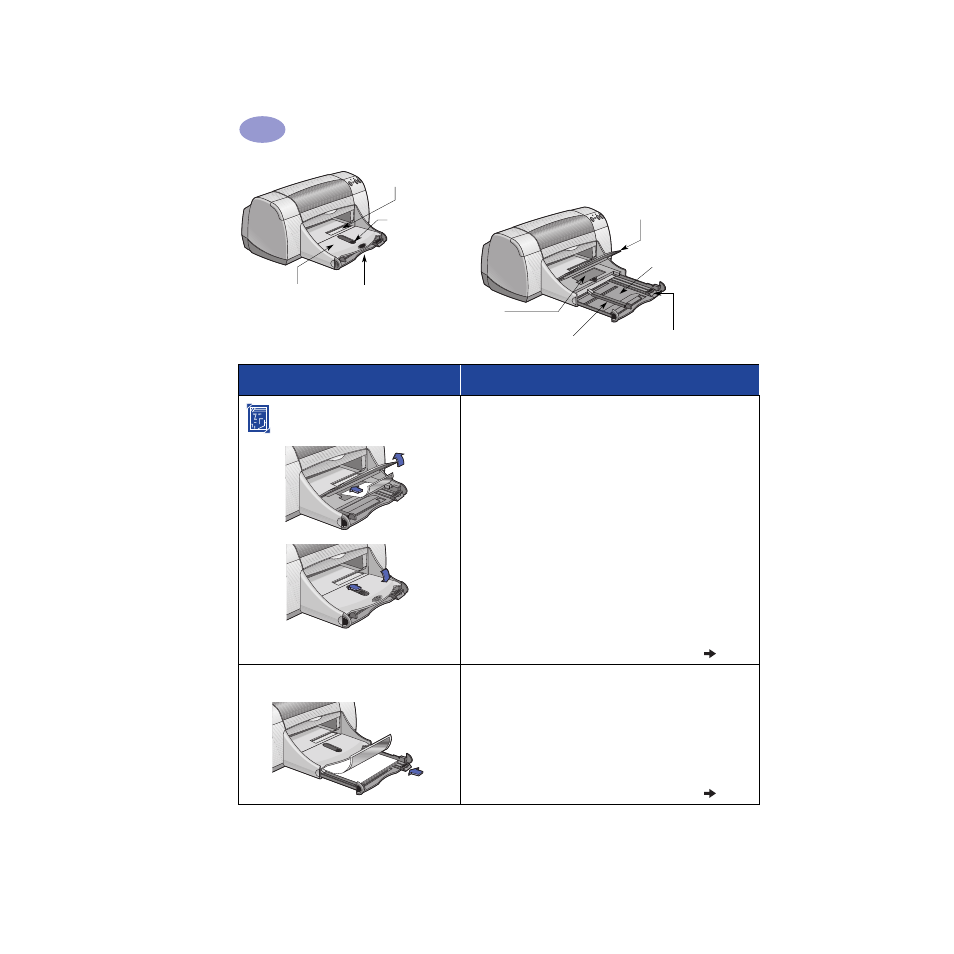
OUT tray down
Paper width guide
Photo Tray
IN tray pulled out
OUT tray up
Photo Tray Button
Single envelope slot
Paper length guide
IN tray pushed in
I want to print…
I should…
4 x 6 in., 102 x 152 mm
Photo Paper
1
Raise the OUT tray to the up position.
2
Insert up to 24 sheets of HP Premium Plus Photo
Paper, Glossy 4 x 6 in., 102 x 152 mm
(with tear-off tab) into the Photo Tray, glossy side
down. Place paper with the tear-off tab away from
the printer.
3
Lower the OUT tray.
4
Press the Photo Tray Button and slide it toward the
printer so that the Photo Tray is engaged.
5
Choose the appropriate print settings.
6
Print the photo.
Note:
The first time you use the Photo Tray, the
printer will calibrate the tray by feeding through a
blank sheet.
7
When you have finished printing, press down on the
Photo Tray Button, and slide it away from the printer
to disengage the Photo Tray.
8.5 x 11 in. or A4 Photo Paper
1
Remove all paper from the IN tray.
2
Insert up to 30 sheets of photo paper (printable side
down) into the IN tray.
3
Slide the paper guides snugly against the edges of
the paper. Make sure the IN tray is pushed in.
4
Choose the print settings that match the type and size
of the photo paper.
5
Print the photos.