Installation, Cut countertop opening, Rear discharge conversion – Electrolux EI30DD10KS User Manual
Page 10: Mount the unit
10
Cut Countertop Opening
- Lay out and cut the cooktop cut-out far enough
forward so downdraft will fit behind it (refer to cooktop
installation instructions).
- Set cooktop in place and slide it as far forward
as possible. Center and square it with edges of
countertop.
Rear Discharge Conversion
- If ducting will be connected to the back of the
unit remove the plate from the back of the chassis.
Remove the Transition Duct from the front of the
chassis and mount to the back. See page 12 for
mounting the Transition Duct.
- Attach the plate removed from the rear of the chassis
to the front.
- Place the template against the back flange of the
cooktop and center it. Trace around template to mark
the downdraft opening.
- Remove cooktop from countertop.
- Cut downdraft opening. Be careful not to chop edges
of countertop. Mask the countertop to help prevent
scratching the surface.
- A ½” minimum clearance behind cutout must be
maintained behind the telescopic downdraft for proper
installation.
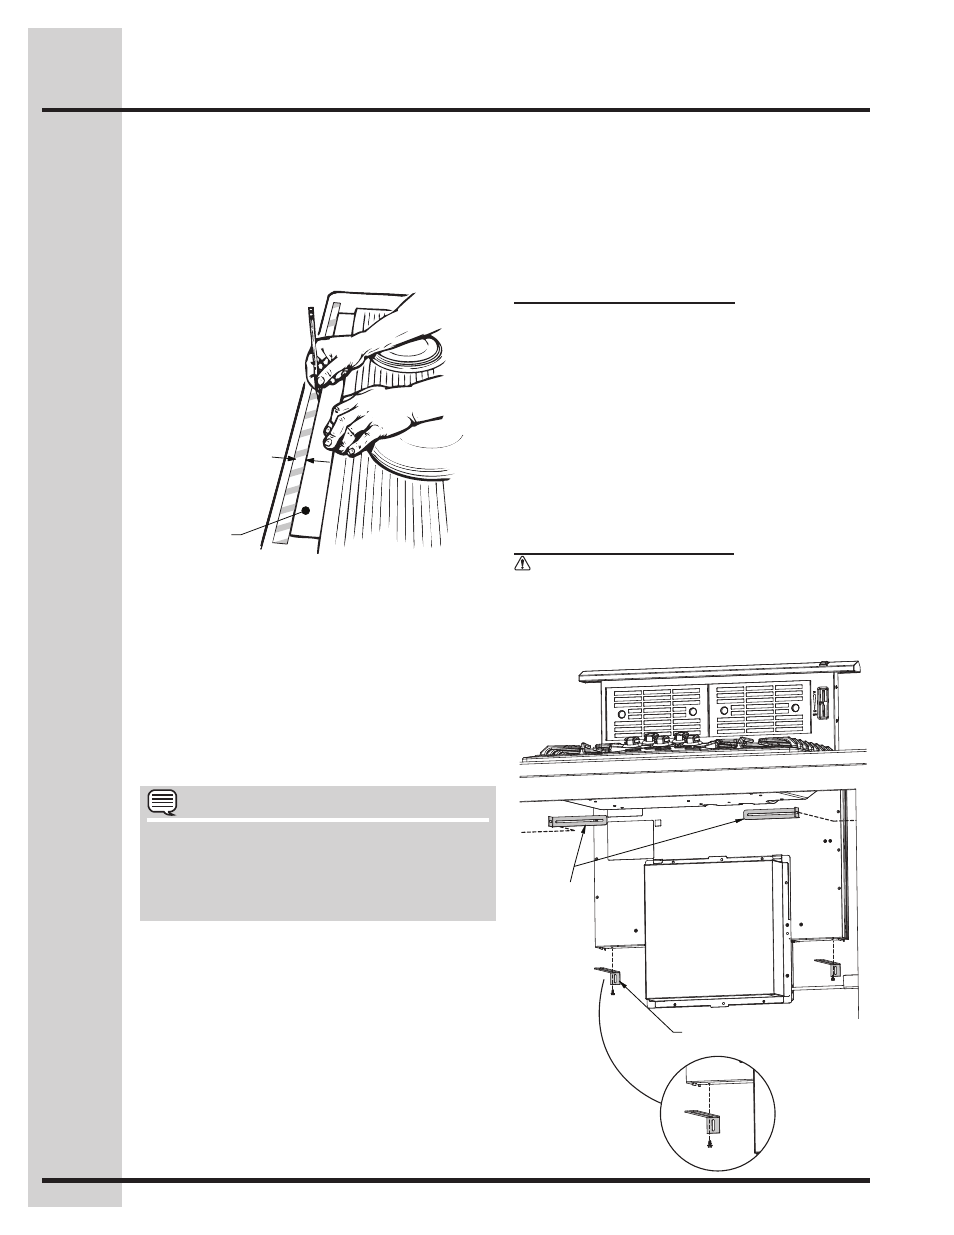
Mount the Unit
Set downdraft into opening and position with the
back of the unit contacting the back edge of the
cutout.
Stabilizing brackets should be installed at the bottom
of the vent housing and just below the bottom of the
cooktop chassis.
Lower stabilizing brackets:
One stabilizing bracket should be installed on each
side of the vent housing. Remove the hex head
screws from the bottom of the vent housing and
use it to attach each bracket to the bottom of the
housing. Slide the brackets to the back wall of the
cabinet so that the vent housing is vertical, check the
level of the vent on both the right and left sides, and
tighten the screws. Attach the stabilizing brackets to
the back wall using the appropriate screws for your
cabinet material and thickness. These screws are
not supplied with downdraft system.
The end of the stabilizing bracket may have to be
bent down for transition duct clearance.
Upper stabilizing brackets:
Caution:
Do not attach the upper bracket to the
vent with screws, doing so may jam the vent.
Attach a stabilizing bracket to the left and right
cabinet walls just below the bottom of the cooktop
chassis. The long leg of the bracket must be in
contact with the vent housing.
Remove screws
from the chassis
housing and re-
use to install the
stabilizing brackets.
A ½” minimum
clearance behind
cutout must be
maintained for
proper installation.
DO NOT
Screw
Top
Stabilizing
Brackets
to Chassis
Housing
Template
NOTE
Cabinet constructions may vary. Be sure to
take cabinet frame members into account. They
may have to be removed or relocated. Do not
compromise the structural integrity of the cabinet
in doing so.
Installation