Cop y – Canon EOS Rebel T3 18-55mm IS II Lens Kit User Manual
Page 116
B
: Matching the Light SourceN
116
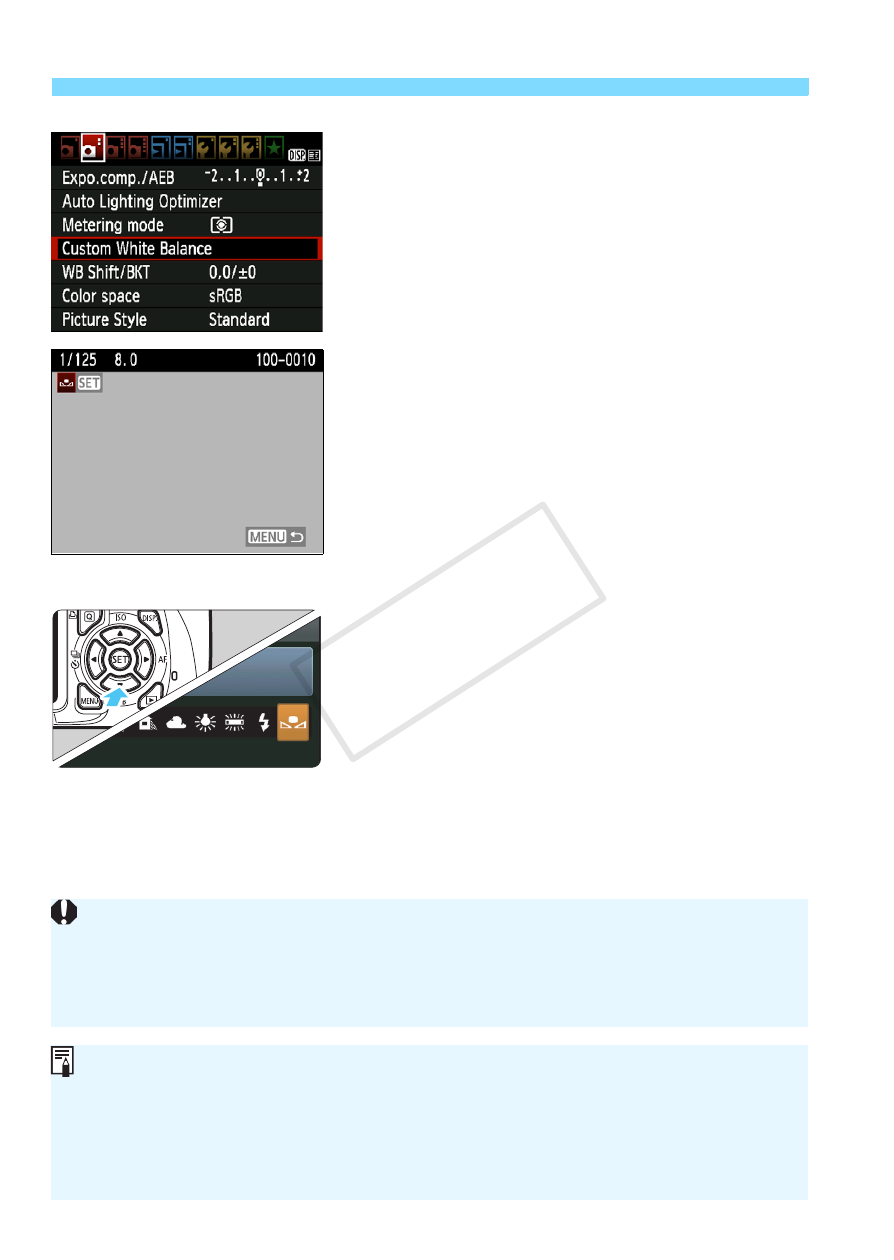
2
Select [Custom White Balance].
Under the [2] tab, select [Custom
White Balance], then press <
0>.
X
The custom white balance selection
screen will appear.
3
Import the white balance data.
Select the image that was captured in
step 1, then press <
0>.
X
On the dialog screen which appears,
select [OK] and the data will be
imported.
When the menu reappears, press the
4
Select the custom white balance.
Press the <
XB> button.
Select [O], then press <
0>.
If the exposure obtained in step 1 is way off, a correct white balance
might not be obtained.
If the image was captured while the Picture Style was set to
[Monochrome] (p.80), it cannot be selected in step 3.
Instead of a white object, an 18% gray card (commercially available) can
produce a more accurate white balance.
The personal white balance registered with EOS Utility (provided
software, p.270) will be registered under
for the registered personal white balance will be erased.
COP
Y