Load paper to adjust the printheads – Canon imagePROGRAF iPF6400 User Manual
Page 5
5
Load the provided adjustment paper and adjust the Printheads.
Load Paper to Adjust the Printheads
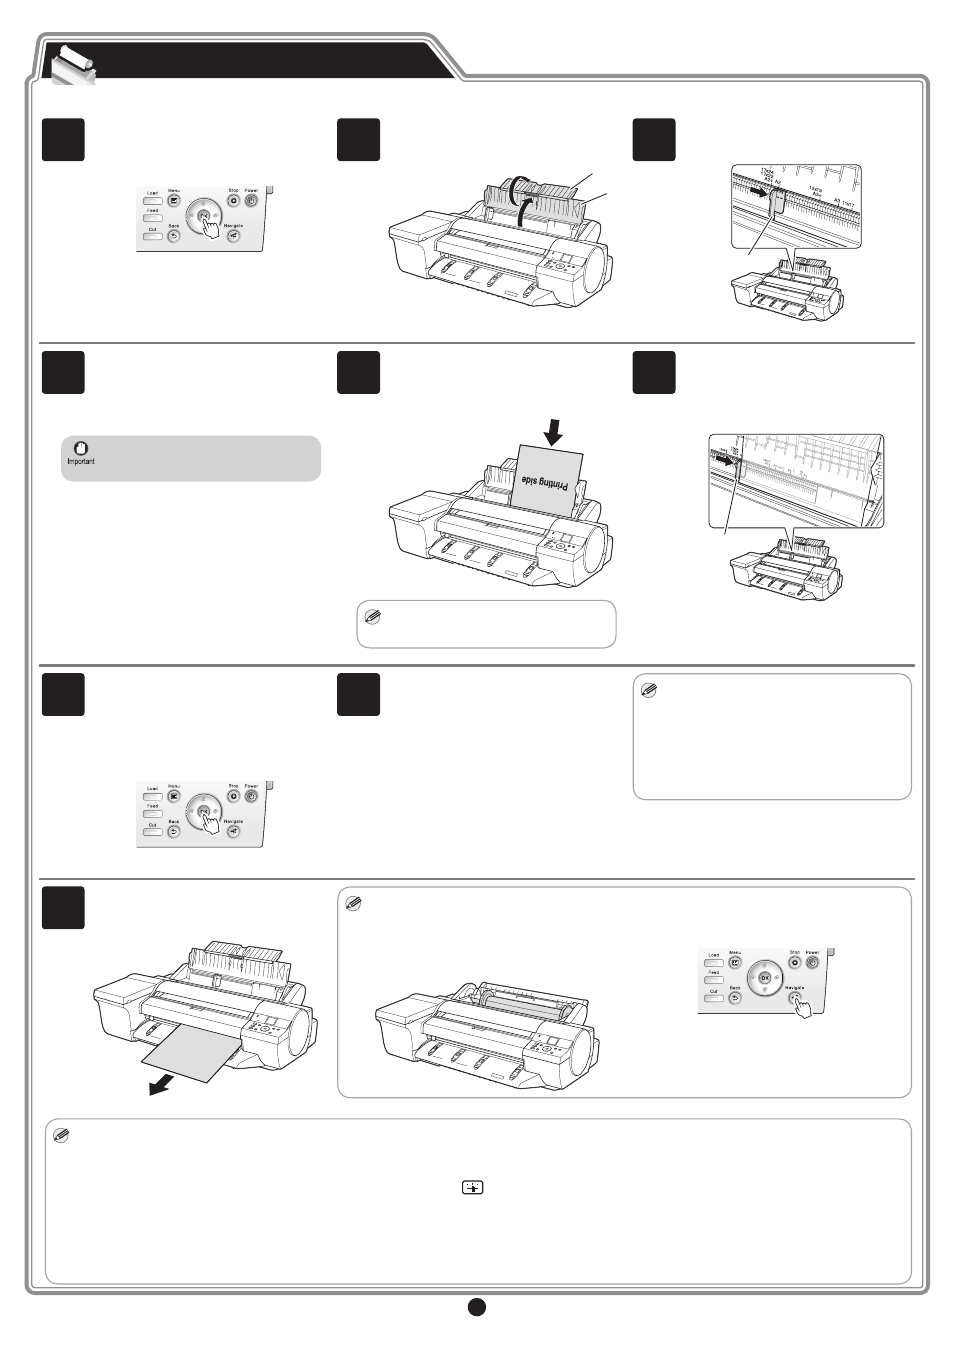
1
Select type of paper for printhead adj.
is shown on the display screen. Check
that Manual Paper is selected and press
OK.
Instructions on loading manual paper are
shown on the display screen.
2
Open the Paper Tray Cover (a), and then
open the Tray Extension (b).
a
b
3
Slide the Width Guide (a) to align it with
the mark for the size of paper you will
load.
a
4
Prepare one sheet of paper.
Refer to the packaging for the paper to
check which side is the printable surface.
•
Return unused paper to the pouch it came
in, and store it away from heat, humidity
and direct sunlight.
5
Load one sheet, printing-side up, in the
Top Paper Feed Slot.
Insert the paper until it touches the far
end of the tray lightly.
MEMO
• If it is difficult to load from the front of
the printer, load from the back of the
printer.
6
Move the Width Guide (a) to match the
size of paper loaded.
Set the Width Guide against the edge
of the paper to prevent the paper from
becoming crooked or wrinkled.
a
7
The screen for selecting the paper type
is shown on the display screen. Press ▲
or ▼ to select the type of paper loaded in
the printer.
Select Coated Paper and press OK.
Then from the menu that appears, select
HW Coated and press OK.
8
When paper advance ends, the system
is automatically filled with ink for the first
time and Printhead adjustment is started.
It takes a total of about 35 minutes.
Make use of this time by referring to
"Install the Software and the Electronic
Manuals" on page 6 to install the printer
driver and the User Manual on your PC.
MEMO
• Charging the system with ink fills the system
between the ink tanks and printheads. In
addition, cleaning is performed to keep the
printer in optimal condition. This may cause
the remaining ink indicator and maintenance
cartridge capacity indicator to drop to about
80 % (the remaining ink indicator may drop
to about 40 % for the starter ink tank), but
this is not a problem with the printer.
MEMO
After you have finished setting up the printer and installing the software and electronic manuals, we recommend performing color calibration. Color
calibration compensates for changes in color from individual variation and aged deterioration of the printer, ensuring better color consistency.
Perform color calibration using the provided Adjustment Paper, which is compatible with this process. For information on other compatible paper,
refer to the Paper Reference Guide.
During color calibration, on the control panel's display screen, open
(settings/adj. tab) and select Adjust Printer - Calibration - Auto Adjust.
The process of color calibration takes about 10 minutes.
To use the spectrophotometer unit (optional) on the iPF6450 to perform color calibration, refer to the "Color Calibration Using the
Spectrophotometer Unit (option)" in the User's Guide.
If you use the color calibration for color adjustment, it is useful to set the function to notify the execution period (Prompt Execution). For details of
the function, refer to "Color Calibration Using the Printer Sensor" in User's Guide.
When the setup is completed, refer to the various manuals to use the printer. Refer to "The Manuals Supplied with This Printer" on page 1.
•
•
•
•
9
When printhead adjustment ends, paper
is printed with an adjustment pattern and
is ejected.
Printer setup is now complete.
MEMO
• For how to load roll paper, refer to the
Basic Guide, to the User Manual installed
at "Install the Software and the Electronic
Manuals", or to the instructions displayed
by the navigation function of the control
panel.
Follow the procedure below to display the
navigation on how to load roll paper.
1. Press Navigate.
2. Use the ▲ and ▼ keys to select Load Roll
Paper and press OK.
3. Use the ▲ and ▼ keys to select View Op. Guide
and press OK.
The navigation starts.