Headset connections with the callmaster v – Avaya Definity Callmaster V User Manual
Page 6
2
The following features correspond to the numbers in Figure 1.
Note: Two feature buttons must be administered in the following ways:
•
One of the feature buttons must be designated as the
Headset On/Off button;
•
The Release feature must be administered on a second feature
button.
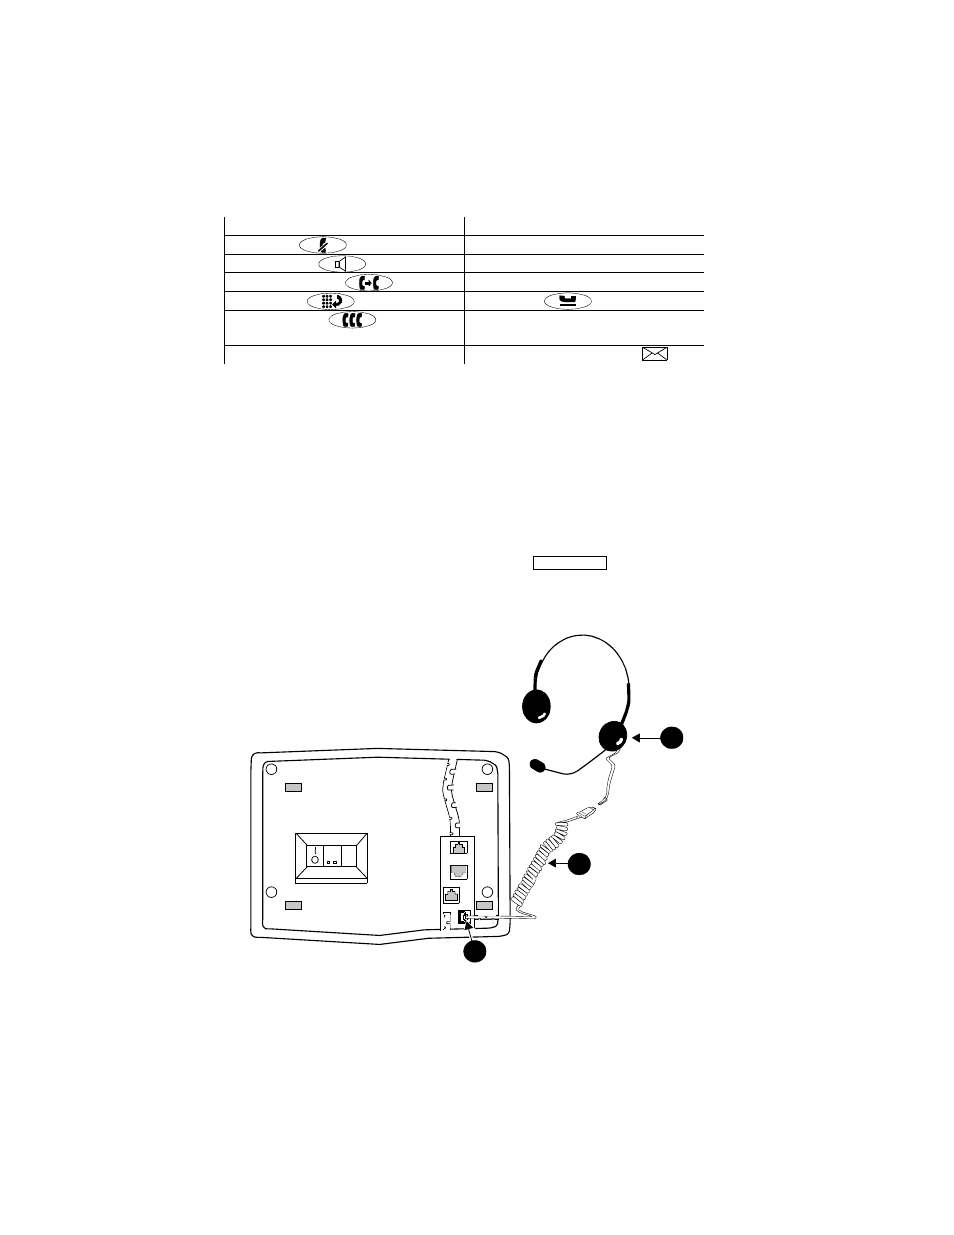
Headset Connections with the CALLMASTER V
The headset connection for the CALLMASTER V consists of a headpiece
(shown as 1 in Figure 2 below) which is plugged into an adapter cord (shown
as 2).
Note: Your system manager MUST administer a
button on your
set. Use this button to turn your headset on and off. For instructions for
using this feature button, see “Headset On/Off” in the section titled
Call-Handling Features.
FIGURE 2
The Headset Connected to One of the Headset Jacks (shown
as 3) on the CALLMASTER V Telephone
1) Telephone Notepad
8) Volume control button
2) Mute (or
) button
9) Display
3) Speaker (or
) button
10) Softkeys
4) Transfer/Test (or
) button
11) Display control buttons
5) Redial (or
) button
12) Hold (or
) button
6) Conf/Ring (or
) button
13) Call appearance/feature buttons
(See Note immediately below)
7) Dial pad
14) Message light – labeled
Headset On/Off
1
3
2