8 for shared network printer users, Windows, Wired network – Brother HL-3075CW User Manual
Page 16: For shared network printer users
16
Windows
®
Wired Network
8
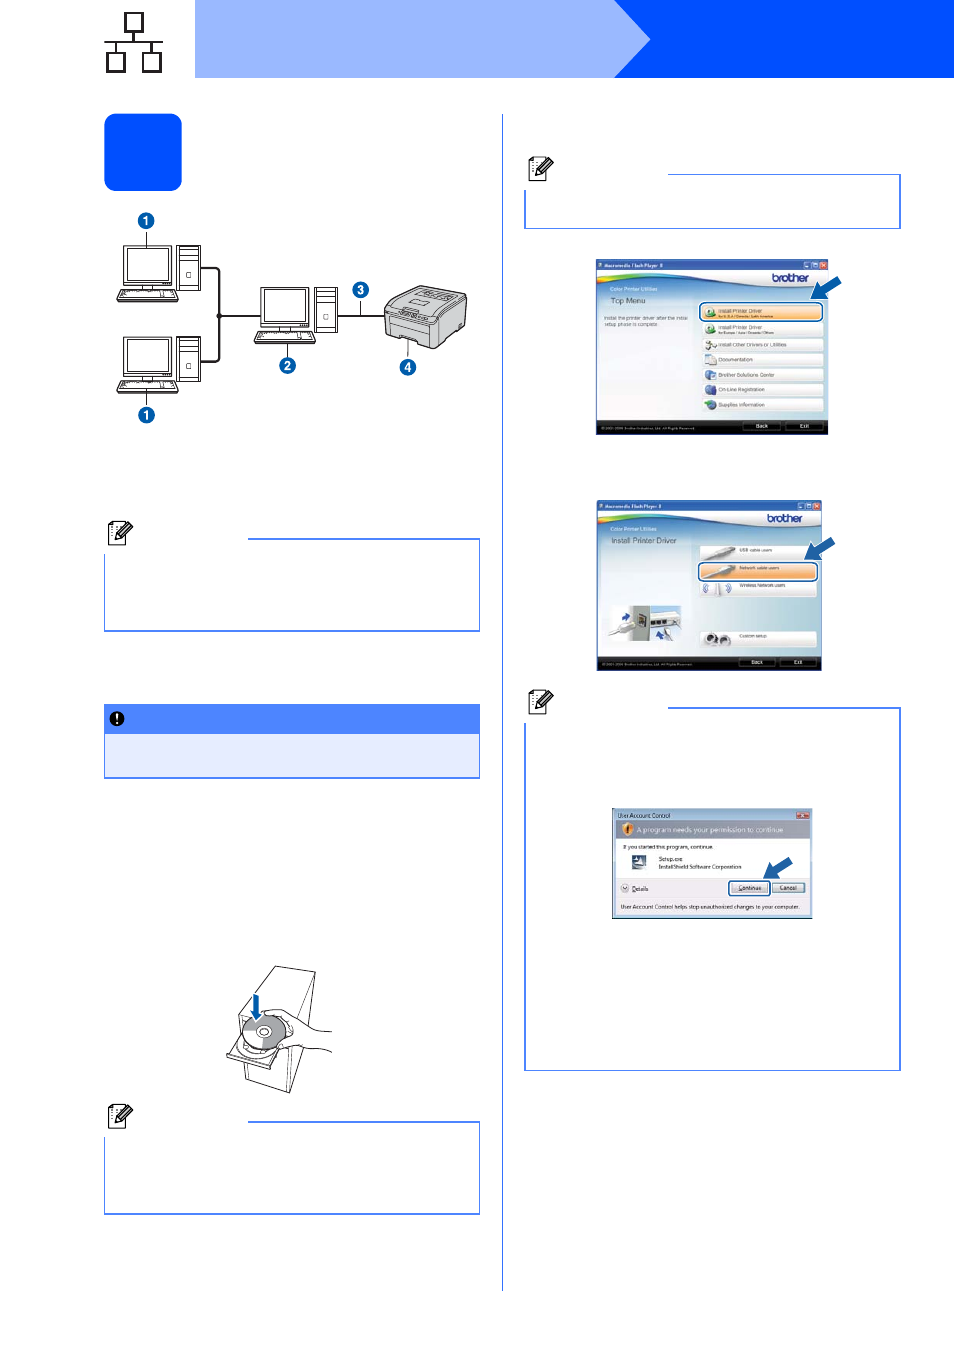
For shared network printer
users
a
Client computer
b
Also known as “Server” or “Print server”
c
TCP/IP or USB
d
Printer
Install the driver and choose the correct printer
queue or share name
a
Turn on your computer. (You must be logged
on with Administrator rights.)
b
Put the supplied CD-ROM into your CD-ROM
drive. The opening screen will appear
automatically.
Choose your printer model and the language.
c
Click Install Printer Driver on the menu
screen.
d
Click Network cable users.
Note
If you are going to connect to a shared printer on
your network, we recommend that you ask your
system administrator about the queue or share
name for the printer prior to installation.
IMPORTANT
Make sure there are no USB Flash memory
drive inserted.
Note
If the Brother screen does not appear
automatically, go to My Computer (Computer),
double-click the CD-ROM icon, and then double-
click start.exe.
TCP/IP
Note
Choose the Install Printer Driver icon for your
region.
Note
• For Windows Vista
®
and Windows
®
7, when
the User Account Control screen appears,
click Continue or Yes.
• If you want to install the PS driver (Brother’s
BR-Script Driver), choose Custom Setup and
then follow the on-screen instructions. When
the Select Components screen appears,
check PS (PostScript Emulation) Driver, and
then continue following the on-screen
instructions.