Brother QL-720NW User Manual
Page 24
16
3
Read the license agreement
and click [Agree] if you
agree with the terms and
conditions.
4
Click [Install] to start the
installation and follow the
on-screen instructions.
For Windows Vista
®
and
Windows
®
7, when the User
Account Control screen
appears, click Allow or Yes.
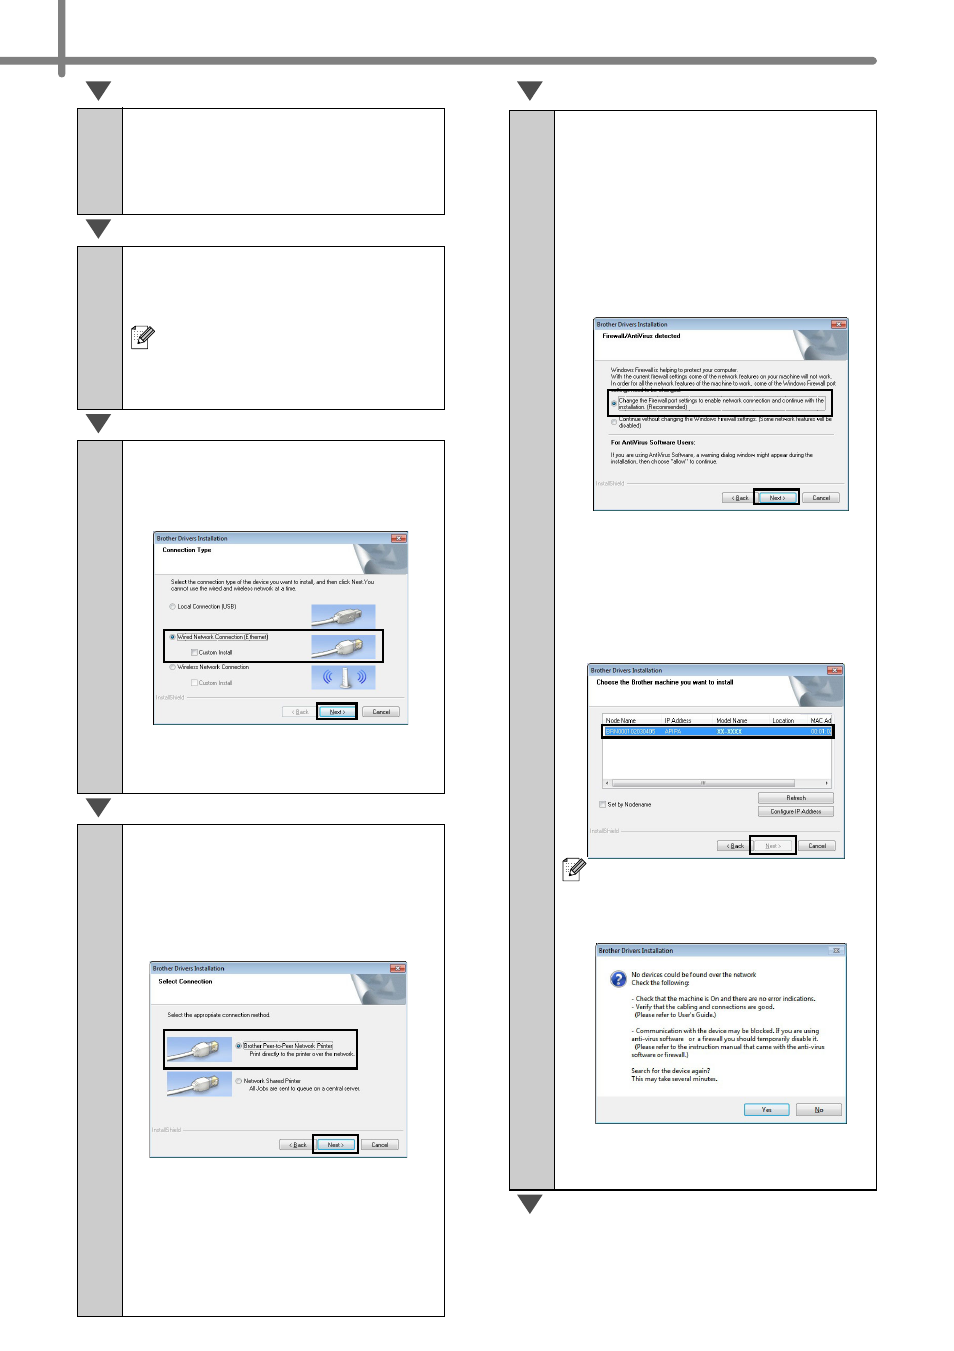
5
Choose Wired Network
Connection (Ethernet),
and then click [Next].
Follow the on-screen instructions
to check the cable and lamp
status, and then click [Next].
6
Choose Brother Peer-to-
Peer Network Printer
(recommended) or
Network Shared Printer,
and then click [Next].
The following step describes the
operation when Peer-to-Peer is
selected.
For details on Network Shared
Printer connections please see
Brother Solutions Center
http://solutions.brother.com/
7
When this screen appears,
choose Change the Firewall
port settings to enable
network connection and
continue with the
installation. (Recommended)
and click [Next].
If you are not using the Windows
®
Firewall allow access using UDP
ports 137 and 161.
•
Choose your machine from the
list, and then click [Next].
• If your machine is not found
over the network, the
following screen will appear.
Confirm your settings by following
the on-screen instructions.