Installing the pt-9200dx printer driver – Brother PT-9200DX User Manual
Page 17
13
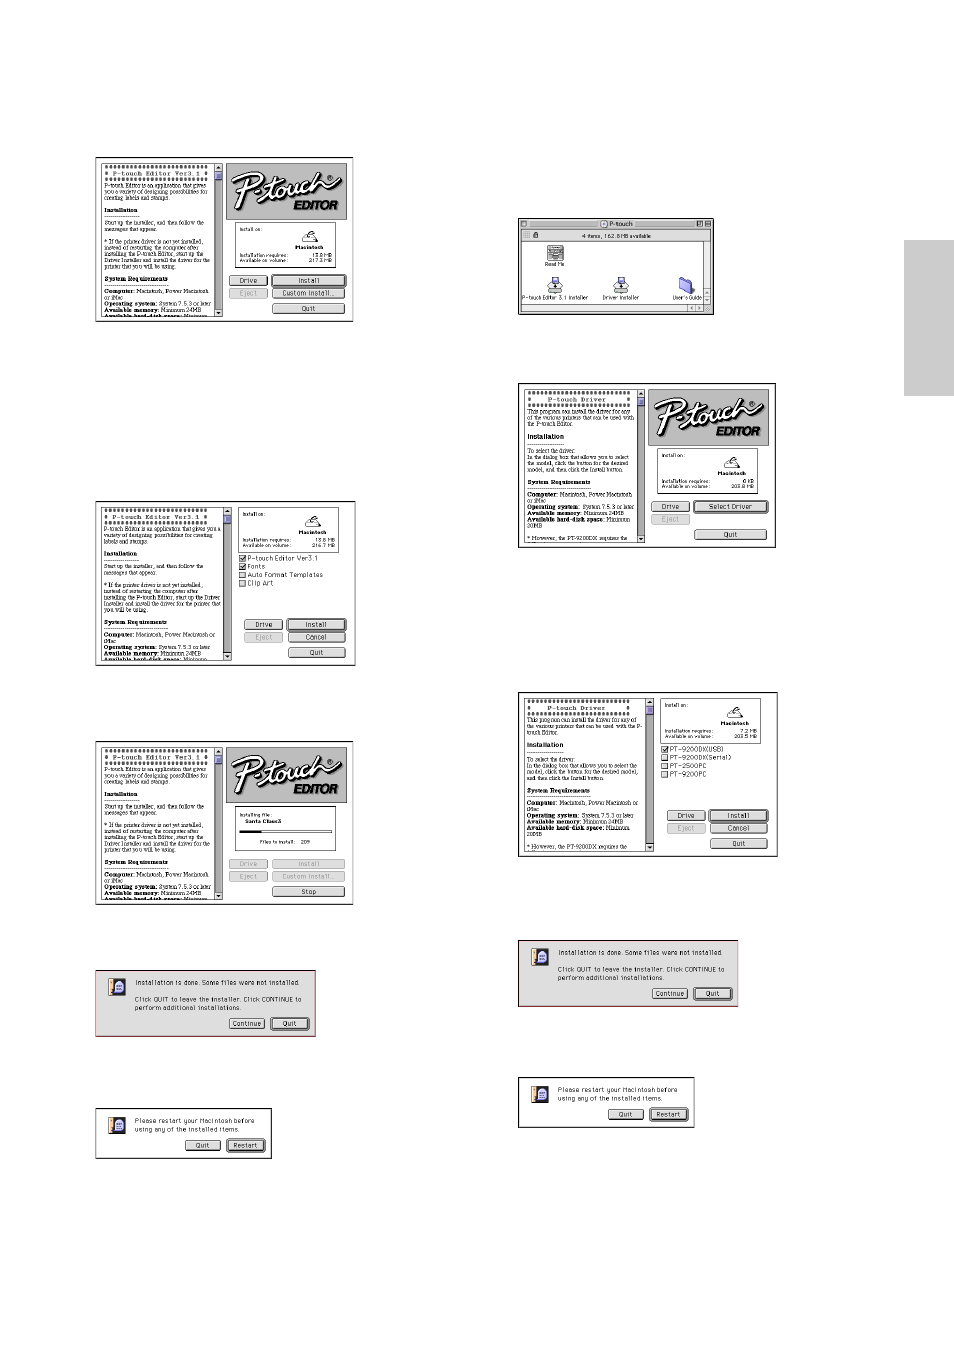
Installing the PT-9200DX printer driver
1 Double-click the Driver Installer icon in the P-touch
folder.
2 After the installer starts up, click the Select Driver
button.
3 In the dialogue box that appears, select “PT-
9200DX(USB)” (for a USB port connection) or “PT-
9200DX(Serial)” (for a modem or printer port connec-
tion). The printer drivers with a check mark beside
them are installed.
Then, click the Install button.
4 Installation begins. When the installation is finished
and the following dialogue box appears, click the
Quit button.
5 When the dialogue box appears, asking if you wish to
restart the computer, click the Restart button to restart
the computer.
6 After the computer is restarted, turn on the P-touch.
Clicking the Custom Install button displays a dialogue
box that allows you to select which options to install.
Only the options with a check mark beside them are
installed.
Select the options that you wish to install, and then
click the Install button.
Dialogue box that appears if the Custom Install button
is clicked:
6 Installation begins.
7 When the installation is finished and the following
dialogue box appears, click the Quit button.
8 When the dialogue box appears, asking if you wish to
restart the computer, click the Quit button to continue
and install the printer driver.
For Macintosh