Sterlco GH-M Series Extrusion Control Weigh Hoppers User Manual
Page 32
Chapter 3: Installation
32 of 60
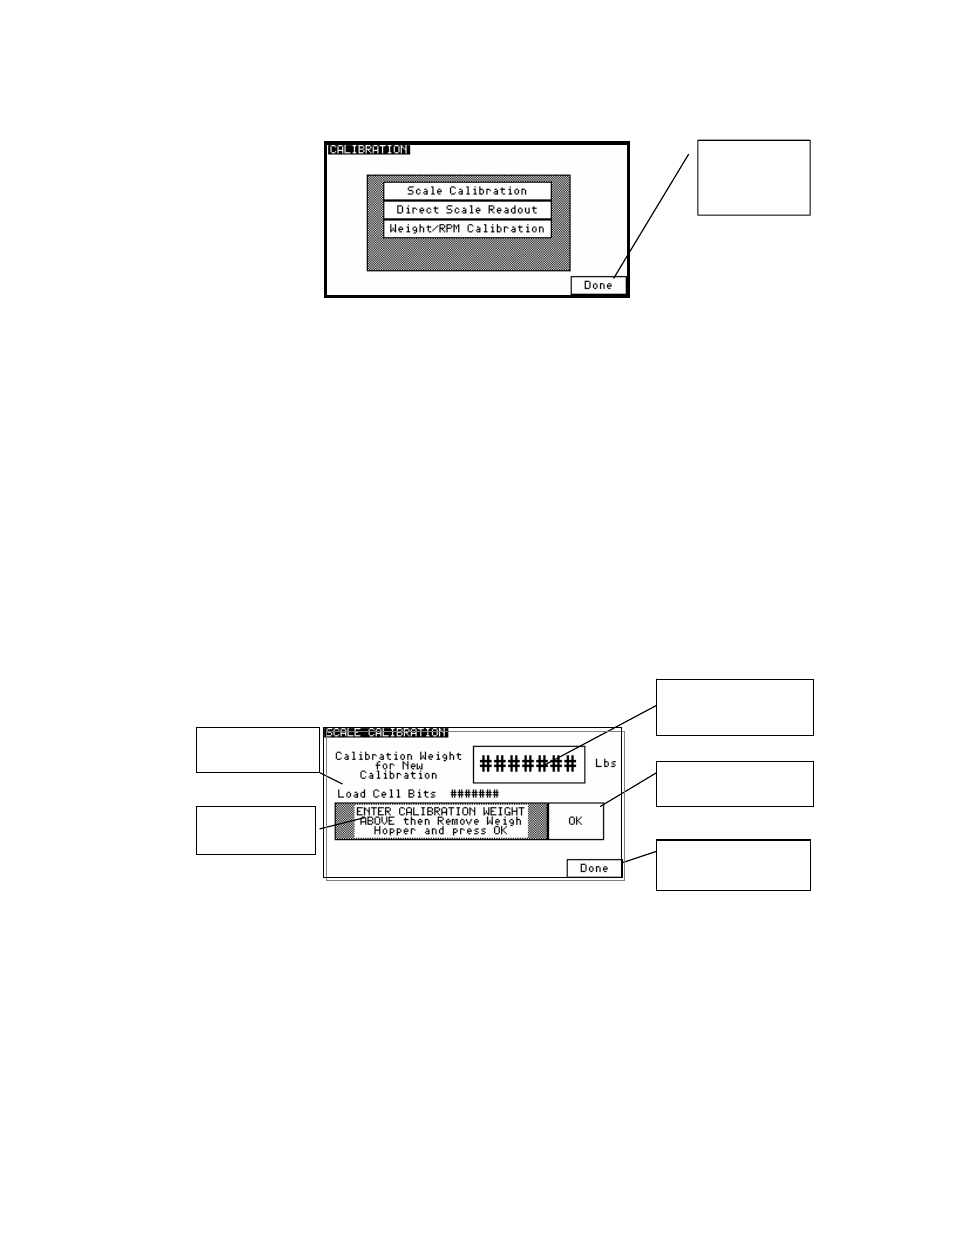
Figure 15: Display Calibration Menu Screen
3. Once in “Scale Calibration”, enter in the scale calibration weight value stamped on
the side of the weight.
4. The controller will prompt you to empty the weigh hopper and press “OK”.
5. After touching OK, the controller will display “PLEASE WAIT...”
6. Next, the controller will ask you to hang the calibration weight on the weight hopper
and press OK.
7. Finally, the controller will ask you to remove the calibration weight and press “OK”
to complete the calibration.
8. The controller will verify that the calibration was done correctly by showing
“Calibration Successful.”
9. Press “Done” until you have reached the Recipe screen.
Figure 16: Display Calibration Screen
Verifying Calibration (Recommended on a periodic basis to ensure accuracy)
1. From the “Recipe” Page, touch the Manufacturer’s icon and enter “5413”, then press
the “Enter” key.
2. Touch “Calibration” and then “Direct Scale Readout”
3. Ensure the weigh hopper is empty.
4. Locate the weight display for the load cell directly below “Current Bits.” Write
down the displayed value.
Enter in the Calibration
Weight
Press here to perform
the calibration
Go Back to the
Calibration Directory
Current Loadcell
Bits
Follow
Instructions
Go back to the
Setup
Directory