MXL Acoustica MVS User Manual
Page 6
11
10
www.mxlmics.com
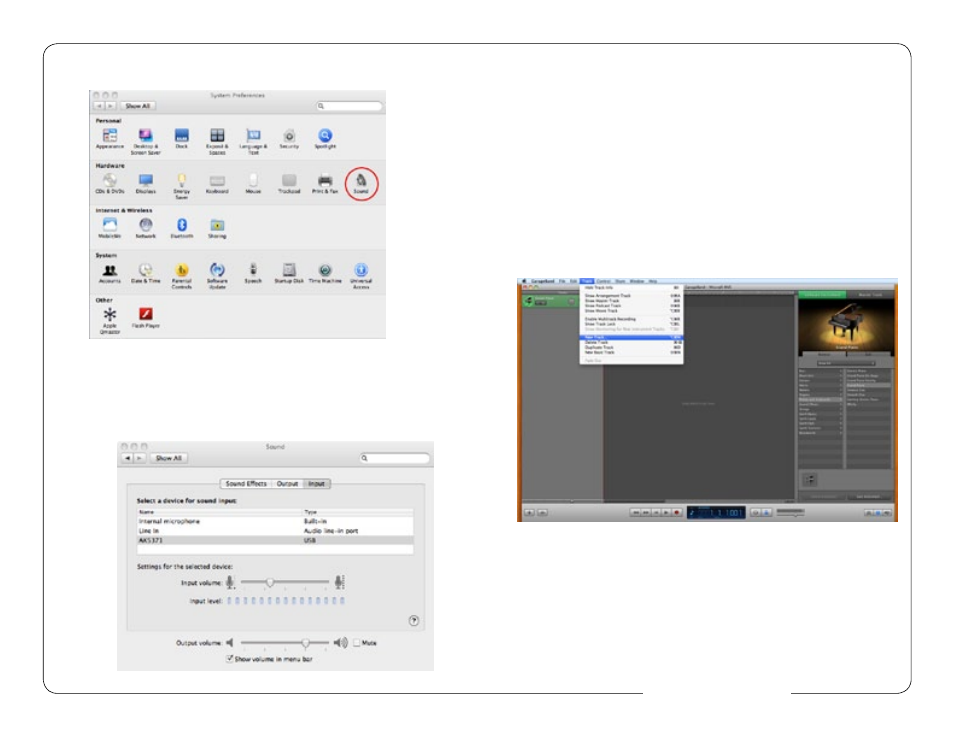
4. Next, click on the Sound icon in the Hardware group as shown in
Figure #8 below.
Figure #8
5. After opening the Sound dialog screen, there will be three tabs at the top of
the window, select the Input tab by clicking on it.
6. Then select the AK5371 (this is the name for the Acoustica MVS
Microphone in the computer) as the device for sound input as shown in
Figure #9 below.
7. By watching the movements of the Input level meter in this window, you
can now see that the Acoustica MVS USB microphone is working as you
speak into it. This setting will be saved as the default input whenever the
microphone is plugged in.
Setting the Acoustica MVS USB to record in Garage Band
1. Open Garage Band. This application will be found in either the Dock Bar or
by opening the Apple Finder, clicking on Applications and/or opening
Garage Band.
2. Garage Band opens with the default project “My Song”. Refer to Garage
Band’s user manual to change the default project.
3. “My Song” opens with one software instrument track. To record through the
USB microphone, click on Track on the top of the window bar and select
New Track as shown in Figure 10 below.
Figure #10
4. Select the tab in the window that opens that says Real Instrument.
Then select the source you will be recording through the microphone, such
as vocals or guitar, as shown in Figure #11. (See next page).
Figure #9