Testing your setup in windows xp, If you don’t hear anything – MXL Acoustica MVS User Manual
Page 3
5
4
www.mxlmics.com
4. In approximately one minute, Windows should display a dialog message
stating that Your New Hardware is Installed and Ready for Use. After this first
connection, Windows will require just a few moments to identify the micro-
phone.
Congratulations! You are ready to begin recording.
Testing Your Setup in Windows XP
To test your setup, we’ll use Window’s Sound Recorder.
Sound Recorder can be found by navigating the following…
1. Press or click Start.
2. Place your mouse cursor over All Programs, then Accessories, followed by
Entertainment.
3. Click Sound Recorder to launch the application.
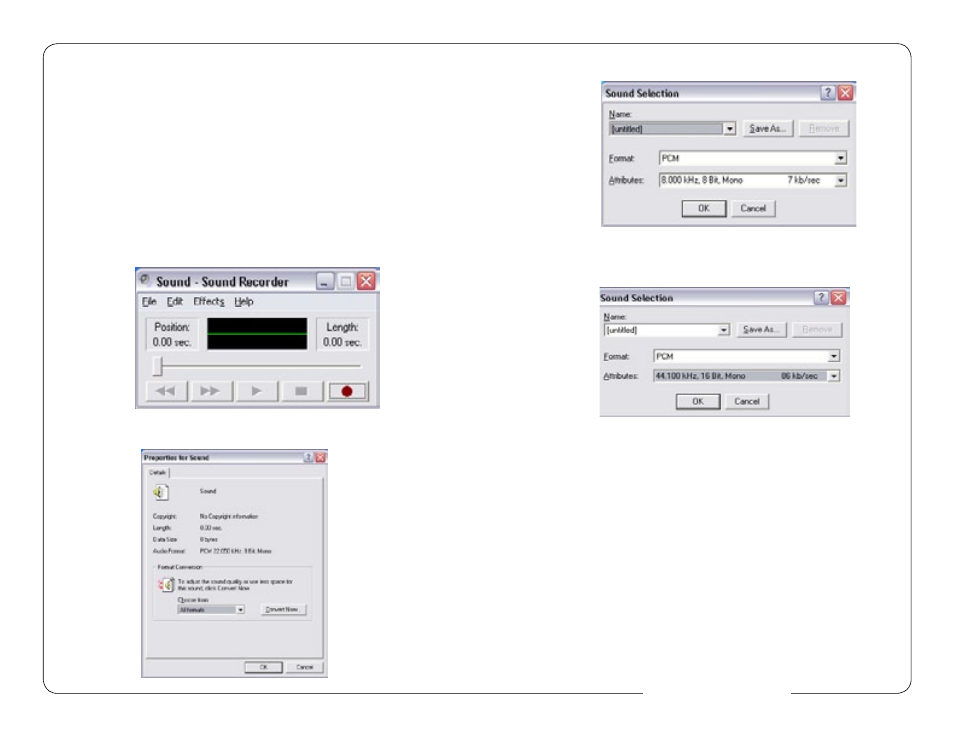
It should look like Figure #2.
Figure #2
4. Select File - Properties. It should look like Figure #3.
Figure #3
5. Click the Convert Now… button. It should look like Figure #4.
6. In the Attributes drop down Window, select 44.100 kHz, 16-Bit, Mono as
shown in Figure #5.
7. Click OK, then Click OK to close the Properties for Sound Window.
8. You are now ready to record!
9. With your mouse, click the RED record button to start recording.
Speak (or sing) into your microphone.
10. Click the BLACK, rectangular button to end recording.
11. Press the
◄◄
button to reset to the beginning of the recording.
12. Press the
► button to start playback.
If You Don’t Hear Anything…
If you followed the directions and have been unable to record a sound, please
check Window’s Audio Properties dialog window, shown in Figure #6, and
ensure that sound recording is set to AK5371 (this is the name for the Acoustica
MVS Microphone in the computer) and sound playback is set for your
computer’s sound card or other output device. If you are uncertain of this set-
ting, consult your computer’s owner’s manual.
Figure #4
Figure #5