Milestone XProtect Transact User Manual
Page 9
Milestone XProtect
®
Transact
Users Manual
www.milestonesys.com
9
Viewing transactions in the
XProtect Smart Client
Example of available layouts; more layouts may
be available in your version.
Depending on requirements and user rights, you may create the view in a shared or private group.
Tip: For further information about how to create views, see separate documentation for your XProtect
Smart Client.
1. Drag the required cameras from the Setup tab's System Overview section to the view's
camera slots.
2. This step, and the next, may not be necessary if you are using one of the XProtect Transact
views particularly suited for viewing transaction data and camera images together.
Drag the System Overview section's Transact Source entry to the slot in which you want to
view transaction data.
The transaction data slot now changes color. However, you must still specify exactly which
XProtect Transact source you want to view transaction data from.
Tip: If more than one XProtect Transact source is available, and if enough positions are
available in the view, you can include more than one XProtect Transact source in the view.
You can also create several views with different transaction sources.
See Status of transaction sources (on page 11) for information about the status bar of
transaction view positions and the different possible states of a source.
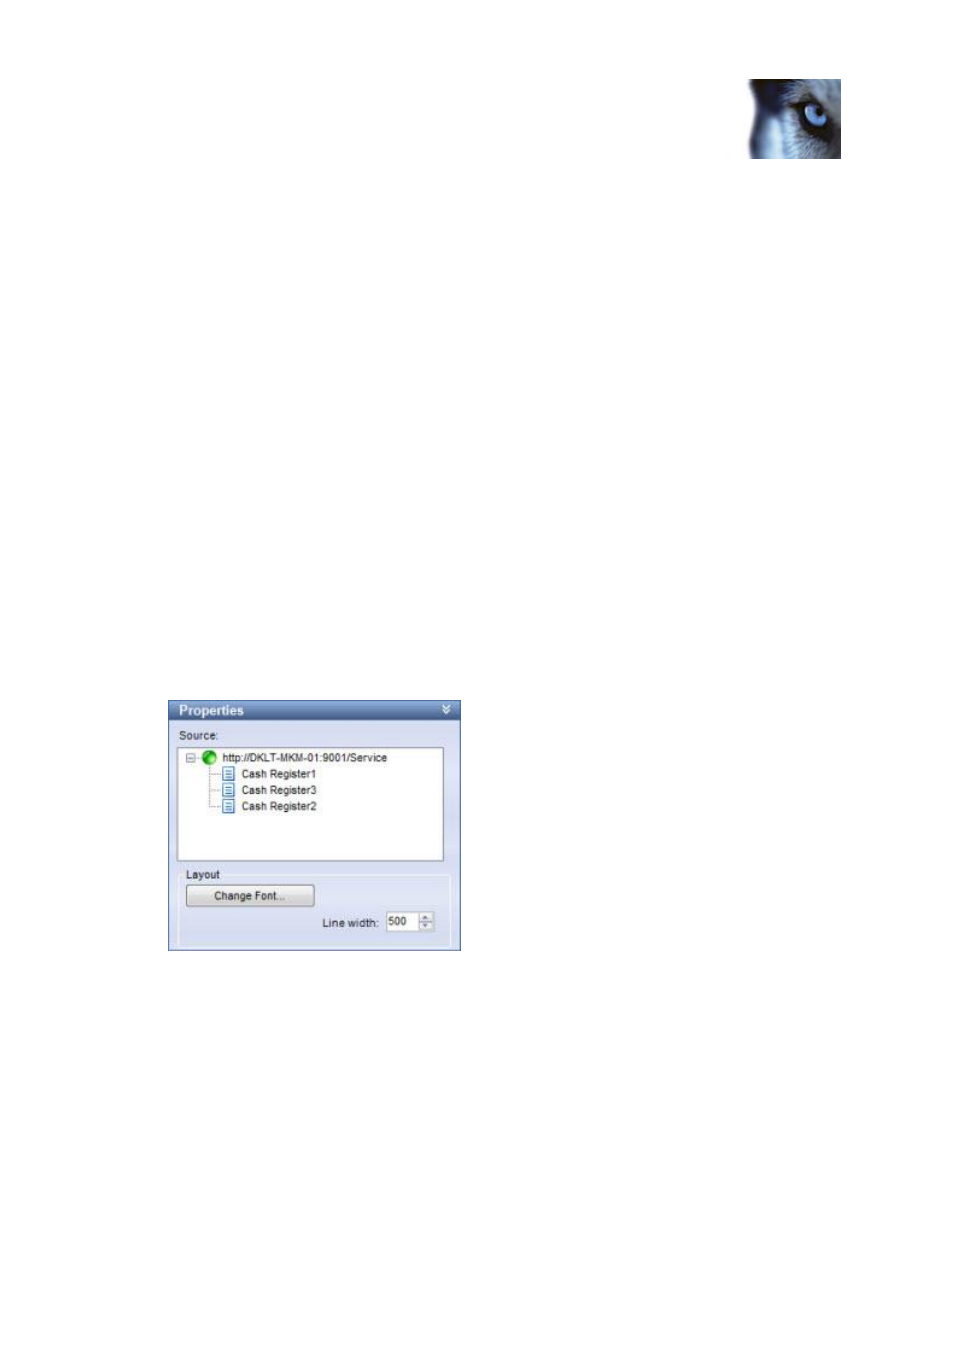
3. Select the view's transaction data position, then expand the Setup tab's Properties section and
expand the list over XProtect Transact servers:
Color legend:
o
Gray: Starting up (will only be visible on slow connections).
o
Yellow: Getting status.
o
Red: Unable to connect to server.
o
Green: OK.
If color indication for a service is red, the system will keep trying every five seconds until
contact is made to the server.