MAGURA HS33 (2013) User Manual
Page 6
Español
Italiano
Nederlands
Français
English
Deutsch
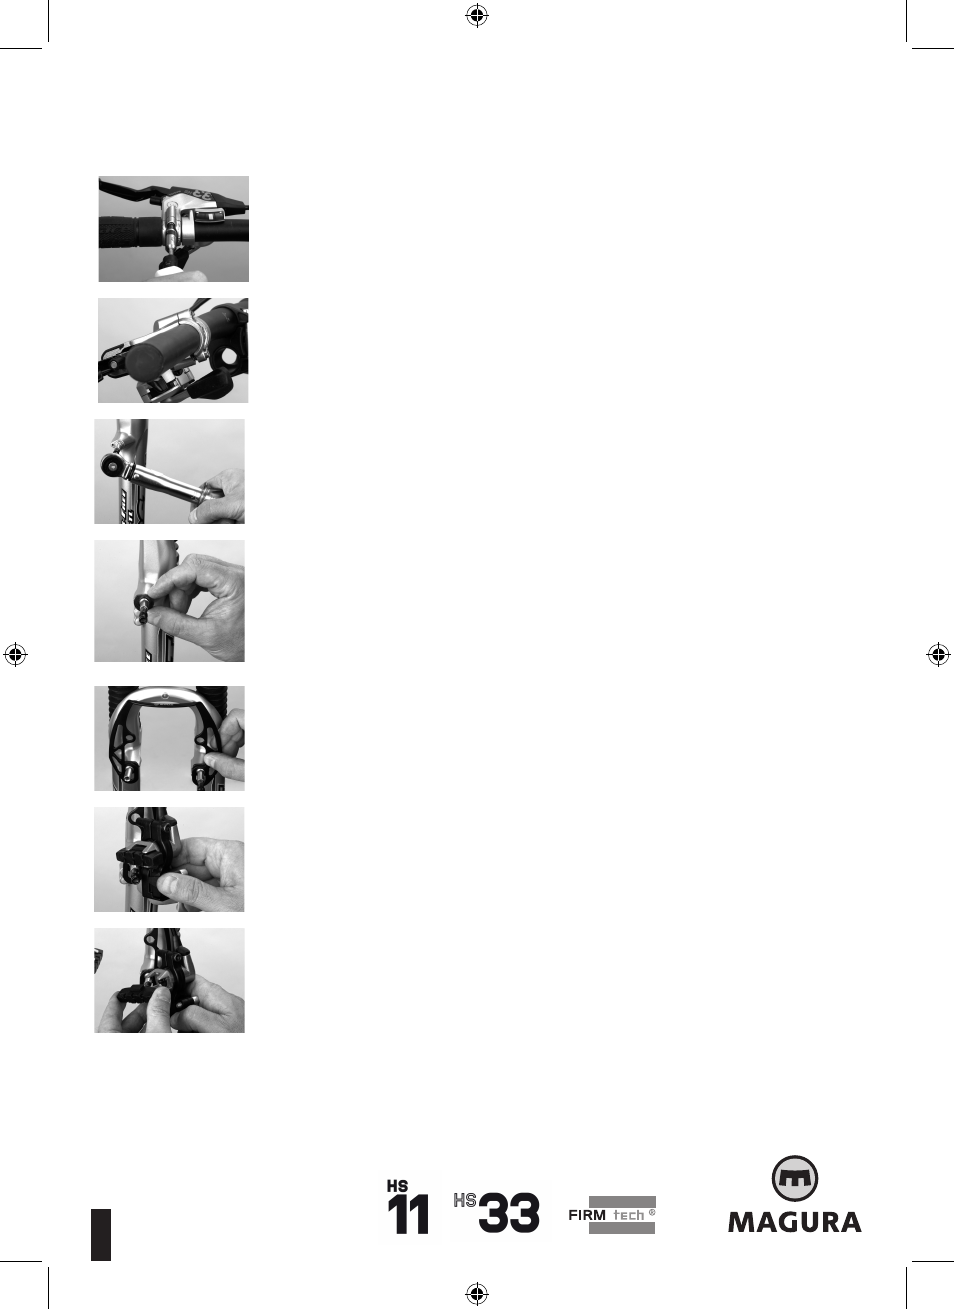
1. Mount the brake lever onto the handlebar (Tightening torque 4 Nm/34 in. lbs).
2. The clamp side with the arrow points always to the top and is tightened fully. Hint:
Tighten the brake lever so that you can still turn it by hand on the handlebar when you apply
big forces. This old motocross trick will reduce crash damages.
3. Screw in the quick release bolt slightly into the left (frontwheel) resp. right (rearwheel)
canti stud (seen in rotation direction). Please watch out for paragraph 12 on the following pa-
ge!
4. Mount a canti stud washer on both canti studs, flat side pointing up. The mounting of
these washers is not a must, it can be necessary, though, for example when the upper end of
the mounting plate touches the booster of the suspension fork. In case you need it to move
the brake forward use only one washer per stud!
5. Slide the EVO 2 mounting plate on the canti studs. The EVO 2 logo has to be legible
from the assembly position and must not stand upside down. On the following pictures the
wheel is often not in place, to show the details better. Mounting a MAGURA brake with the
wheels mounted is much simpler. For this reason, keep the wheels mounted then.
6. The upper cones of the adaptor must fit properly into the drill of the EVO 2 mounting
plate. Mount the left side with an Allen key no. 5, but do not tighten yet fully the bolts!
7. Before you install the right side, check out how easy it is to change MAGURA brake
pads. Simply click them in! Then slide the right side onto the canti stud and close the quick
release.
7
FELGEN 2011 E.indd 6
07.06.2011 17:08:26 Uhr