HT instruments HT8051 User Manual
Page 8
HT8051
EN - 7
4.2.5.
key
In operating modes SOUR mA, SIMU mA, OUT V and OUT mV pressing this key allows
setting the output current/voltage with automatic ramp, with reference to measuring ranges
0
20mA or 4 20mA for the current and 0 100mV or 0 10V for the voltage. Below
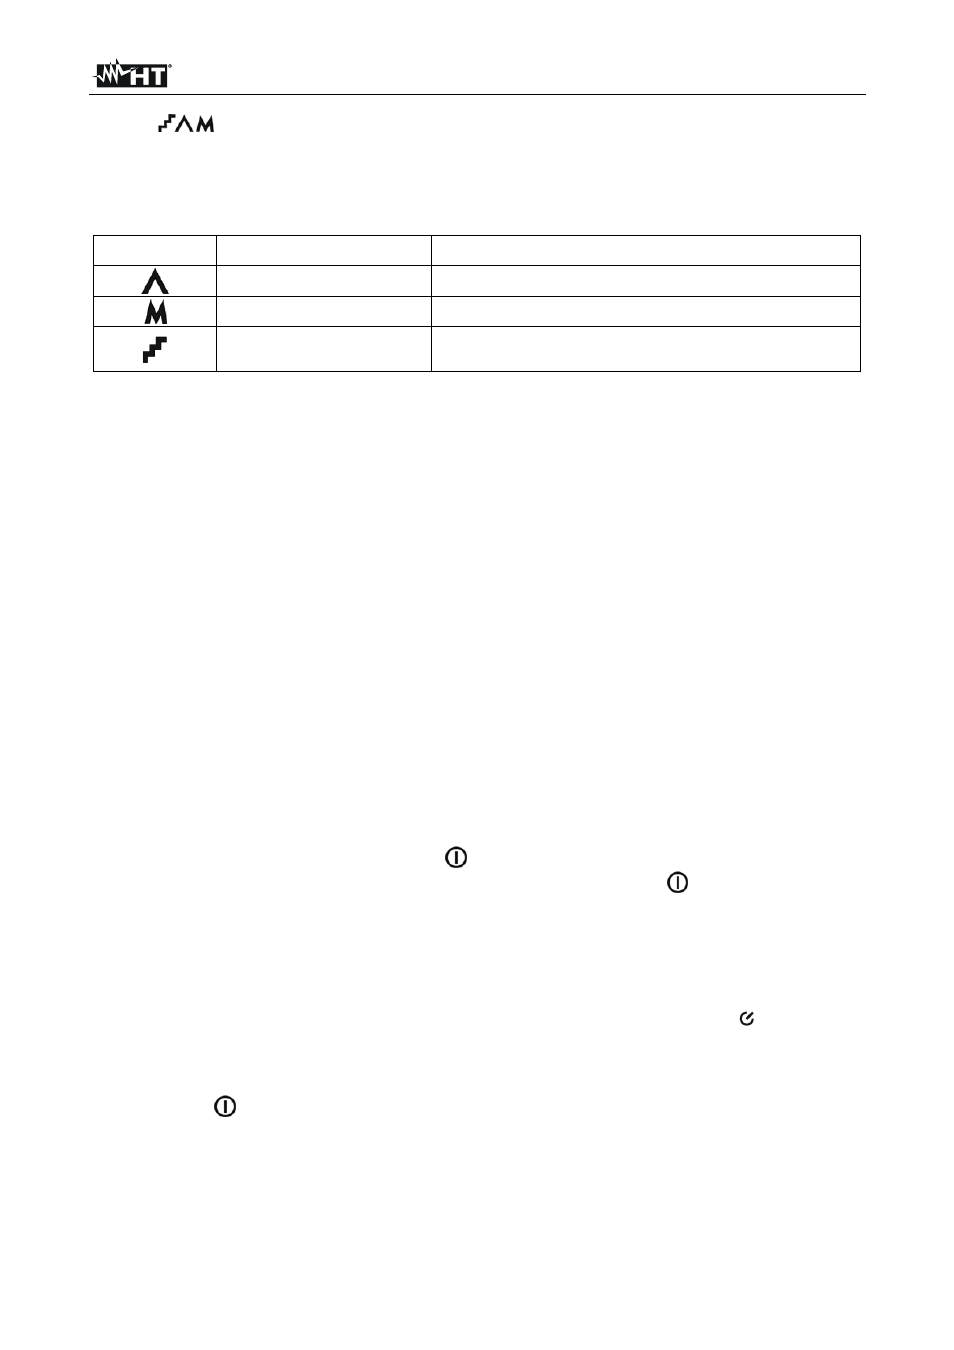
shows the available ramps.
Ramp type
Description
Action
Slow linear ramp
Passage from 0%
100% 0% in 40s
Quick linear ramp
Passage from 0%
100% 0% in 15s
Step ramp
Passage from 0%
100% 0% in steps of 25%
with ramps of 5s
Table 1: List of available ramps for output current/voltage
Press any key or turn off and then on again the instrument to exit the function.
4.2.6. Adjuster
knob
In operating modes SOUR mA, SIMU mA, OUT V and OUT mV the adjuster knob (see
Fig. 1 – Position 8) allows programming the output current/voltage generated with
resolution 1
A (0.001V/0.01mV) / 10A (0.01V/0.1mV) / 100A (0.1V/1mV). Proceed as
follows:
1. Select operating modes SOUR mA, SIMU mA, OUT V or OUT mV.
2. In case of current generation, select one of the measuring ranges 0
20mA or 4
20mA (see § 4.2.7).
3. Press the adjuster knob and set the desired resolution. The arrow symbol “
” moves to
the desired position of the digits on the main display following the decimal point.
Default resolution is 1
A (0.001V/0.01mV).
4. Turn the adjuster knob and set the desired value of output current/voltage. The
corresponding percentage value is indicated on the secondary display.
4.2.7. Setting measuring ranges for output current
In operating modes SOUR mA and SIMU mA it is possible to set the output range of
generated current. Proceed as follows:
1. Switch off the instrument by press the
key
2. With 0-100% key pressed switch on the instrument by press the
key
3. The value “0.000mA” or “4.000mA” is shown at display for approx. 3 seconds and then
the instrument back to the normal visualization
4.2.8. Adjusting and disabling the Auto Power OFF function
The instrument has an Auto Power OFF function which activates after a certain period of
idleness in order to preserve the instrument’s internal battery. The symbol “ ” appears on
the display with enabled function and the default value is 20 minutes. To set a different
time or deactivate this function, proceed as follows:
1. Press the “
” key to switch on the instrument and, at the same time, keep the MODE
key pressed. The message “PS – XX” appears on the display for 5s. “XX” stands for
the time indicated in minutes.
2. Turn the adjuster to set the time value in the range 5
30 minutes or select “OFF” to
disable the function.
3. Wait 5s until the instrument automatically quits the function.