Start-up, 1 power switch selections, 2 applying power – Detcon 840 User Manual
Page 13: Power switch selections, Applying power, Figure 6 power switch configuration
840 Operators Manual
Model 840 Operator Manual
Rev. 1.9
Page 9 of 29
5.
Start-up
NOTE: Before applying power, check and make sure that all the wiring connections and external devices
are installed correctly.
NOTE: Applying power with devices hooked up incorrectly may cause damage to the equipment.
5.1 Power Switch Selections
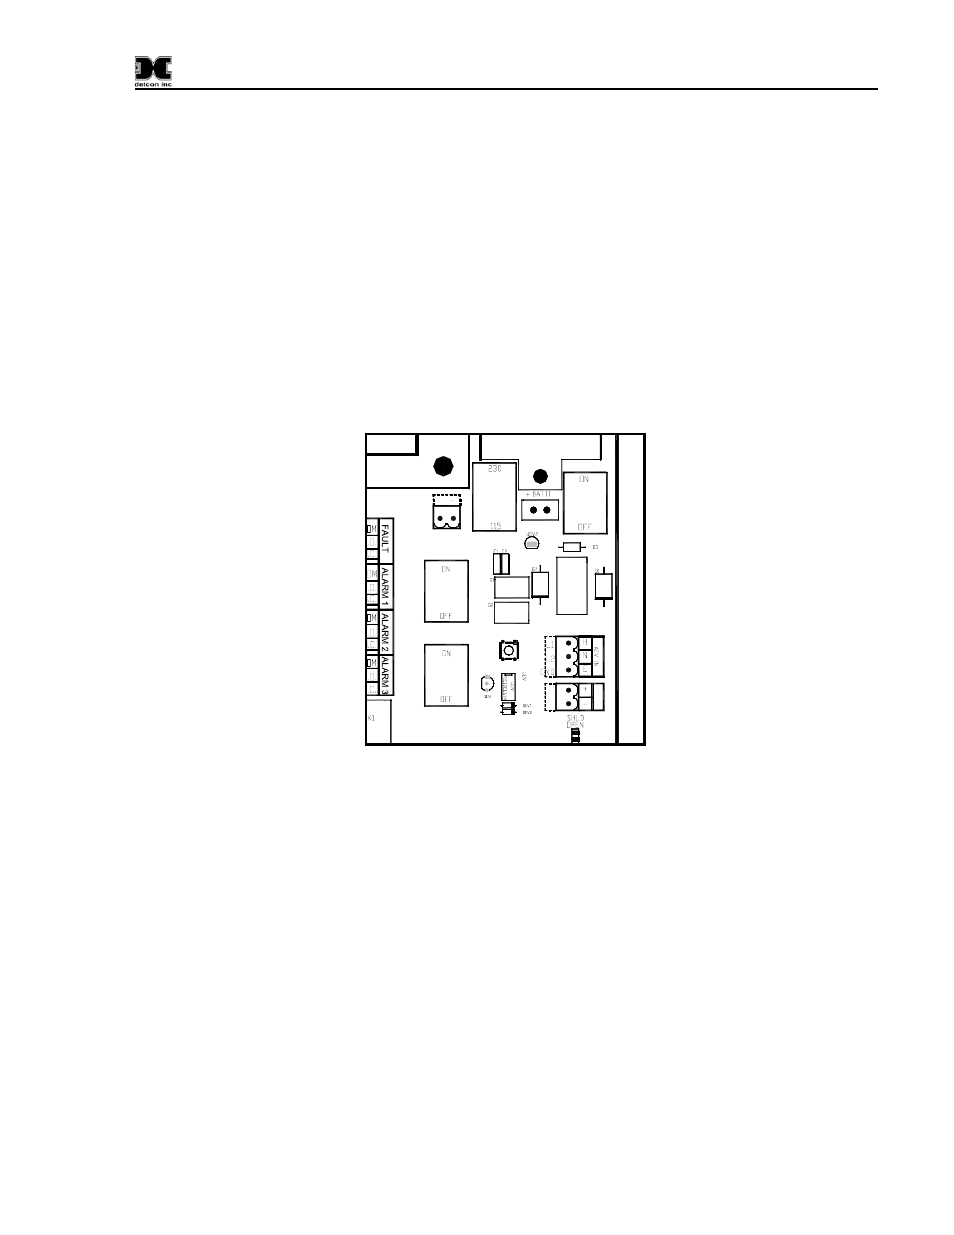
Refer to Figure 6. For AC power, locate the V-SELECT switch (SW2) and select the appropriate voltage
setting. If the unit will be powered by AC voltage only, then the VAC power switch (SW1) should be
turned to the ON position, and insure the VDC power switch (SW4) is in the OFF position. If DC is used
to power the unit, the VDC power switch should be turned to ON and the VAC power switch should be
OFF. If the unit is to be powered by AC and DC sources simultaneously, then both power switches should
be in the ON position. The switches are located on the Motherboard, shown in Figure 4
SW4
VDC
POWER
SWITCH
SW0V
EXT
ERN
A
L
DC I
N
JP1
EXTERNAL
AC IN
J8
J2
+
PS2
SW1
VAC
POWER
SWITCH
VOLTAGE
SELECT
SW2
BATTERY
SW3
Figure 6 Power Switch Configuration
NOTE: An optional battery back up can be installed in all basic units. A switch to connect or disconnect
the battery back up is located on the Motherboard. If the Battery Back-up option is installed this switch
will normally be “ON”. See Section 8.1 for details on the Battery Back-up Option.
5.2 Applying Power
Connect power per Section 4.2.
With the AC or DC power source connected, turn the applicable power switches to the ON positions.
Verify that the Main Display LCD comes up displaying gas readings on the display. Assuming there is no
target gas in the area of the gas sensor, the sensor should read 0 (zero) after a short warm-up period of 1-2
minutes.
NOTE: All alarm relays will be disengaged for the first 1-minute after power-up to provide for an
adequate sensor warm-up time.