Step 5 – Catskill Craftsmen 51538 User Manual
Page 7
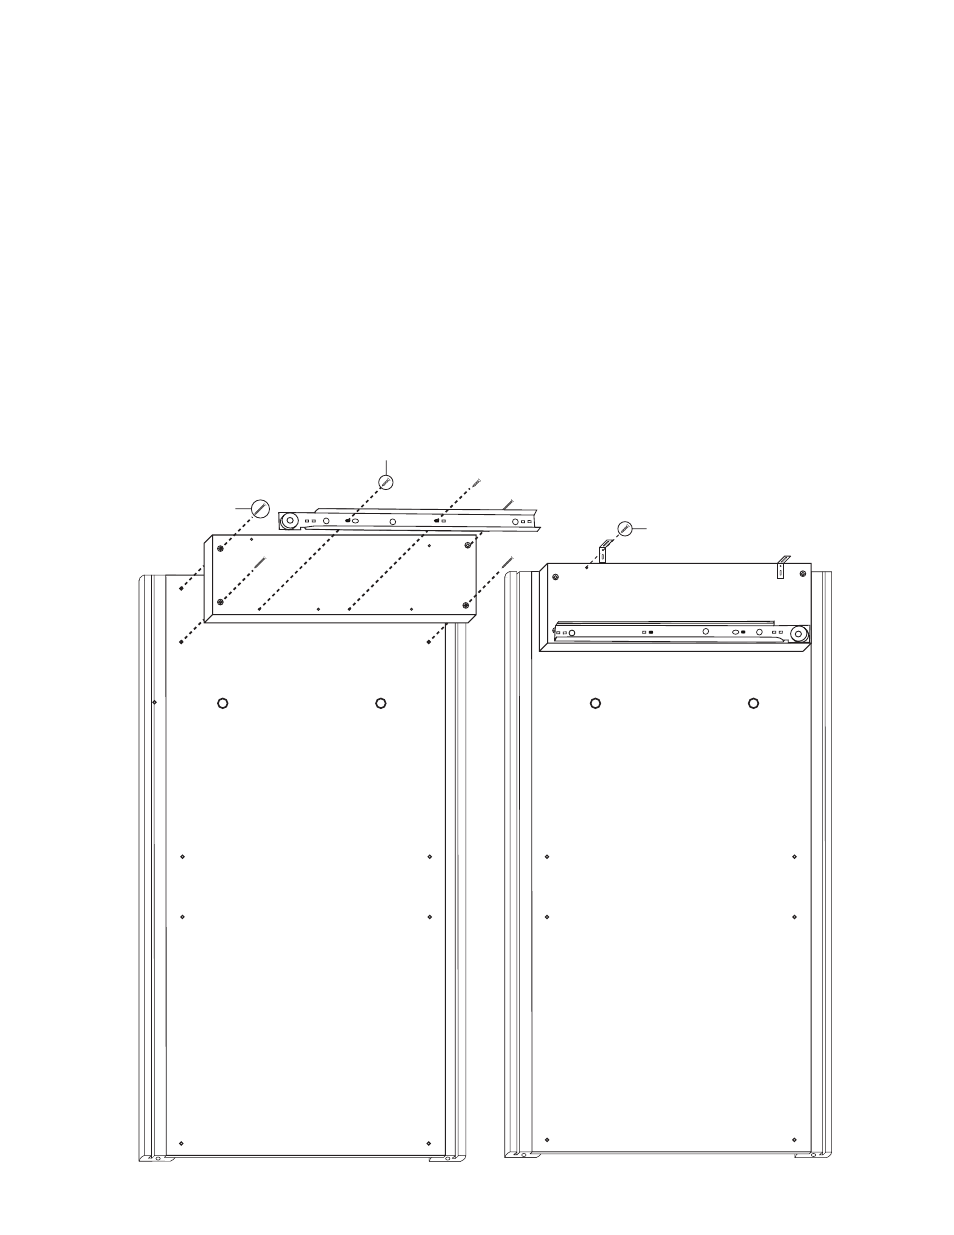
STEP 5
A. Attach a Glide Support Stick to the top of each Side Panel using 1 1/4” #8 screws. The
countersunk holes (reamed out) in the stick are positioned as in illustration 5 so that the glide holes
are toward the lower edge. Sticks should be flush with top of panel.
B. Attach the cabinet glide of the Drawer Glides to the Glide Support Stick using 5/8” #7 flat head
screws. Left glide to left Side Panel, right glide to right Side Panel. The glides look almost alike
however, the right glide (as you face the cart) has a rolled lip at the top of the glide that keeps the
drawer glide wheel in place. Line up the holes in the glides so that the end with the wheel comes flush
with the front edge of the Glide Support Stick. Only 2 pilot holes are used in the glide support sticks.
C. Attach the “L” brackets to the top of the glide supports using 5/8” #7 screws. Use the hole rather
than the slot. The slot will be used to attach the table top. The “L” brackets should be flush with the
top of the glide support sticks.
Note: Cabinet drawer glides usually have an imprint “CL” or “CR” inside near the wheel.
CR=Right / CL=Left
TOP
TOP
5/8” #7 Screw
1 1/4” #8 Screw
5/8” #7 Screw