9100 c – Triton 9100 Electronic Lock Installation Manual User Manual
Page 5
T
RITON
S
YSTEMS
5
E
LECTRONIC
L
OCK
I
NSTALLATION
M
ODEL
9100 C
ASH
D
ISPENSER
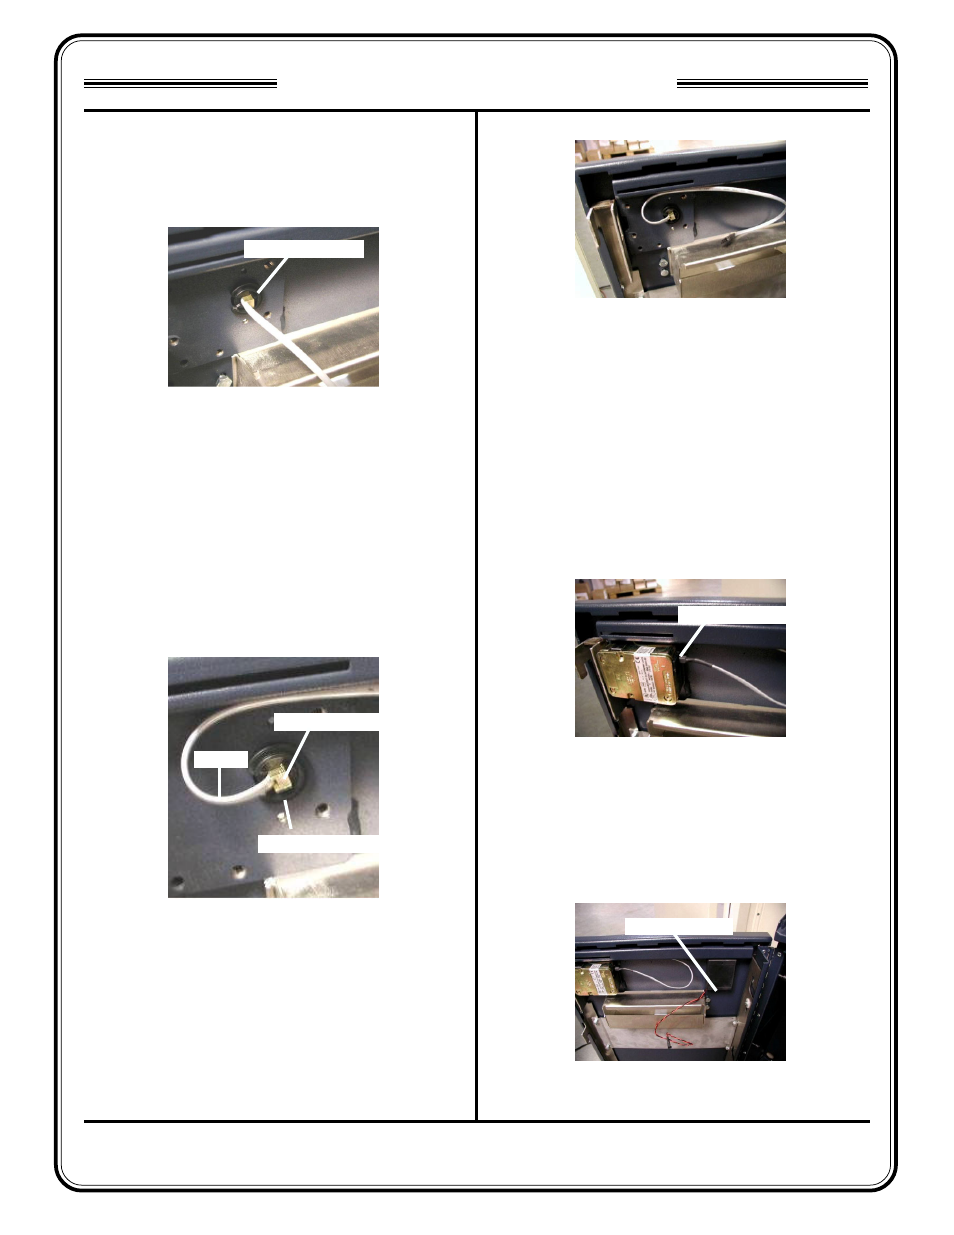
5.
Next, slide the deadbolt bushing over the end of
the keypad cable so that it rests over the brass
spindle, flush with the inside of the door.
6.
IT IS VERY IMPORTANT THAT THE KEYPAD
CABLE BE ROUTED EXACTLY AS SHOWN!
Failure to do so may result in the lock
malfunctioning and thereby locking the cabinet.
The keypad cable must exit through the cutout in
the deadbolt bushing, curve over the top of the
bushing, and exit on the right, as shown in the figures
below.
7.
To install the lock (deadbolt assembly), insert the
deadbolt though the cutout in the sliding locker bar.
Next, align the brass spindle so that it falls into the
square cutout located on the back of the lock.
Once aligned, the lock should sit flush with the
mounting plate. Install the three mounting screws
to hold the lock in place. Plug the keypad cable into
the top connector labeled “ENT” located on the lock.
8.
Peel off the adhesive backing on the battery box
and attach it to the inside of the door. NOTE: For
better adhesion, clean the area of the door with
alcohol prior to attaching the battery box.
Figure 9. Attach battery box to inside of
door.
Battery Box
Figure 8. Install Lock. Plug Cable into
ENT connector on lock.
ENT Connector
Figure 7. Cable curves over top of
bushing and exits to the right, as shown.
Figure 6. Route cable through cutout in
deadbolt bushing.
Brass Spindle
Deadbolt Bushing
Cable
Figure 5. Slide deadbolt bushing over
brass spindle.
Deadbolt Bushing