Tilton 74-Series Kit (98-1230) User Manual
Installation instructions, Series master cylinder kits
Description
Tilton Master Cylinders are engineered to provide optimum performance at a moderate cost.
There are many configurations that can be assembled with the wide range of components
that are included. The universal mounting design allows you to mount the master cylinder
from the side, the flange, or both. The master cylinders are made of lightweight aluminum
and have a clear anodized coating to prevent wear and corrosion. Two reservoirs are in-
cluded in the kit; 10.7 ounce and 4.0 ounce. Also included are a 3/16" inverted flare fitting and
AN-3 line adapter. Tilton master cylinders set the standard for the industry and are a direct
replacement for master cylinders that have a 2.25" spaced, 2-bolt mounting pattern.
Installation notes
• Decide which reservoir size and style fits your application.
• The 4.0 ounce reservoir is recommended for clutch applications and brake systems used
in short races where brake pad wear is at a minimum.
• The 10.7 ounce reservoir is recommended for use on brake master cylinders when there is
a significant amount of pad wear during an event. They also have more reserve capacity
in the event of a fluid leak somewhere in the system.
• Mount the reservoirs above the calipers to prevent fluid bleed-back from the calipers to
the master cylinders.
• Make sure that all of the parts are clean before assembling.
installation
Master Cylinder
1. Remove the dust cover from the master cylinder reservoir opening.
2. Make sure that the o-ring is seated properly in the groove of the reservoir entry port on
the master cylinder body.
3. Apply a small amount of rubber grease (P/N: RG-17) onto the o-ring.
4. Do not damage the o-ring or move it out of position when installing the reservoir or the
remote fitting.
5. Slide the selected reservoir or remote fitting onto the master cylinder body along with
the wire clamp.
6. Place the wire clamp so that one wire of the clamp is above the o-ring and the other is
below the o-ring.
7. Do not over tighten the wire clamp or you may damage the reservoir or remote fitting. It
should be “snug”.
8. Insert the reservoir filter into the reservoir properly by referring to Diagram 1.
9. Thread the reservoir cap onto the reservoir to keep dirt out.
10. Select the appropriate fitting for your application and attach this fitting to the master
cylinder body.
11. Mount the master cylinder on the vehicle.
12. Proceed to the Brake Bleeding section.
Master Cylinder with Remote Mount Reservoir
1. Determine the location for mounting the remote mounted reservoir.
2. The supplied rubber hose can be cut to length. Select the location for the remote
mounted bracket accordingly.
3. After selecting the location for mounting the remote reservoir, drill the two 1/4" diameter
mounting holes on 1.20" centers.
4. Install the remote-mounting bracket with the appropriate hardware.
5. Apply a small amount of rubber grease (P/N: RG-17) onto the o-ring on the remote fitting.
74-Series Master Cylinder Kits
INSTALLATION INSTRUCTIONS
98
-12
30
aBs WarninG:
This product is not designed for use with
ABS (anti-lock braking) systems.
MAX
MIN
MAX
MIN
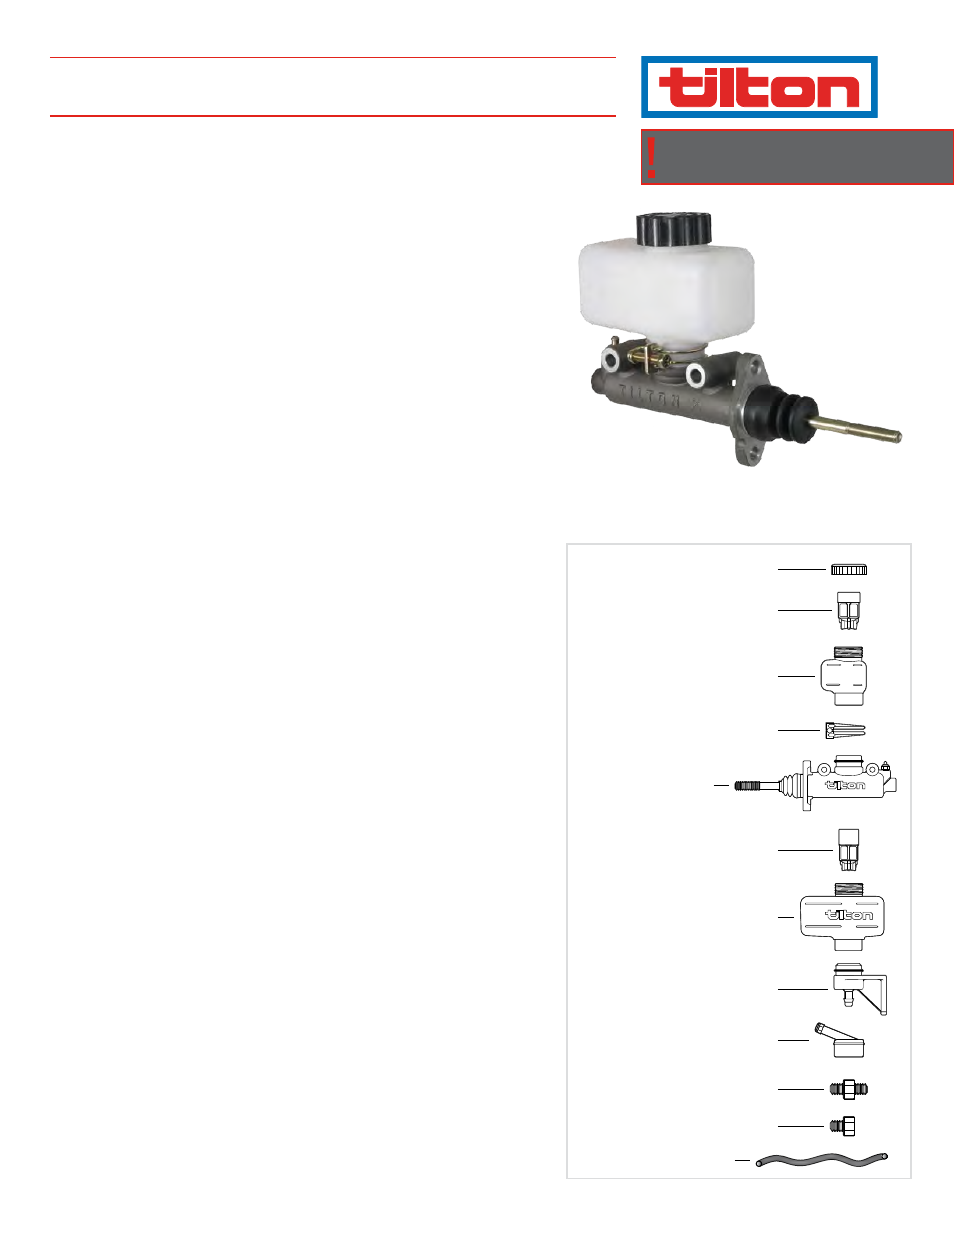
AN3 Male-Male - 73-820
3/16” Flare Male - TE2089-188L
Hose (24") - 74-214
10.7 oz Reservoir - 74-204
Remote Mount Bracket - 74-212
Remote Fitting - 74-200
Clamp - 74-208
Master Cylinder
4.0 oz Reservoir Filter - 74-210
4.0 oz Reservoir - 74-202
Cap - 74-207
10.7 oz Reservoir Filter - 74-211
Diagram 1 -
Master Cylinder Kit and Replacement Parts