Assembly – RIKON Power Tools 50-142 User Manual
Page 7
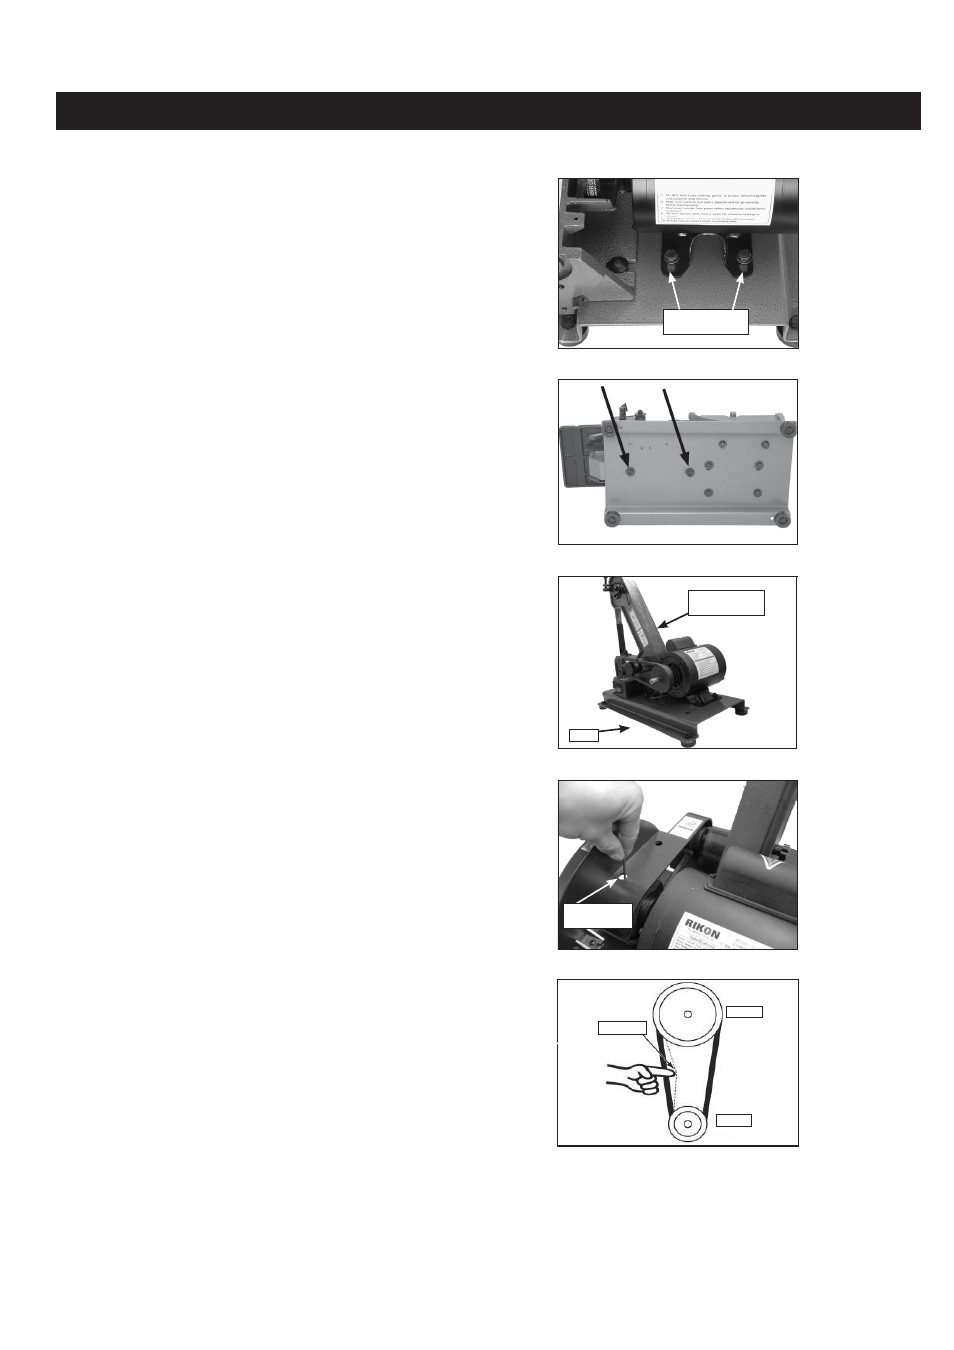
Fig. 06
Fig.07
Fig.08
Assembly
To assemble your 50-142 sander:
1. Using 13mm wrenches, loosen the four motor
mount hex bolts (Figure 6) so you can adjust the
motor position in the next steps.
2. With assistance, position the belt housing as-
sembly on the left side of the base, taking care
not to pinch the power cords between the assem-
bly and the base.
3. Place the V-belt around both pulleys, and
secure the belt housing assembly with the two
M10-1.5 x 20 cap screws, lock washers, and flat
washers (see Figures 7 & 8)—do not fully tighten
the fasteners for now.
4. Center the motor arbor in the cutout of the cast
iron disc guard (see Figure 9), then re-tighten the
motor mount hex bolts.
5. Position the belt housing assembly so there
is about 1⁄4" V-belt deflection when moderate
pressure is applied to the V-belt between the pul-
leys (see Figure 10)—then fully tighten the cap
screws to secure the belt housing assembly in
place.
6. Insert one M4-.7 x 10 Phillips head screw and
flat washer into the left inside mounting bracket
of the V-belt safety cover (see Figure 11). Then
hold it in place with a screwdriver as you slide
the cover over the V-belt and tighten the fastener
into the cast iron disc guard.
7. Secure the right side of the V-belt cover with
one M4-.7 x 10 Phillips head screw and flat
washer.
8. Position the V-belt rear cover, as shown in
Figure 12, and secure it in place with the
M4-.7 x 40 Phillips head screw and wingnut.
9. Slide the aluminum disc onto the motor arbor,
making sure to align the arbor key with the disc
keyway.
Fig. 09
Fig. 10
Deflection
Pulley
Pulley
Motor Mounting
Hex Bolts 2 of 4
7
Belt Housing
Assembly
Base
Set Screw
Access Hole