Operations – RIKON Power Tools 50-142 User Manual
Page 13
Operations
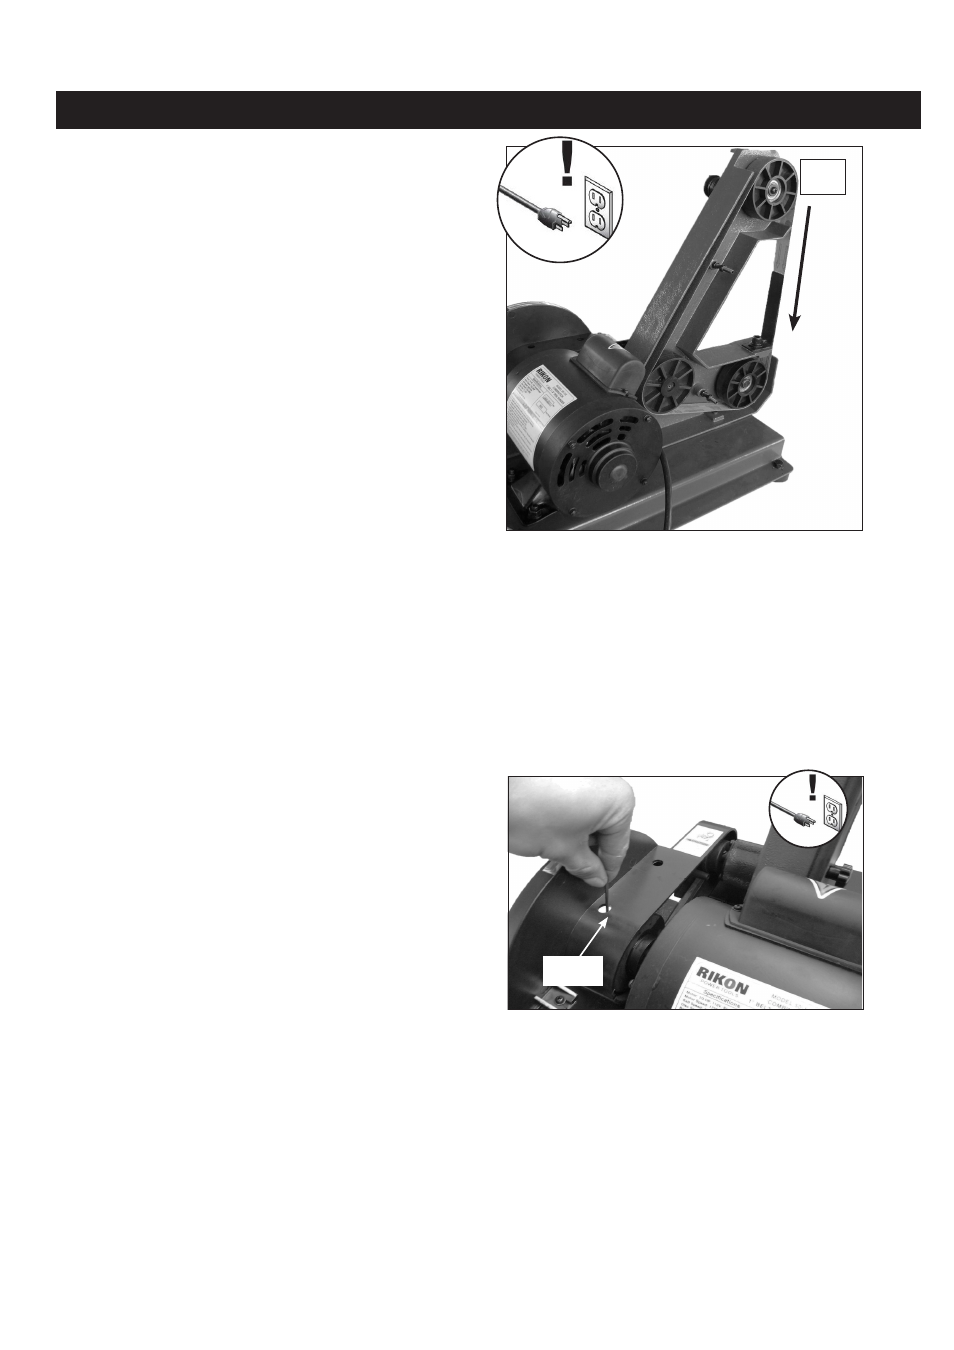
Changing the Sanding Belt
Most sanding belts are designed to sand in only
one direction and will have a direction arrow on the
back of the belt. The 50-142 is designed so that the
sanding belt travels downward to the sanding table.
To change the sanding belt:
1. DISCONNECT THE SANDER FROM
POWER!
2. Unscrew the two knobs from the sanding belt
cover and remove the cover from the sander (see
Figure 29).
Fig.29
Sanding
Belt
Direction
3. Press down firmly on the tracking adjustment
knob to remove the tension from the sanding belt.
4. Roll the old sanding belt off the three pulleys,
and roll the new belt back on.
5. Make sure the sanding belt is positioned in the
center of all three pulleys.
6. Replace and secure the sanding belt cover.
7. Check and the adjust the sanding belt traction,
as instructed on Page 12.
Changing the
Sandpaper Disc
The Model 50-142 accepts 8" diameter pressure
sensitive adhesive (PSA) sandpaper discs.
To change the sanding disc:
1. DISCONNECT THE SANDER FROM
POWER!
2. Remove the sanding disc table, disc dust
port, and dust cover.
3. Rotate the disc until you can see the set
screw through the access hole (see Figure
30).
4. Using the 2.5mm hex wrench through the
access hole in the V-belt safety cover, loosen the
set screw and remove the sanding disc.
Set Screw
Access Hole
Fig.30
13
5. Peel off the old sandpaper disc, clean
the aluminum disc thoroughly, and apply
the new sandpaper disc.
6. Reverse Steps 2–4 to reassemble your
sander.