Installation, Warning mechanical installation, Safety precautions – Lincoln Electric IM512 INVERTEC RACKS User Manual
Page 10: K898 series of aluminum racks (4)
INSTALLATION
INVERTEC RACKS
- 3 -
Read entire installation section before starting
installation.
Safety Precautions
ELECTRIC SHOCK can kill.
•
Only qualified personnel should
perform this installation.
•
Turn the input power OFF at the
disconnect switch or fuse box or by
unplugging power cable before
working on this equipment.
•
Do not touch electrically hot
parts.
WARNING
MECHANICAL INSTALLATION
K898 Series of Aluminum Racks (4)
Step 1 Unpack Carton
Remove four pack cartons. Unpack skids and set
aside. Remove hardware mounting rack to pallet.
Remove screws that fasten hood down. For racks
with main disconnect, the switch must be in the
“
OFF
”
position before the hood can be removed. Remove
hood from rack and take out parts bag and check
against the list provided.
Step 2 Attach Skids
Skids can be installed by hoisting rack one foot above
ground level. If hoist is not available, place rack skids
on level surface near rack approximately 27
”
apart
from outside edges. Two-man lift the four pack off
pallet and place onto skids with rack front perpendicu-
lar to skids as shown below. Align holes. Place flat
washer on 1/4 - 20 x 2.25
”
bolt. Insert bolt from the
top side. Place 1/4 - 20 lock nut on bolt from bottom
side. Fasten four bolts and nuts per skid, securely.
The rack is ready for mounting products supported.
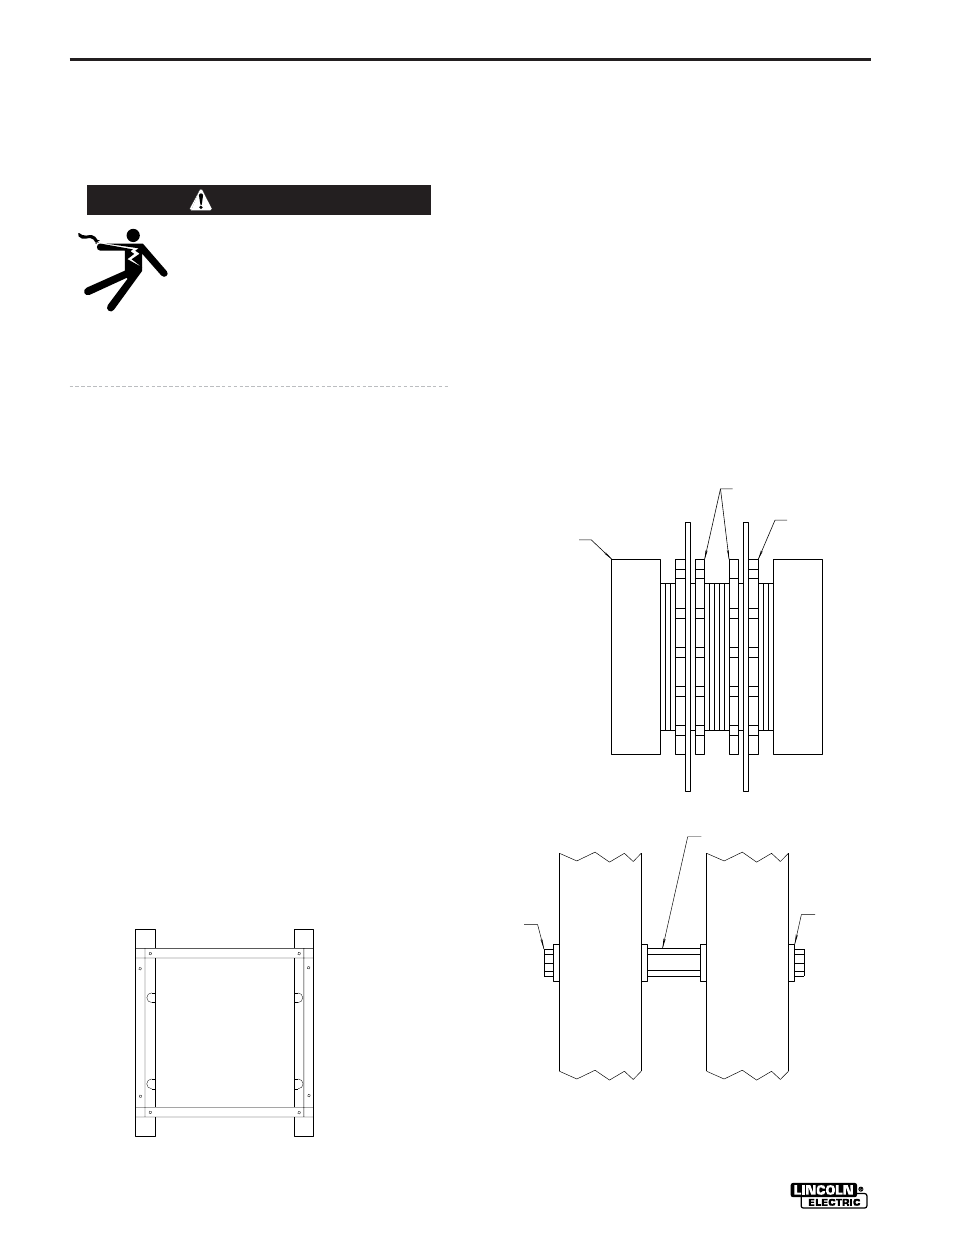
Step 3 Attach K898-3, -4 Slave Unit to K898-1, -2
Primary Unit
Attach slave unit to primary unit only after skids or
casters have been installed to both the primary and
slave units.
Remove hood from both racks. Remove 2.00
”
knock-
outs on primary and slave units. Place both racks in
upright position, side-by-side with slave unit to the
right when viewed from the front. Align units so that
the 2.00
”
holes are concentric. Clamp racks together.
Drill six .313
”
diameter clearance holes for a 1/4 - 20
bolt using the slave unit as a guide. Remove clamp.
Join slave unit to primary unit using close nipple with
two steel lock washers and two neoprene lock wash-
ers as shown below. Do not tighten. Assemble slave
unit to primary unit with two 1/4 - 20 x 2.00
”
bolts, 4
flat washers and a rod coupling in six places as shown
below. Tighten lock nuts on close nipple. Cap close
nipple on each end with plastic bushing.
Mounting
Holes
(8 Places)
FRONT
P l a s t i c B u s h i n g
N e o p r e n e
L o c k W a s h e r
S t e e l
L o c k W a s h e r
C L O S E N I P P L E
C O N N E C T I O N
B o l t
R o d C o u p l i n g
W a s h e r
B o l t
C o n n e c t i o n s