Installation, Warning – Lincoln Electric IM852 CV ADAPTER User Manual
Page 10
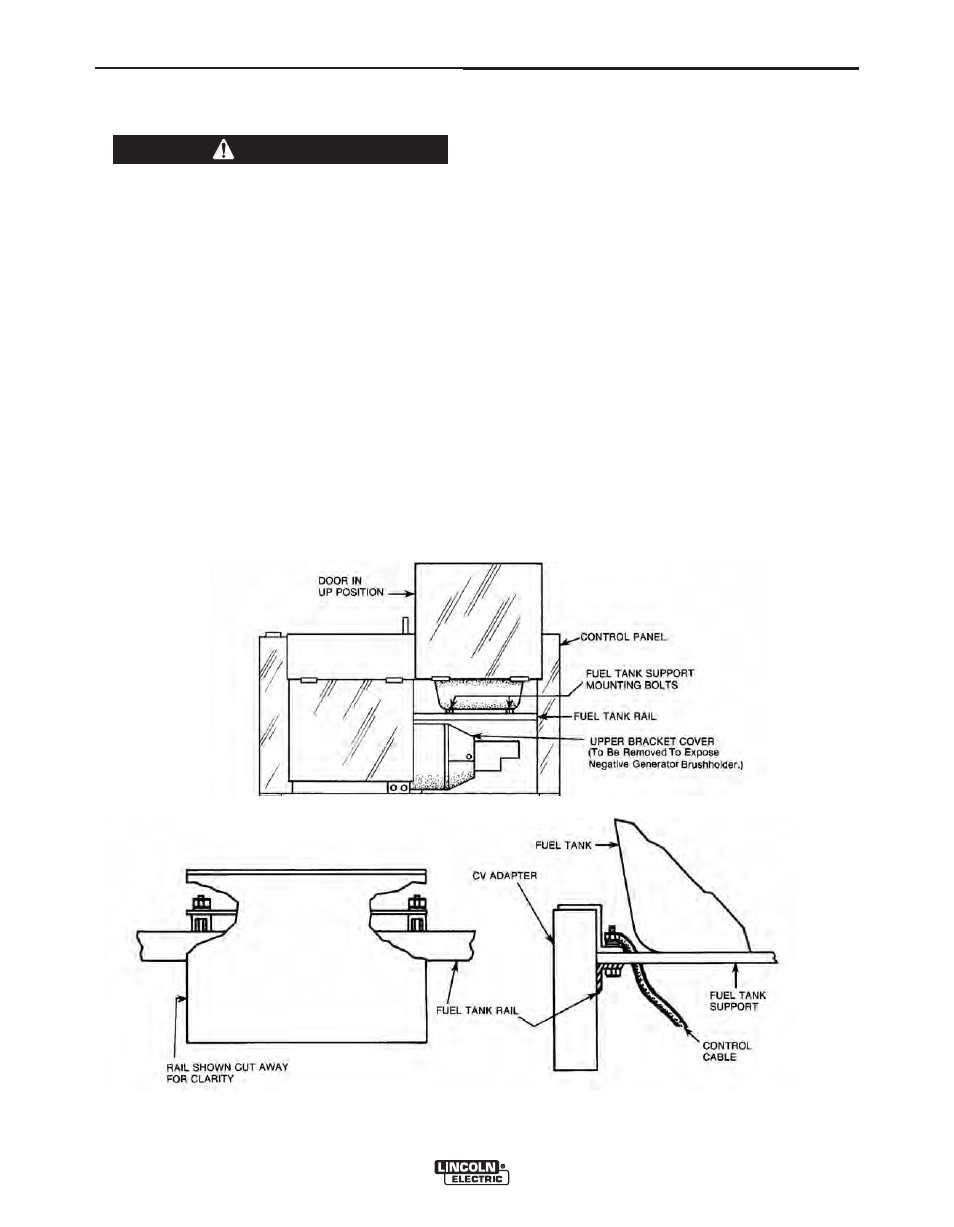
FIGURE 13 – Frame Rail Mounting.
A-3
INSTALLATION
CV ADAPTER
A-3
K385-2 CV ADAPTER TO SAE-400,
SAE-400 WELD’N AIR and
SAE-500 ENGINE WELDERS (Item 1 thru 18)
• TURN THE ENGINE OFF WHILE INSTALLING
THIS ACCESSORY.
• KEEP HANDS, HAIR, CLOTHING AND TOOLS
AWAY FROM MOVING PARTS WHEN STARTING
OR OPERATING ENGINE.
------------------------------------------------------------------------
1. Remove the upper bracket cover. Also, remove
the two fuel tank support mounting bolts on the
side opposite the output terminals (see Figure
12). Remove the guards mounted on the inside
of the front control panel.
2. Mount the K385-2 loosely in position as shown in
Figure B and Figure 13 for SAE-400 and SAE-
500 or loosely in position as shown in Figure A
and Figure 13 for SAE-400 WELD’N AIR. It is
important that the CV Adapter be positioned flush
against the fuel tank rail. Take care not to pinch
any leads or lines.
Note: CV Adapter control leads are not color coded on all
units.
3. Remove existing yellow lead from the outside termi-
nal of the reversing switch and connect it to the
same terminal on the reversing switch that is con-
nected to the red lead.
4. Remove existing resistor lead from reversing switch
and connect both ends of this blue lead to the same
resistor terminal to store lead.
5. Remove existing blue field lead from the 500 resister
and connect it to CV Adapter blue lead 503 using
#10 x 1/4 screw and nut provided. Insulate connec-
tion with tape.
6. Remove the existing brown field lead from the 500
resister and connect it to the CV Adapter lead 509
using the #10-1/4 screw and nut that is provided.
Insulate the connection with tape.
7. Route the CV Adapter leads 600, 602, 610, 612 and
613 through the plastic lead clamp on the side of the
“Current Control” reactor box. Connect the CV
Adapter leads 600 and 602 to the 500 resister with
the existing yellow lead.
FIGURE 12 – Engine Welder (Left Side).
WARNING