Johnson Level & Tool Mfg. 40-6580 User Manual
Page 23
©2009 Johnson Level & Tool
23
Re-calibration
Referencing the results of the self-check and using the “h” mark (the
mid-point between the highest and the lowest point among A, B, C, D).
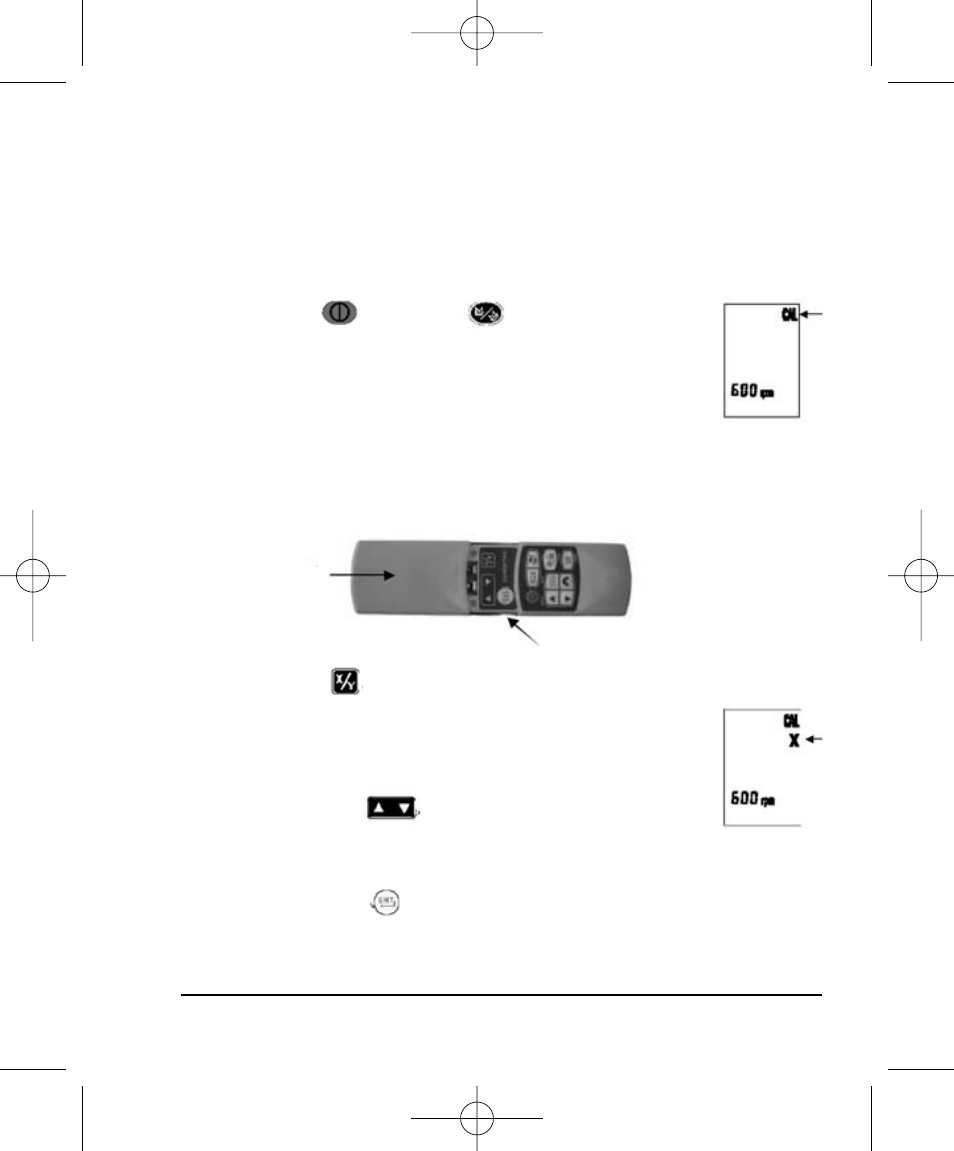
1. Enter self-calibration mode
a. Power off the instrument and face the X-axis towards the wall.
b. Press button and button simultaneously.
Then release the power button while still pressing
the manual button. Release the manual button after
10 seconds. The laser will enter self-calibration
mode and the LCD is shown as figure.
2. X-axis calibration
a. Open the cover on the remote control as shown below.
b. Press button to select the X-direction AUTO-calibration,
the LCD will display as the following figure. The
instrument will rotate and the laser beam line will
show on the wall.
c. Press the button to make the laser beam
line move up and downwards until it coincides with
the “h” mark.
d. Press the button to confirm the X-direction calibration
value. The laser will stop rotating and the X-axis calibration
sign will turn off.
Down cover
Calibration area
2406H 5/28/09 9:04 AM Page 23