Nilfisk-ALTO SW 850S P User Manual
Page 62
USER MANUAL
ENGLISH
SW 850S P
146 0790 000(4)2007-03 A
19
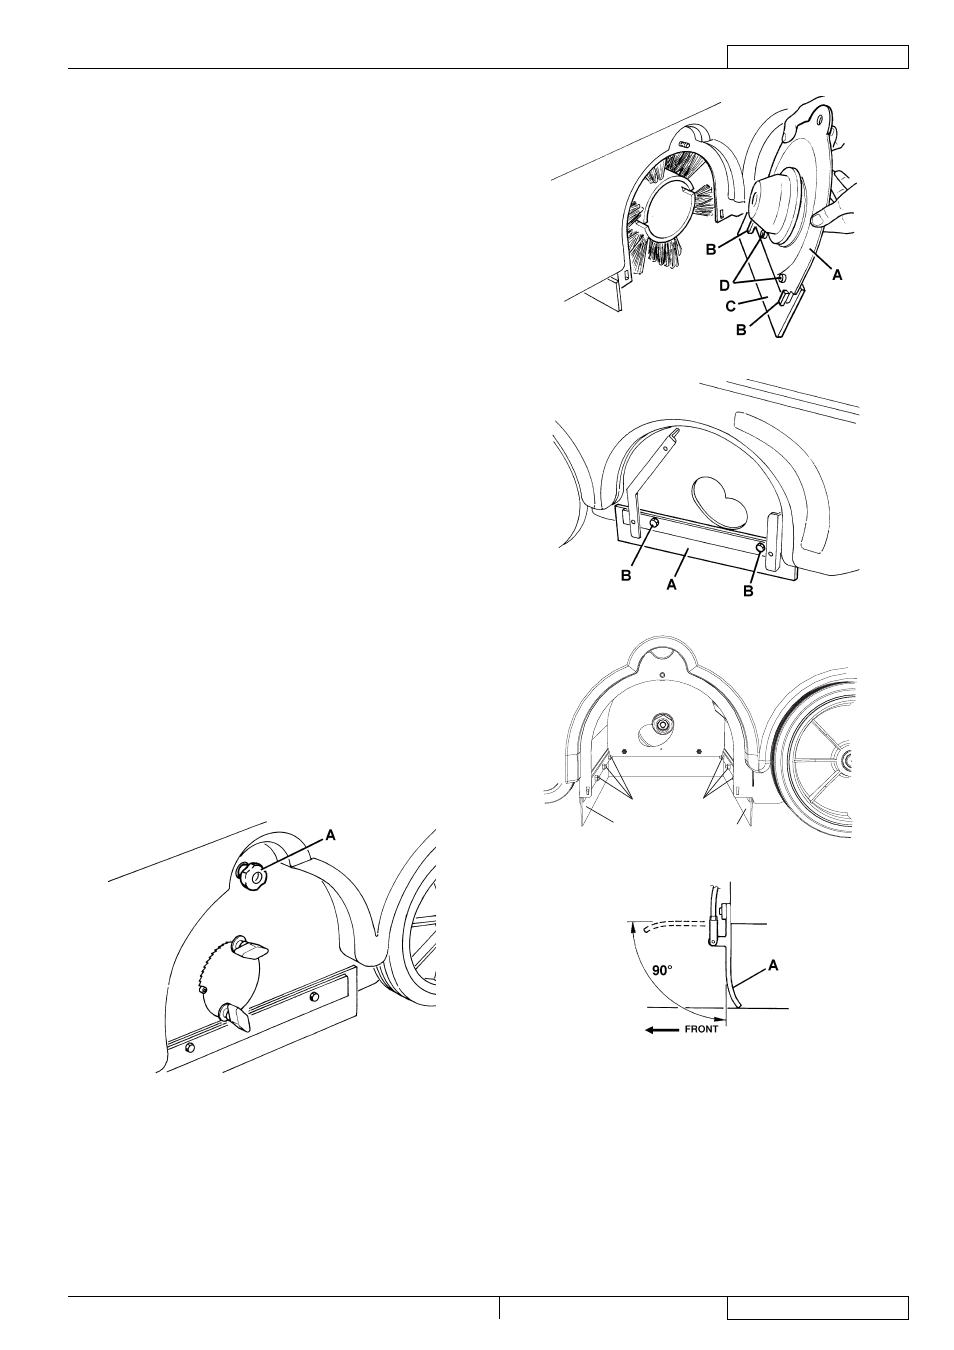
Left skirt
Open the hood (7), loosen the knob (A, Fig. 18) and
remove the main broom left cover (A, Fig. 19), by pressing
it downwards to disengage the fasteners (B).
Adjust the height of the left skirt (C, Fig. 19) by using the
slots (D).
Assemble the components by performing steps 5 to 6 in
the reverse order.
Right skirt
Remove the main broom as shown in the relevant
paragraph.
Remove the main broom belt (57) from the pulley (61);
for an easier removal, turn the pulley (61) by manually
operating on the fan (64).
Remove the screws (25) and the right cover (24) together
with the belt (57).
Adjust the height of the skirt (A, Fig. 20) by using the slots
(B).
Assemble the components by performing steps 8, 9 and 10
in the reverse order.
Front and rear skirt check
Remove the main broom as shown in the relevant
paragraph.
Check the front (A, Fig. 21) and rear skirts (B) for integrity.
Replace the skirts when they have cuts (A, Fig. 15) larger
than 20 mm or cracks/tears (B) larger than 10 mm (for skirt
replacement, refer to the Service Manual).
Check that:
The front skirt (A, Fig. 17) slightly touches the fl oor (as
shown in the fi gure).
The distance from the ground of the rear skirt (A, Fig.
16) is within 0 - 3 mm (as shown in the fi gure).
If necessary, adjust the skirt height by using the slots on
the screws (C and D, Fig. 19).
Press the front skirt lifting lever (27) and check that the
front skirt (A, Fig. 22) turns upwards for about 90° (as
shown in the fi gure); then release the lever (27) and check
that the skirt does not remain in an intermediate position
but returns to its initial position. If necessary, for the front
skirt control cable adjustment or replacement, refer to the
Service Manual.
Assemble the components in the reverse order of
disassembly.
S311471
Figure 18
5.
6.
7.
8.
9.
10.
11.
12.
13.
14.
15.
16.
•
•
17.
18.
19.
S311472
Figure 19
S311473
Figure 20
A
C
D
B
S311474
Figure 21
S311475
Figure 22
HOOD SAFETY SWITCH OPERATION CHECK
While the engine is running, slightly open the hood (7) and
check that the engine stops immediately.
If the engine keeps running when the hood (7) is open, contact
an authorised Service Center or Retailer.