Installing the motherboard – Elitegroup CDC-I (V1.0) User Manual
Page 21
17
Installing the Motherboard
Refer to the illustration below for proper installation:
This motherboard does not support the “Hot-Plug” function.
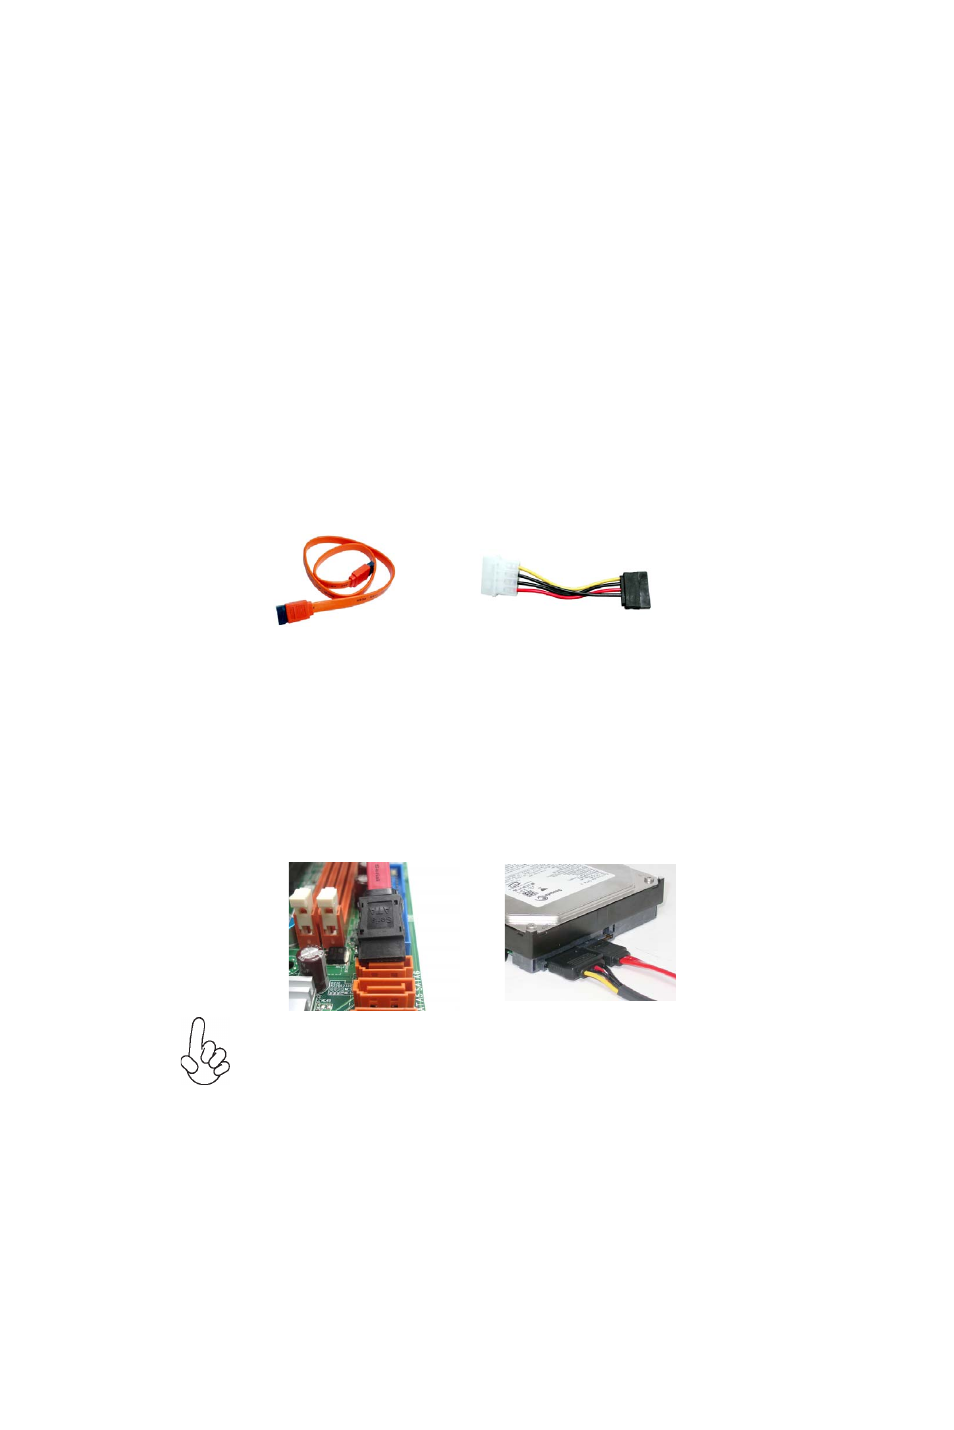
1
Attach either cable end to the connector on the motherboard.
2
Attach the other cable end to the SATA hard drive.
3
Attach the SATA power cable to the SATA hard drive and connect the
other end to the power supply.
Installing a Hard Disk Drive/CD-ROM/SATA Hard Drive
This section describes how to install SATA connector
SATA cable
(optional)
SATA power cable
(optional)
About SATA Connectors
Your motherboard features two SATA connectors supporting a total of two drives.
SATA refers to Serial ATA (Advanced Technology Attachment) is the standard inter-
face for the IDE hard drives which are currently used in most PCs. These connectors
are well designed and will only fit in one orientation. Locate the SATA connectors on
the motherboard and follow the illustration below to install the SATA hard drives.
Installing Serial ATA Hard Drives
To install the Serial ATA (SATA) hard drives, use the SATA cable that supports the
Serial ATA protocol. This SATA cable comes with an SATA power cable. You can
connect either end of the SATA cable to the SATA hard drive or the connector on the
motherboard.