Otter Outdoors Pro Ice Lodge User Manual
Page 2
Page 2
2. Place the seat rail bracket (Item 20) on the first hole and mark second hole location. Note: Bracket for front of
sled has a different bend then the rear of sled. Drill the remaining two 5/16” holes through the sled. Do not attach
the brackets to the sled at this point. Ref. Diagram 2.
Diagram 2
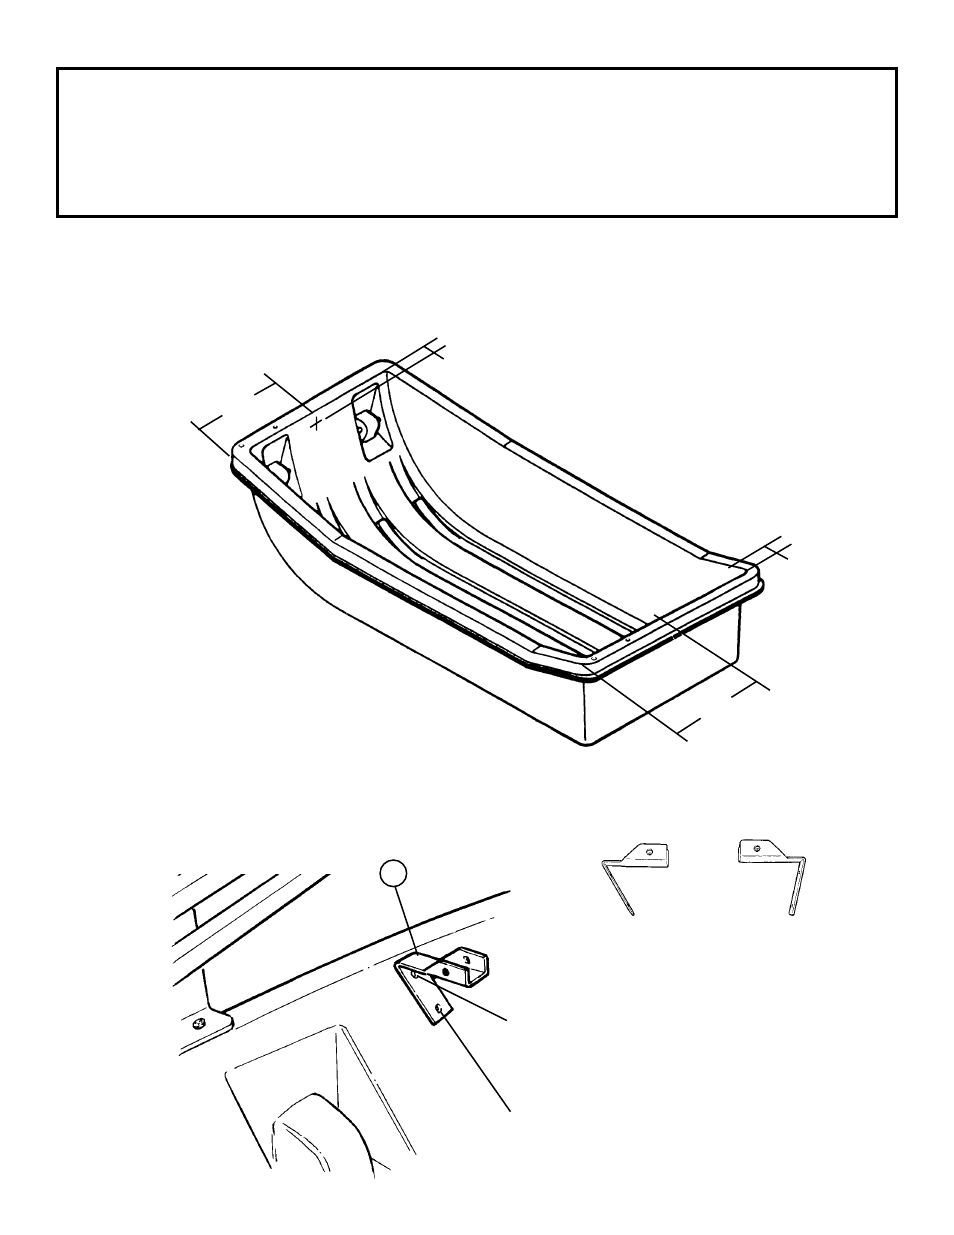
1. Layout all parts and position sled as shown in Diagram 1. Measure 17” from the front/left corner of the sled and
7/8” down and mark the location for the top hole needed for the seat rail bracket (Item 20). Measure 17-1/2”
from the rear/left corner of the sled and 7/8” down and mark the location for the top hole needed on the other
side. Check bracket placement to be sure brackets are either flush with top edge of sled or below the edge. Drill
the two 5/16” holes through the sled. Ref. Diagram 1.
Diagram 1
20
Front
17 in.
7/8 in.
7/8 in.
17-1/2 in.
Note: Frame assemblies
were removed in
illustration for clarity
purposes.
Rear
Mark second hole and drill 5/16”
Front of sled
bracket
Rear of sled
bracket
Right
Left
First hole
Tools Required:
7/16” Box End Wrench
3/8 Bit
7/16” Socket and Ratchet
5/16 Bit
Drill/Driver
Complete Pkg Only
Phillips Bit
1/2” Wrench
3/32 Drill Bit (optional)
1/2” Socket