ODL Sliding Patio Doors with Blinds Between Glass User Manual
Page 5
INSTALLATION INSTRUCTIONS
for Doors with Integral Nailing Fin (JII006-ODL)
5
SPRAy ADHeSIVe/PRIMeR
Apply spray adhesive
per manufacturer’s
instructions (protect
door from overspray)
to nailing fin,
sheathing, and
building wrap around
the patio door as
shown.
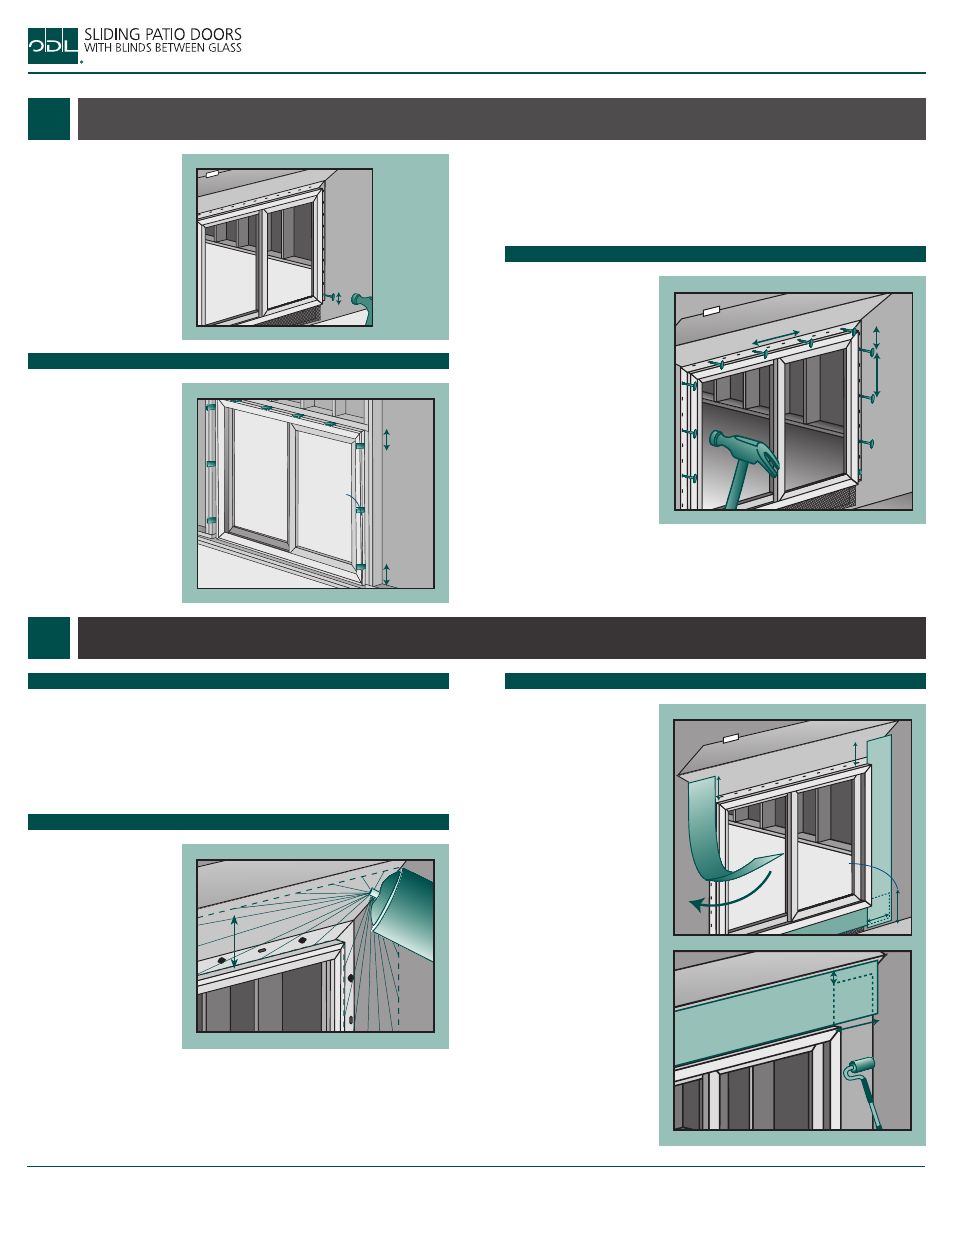
SeCURe PATIO DOOR
Note!
Fastener heads
must be flush. Do
not dent nailing fin.
Always use pre-
punched holes or pre-
drill with a 3/16" bit.
Fasten patio door
through nailing fin
holes 4" from the
corners and 12" apart
all the way around the
patio door.
SHIM THe jAMBS
Note!
Secure all shims
with sealant.
1. From the interior,
shim the operating
panel side jamb 6"
from the corners
and at the strike
plate. Align shims
so that strike plate
screws (installed
later) will each
penetrate a shim.
Warning!
To avoid
injury, use at least two
people to install.
Fasten patio door with
a galvanized roofing
nail between 3" and 4"
from one lower corner.
5
6
INsTALL pATIO DOOr
FLAsh pATIO DOOr
3"-4"
strike
plate
6"
6"
Interior
4"
12"
12"
PRePARe FLASHING
Cut pieces of self-adhesive flashing to length as follows:
• One header piece 14" longer than the header
• Two side pieces: for continuous slab landings, 5" longer than the
sides, or for step-down landings, 5" + the height of the step
• For step-down landings only, one sill piece 10" longer than the sill
and 1" narrower than the height of the step
Sp
ra
y
Ad
he
siv
e
6"
APPLy THe SeLF-ADHeSIVe FLASHING
Note!
keep the edge
of the self-adhesive
flashing as close to
the patio door frame
as possible.
1. If applicable, center
and apply the sill
piece underneath
the sill (bottom
1/2" of the drain
screen must remain
visible).
2. Apply the side
pieces starting 5"
above the header.
3. Center and apply
the header piece
above the header.
4. Press the flashing
down with a J-roller.
5. Do not allow gaps
or bubbles beneath
self-adhesive
flashing (remove
and replace if
necessary).
5"
5"
5"
step
height
minus 1"
2. shim the stationary panel side jamb 6" from the corners and at
center.
3. Shim the head jamb 6" from the corners of each panel.
4. Inspect the patio door for square, level, and plumb. Test for proper
operation (remove and reinstall if necessary).
7"
1"