Installation, Inspections & maintenance – Vestil MPG User Manual
Page 3
1
st
edition 1211
12/21/2011
MPG-series installation instructions.doc
3 of 3
Copyright 2011 Vestil Manufacturing Corp.
Installation
Inspections & Maintenance
At least once per month:
Try to wiggle the curb to assess the soundness of the connections between the anchor bolts and the surface. If the
curb can wobble, determine which connection(s) is loose, and then try to secure the curb by tightening the loose
bolt(s). If the anchors are too loose to prevent the curb from wobbling, install the curb in a different location where the
surface is sound.
Closely inspect the curb for damage (cracks, deformation, etc.). If the speed bump is cracked or splitting, replace it.
Wipe dirt and other filth from the surface of the curb. The curb is yellow to provide a sharp contrast with the
surface/road.
Step 1: Prepare the surface (road) where the curb will be installed. Thoroughly sweep the surface/road where the curb
will be installed. Allow the surface to dry completely, if necessary. Mark the concrete with the location of each bolt hole.
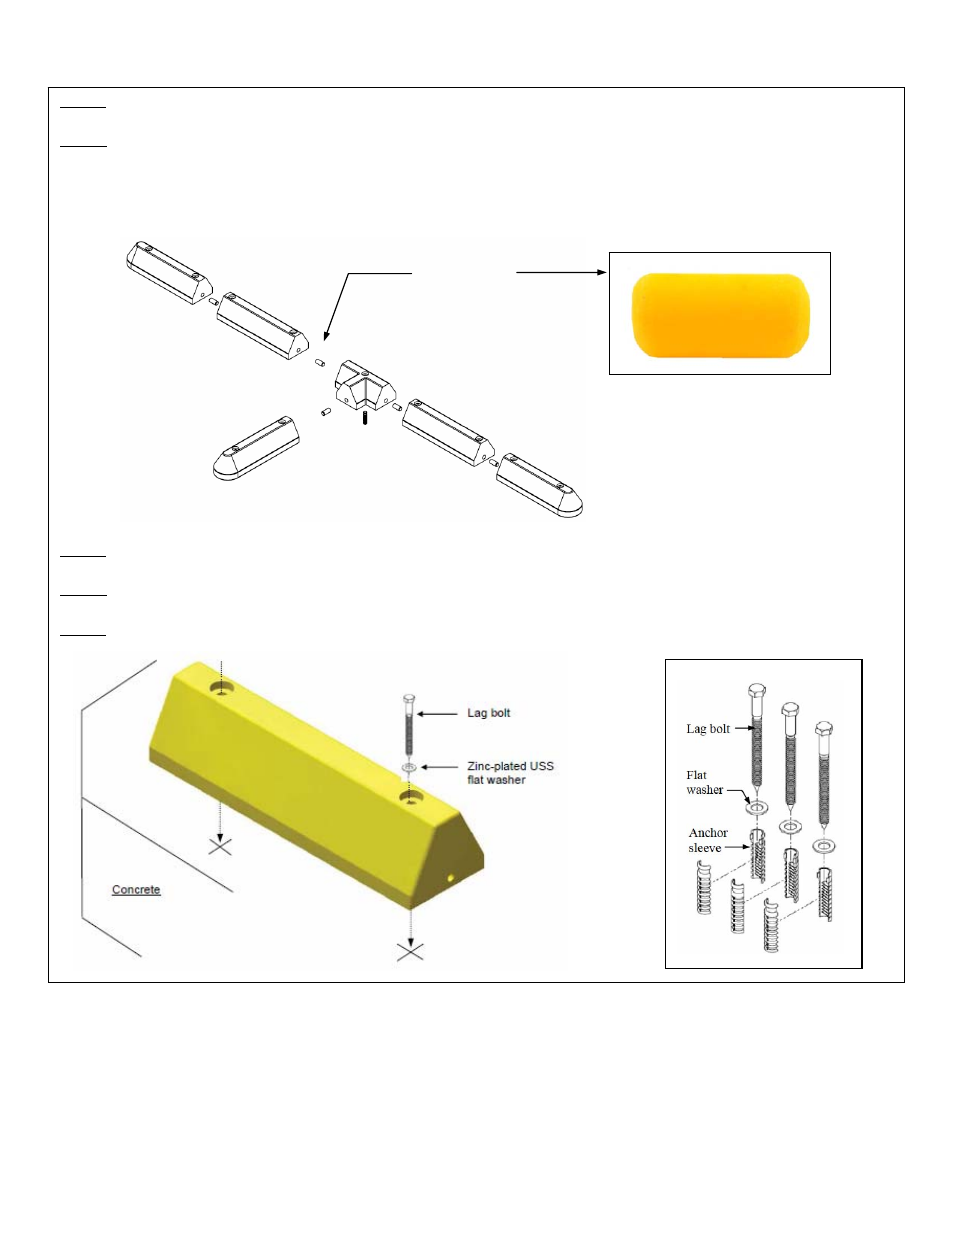
Step 2: If multiple curb segments must be fastened together to form the desired configuration, connect the segments
before proceeding to step 3. [NOTE: An assembly of multiple segments will be heavy; connect only as many segments
as you can comfortably manipulate.] Connect adjacent curb sections using alignment pins as shown in the diagram
below. Drive a pin into one of the pin holes with a 2lb. sledge hammer; then align the pin hole of the adjacent curb
segment with the end of the pin that was just driven into the other section. Apply weight to the first curb section and
hammer the adjacent curb segment onto the pin.
Step 3: Drill 13/16in. (~2.1cm) diameter holes in the concrete to a depth of approximately 6in. (locations shown as X’s in
the diagram above).
Step 3: Press/tap the anchor sleeves into the drilled holes until they are at least flush with the road surface or slightly
lower.
Step 4: Slide a washer onto each lag bolt; then insert the bolts into the bolt holes in the curb. Align the ends of the bolts
with the holes drilled into the surface. Firmly press down on the curb and tightly fasten the bolts to the anchors.
Anchor bolt hardware kit
Connecting pin