Vestil GCAB-4415-72 User Manual
Page 2
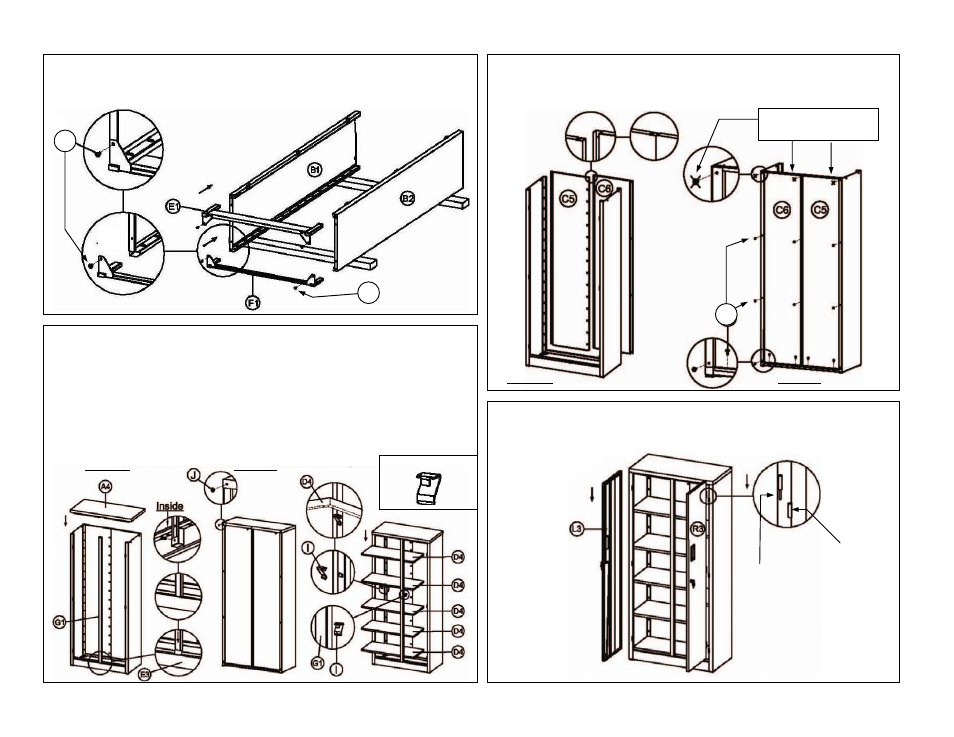
Step 2: Install the left rear panel (C5) and then the right rear panel (C6)
[NOTE: C6 will overlap C5]; then fasten the rear panels together and to the
side panels with 10mm screws (J).
Rear view
Front view
J
Don’t install screws
here until step 3
Step 4: Install the left door (L3) and right door (R3) by inserting the hinge
pins mounted on the door panels into the hinge barrels mounted on the side
panels.
Hinge
barrel
Hinge
pin
Step 1: Insert the front leg assembly (E3) and rear leg assembly (F3) into the
bottom end (has flange with 2 holes for screws) of the left side panel (B7) and
right side panel (B8) as shown in the diagram below. Fasten both leg assemblies
to the panels with 10mm screws (J).
J
J
Step 3: Insert the center brace (G1) into the slot in the front leg assembly and
secure it from the inside with a 10mm screw (shown in first frame of diagram
below). Set the top panel (A4) in place on top of the cabinet and secure it to
the side panels with 10mm screws (J). Brace the rear panels from the inside
(e.g. with a portion of 2-by-4) to prevent the panel from warping, and then
fasten the top panel to the rear panels with 10mm screws. Install shelf supports
(I) in all 4 corners & on the divider (G1) at the same height to support each
shelf; then install the shelves (D4) so that they rest on the supports.
Rear view
Front view
Shelf support (I)