Vanguard Herculito User Manual
Page 9
Herculito Operating Procedures
8
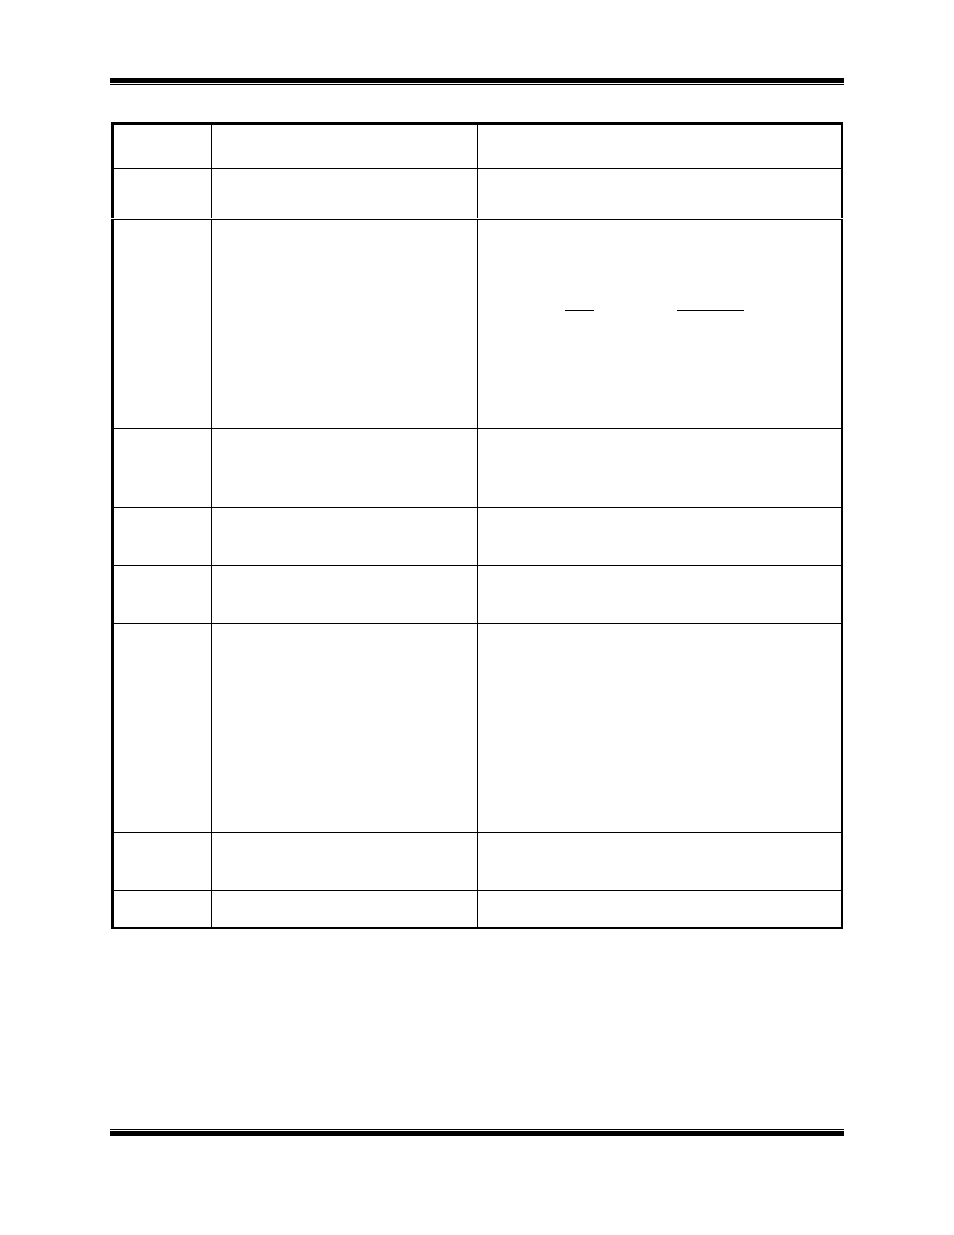
Table 2 Functional Description of Herculito Controls and Display
Figure 1
Index #
Adjacent Panel Marking
Functional Description
1,8
None
Current connector jacks.
2
RS-232C
RS-232C interface port; 9-pin connector;
female DB type. The data are set to 19,200
baud, 1 start bit, 8 data bits, and no parity bit;
PIN ............... SIGNAL
2 Rx
3 Tx
5 Signal Gnd
This serial port is dedicated for factory
calibration and software update.
3
no marking
LCD; 2-line by 16-character; back-lighted;
displays menus of selections, operator entries,
and test-measurement results.
4
GROUND
(Wing Nut)
Herculito ground stud. Connect ground stud
to substation ground using provided cable.
5
90-230 Vac, 8A, 50- 60 Hz
Input power connector with third-wire safety
ground, power switch and, fuse holder.
6
CHANGE
“PUSH”
TO SELECT
One-knob control (all Herculito menus and
selections are controlled by this one control
knob). Turning this control knob scrolls
through different menu options (shown on
the LCD), which display. Pressing the knob
selects the displayed function, usually
producing a new menu of selectable options.
See Figure 8 for a summary of the step-by-
step operating procedures.
7
HIGH CURRENT
PRESENT
LED indicator, red; Lights when high-test-
current is going through the test leads.
9 & 10
(resistor symbol)
Voltage-sensing connector jacks.