Adjustment knobs, Projected image movement – Staub Electronics SM-PROJ-XL-BLK STRONG - UNIVERSAL FINE ADJUST PROJECTOR MOUNT User Manual
Page 9
Pg. 9
SM-PROJ-XL Installation Manual
www.snapav.com Support: 866.838.5052
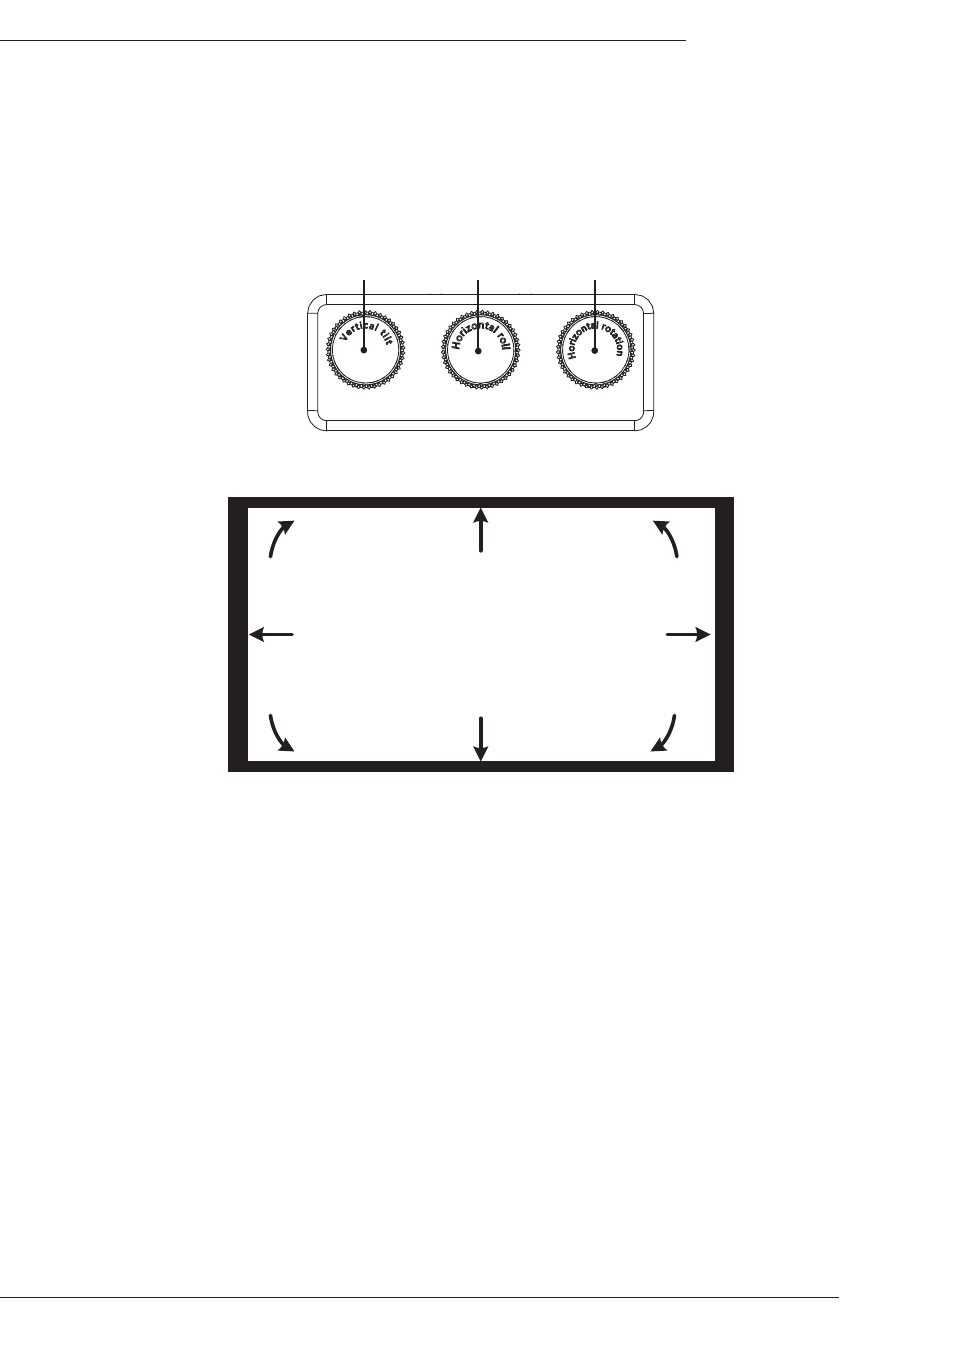
Now that the mount and projector are fully assembled and installed, make all connections and power on the
projector. Display an image from a source or a pattern generator so that final adjustments can be made. See Figure
13 below for reference.
Step 7. Adjusting the Projector Image
Move each knob in the desired direction until the image is properly aligned.
Attach the cover after final adjustments are complete. The SM-PROJ-XL mount is now installed.
Note: The fine adjustment knobs allow for adjustment of up to +/- 5 degrees in each direction. If the adjustments
do not allow enough movement to correct an alignment issue, the mount must be adjusted elsewhere.
Figure 13
Adjustment Knobs
A
B
C
Knob C
Clockwise
Knob A
Clockwise
Knob A
Counterclockwise
Knob C
Counterclockwise
Knob B
Clockwise
Knob B
Counterclockwise
Knob B
Clockwise
Knob B
Counterclockwise
Projection Screen
Projected Image
Movement