Harwin Z30-021 User Manual
Page 5
IS-36 Issue: 2 Date: 27.07.12 C/Note: 11786
Page 5 of 7
Correct crimp height, as per crimp height values given on front page.
A destructive pull-off force test should also be performed occasionally, to confirm the hand crimp
tool is still operating correctly. The correct values for this test are given on the front page of this
instruction sheet. Insulation should be stripped back beyond insulation crimp area before
preparing samples for pull-off force test.
ASSEMBLY – CRIMP INTO HOUSING
The completed crimp can now be inserted into the appropriate Trio-Tek crimp housing. For larger
wire sizes, no other tooling should be required for this operation; the crimps can be pushed in by
hand. Crimps are assembled into the mould with the retaining tang towards the outer edge of
the housing. With thinner wires, it may be helpful to push onto the back of the crimp.
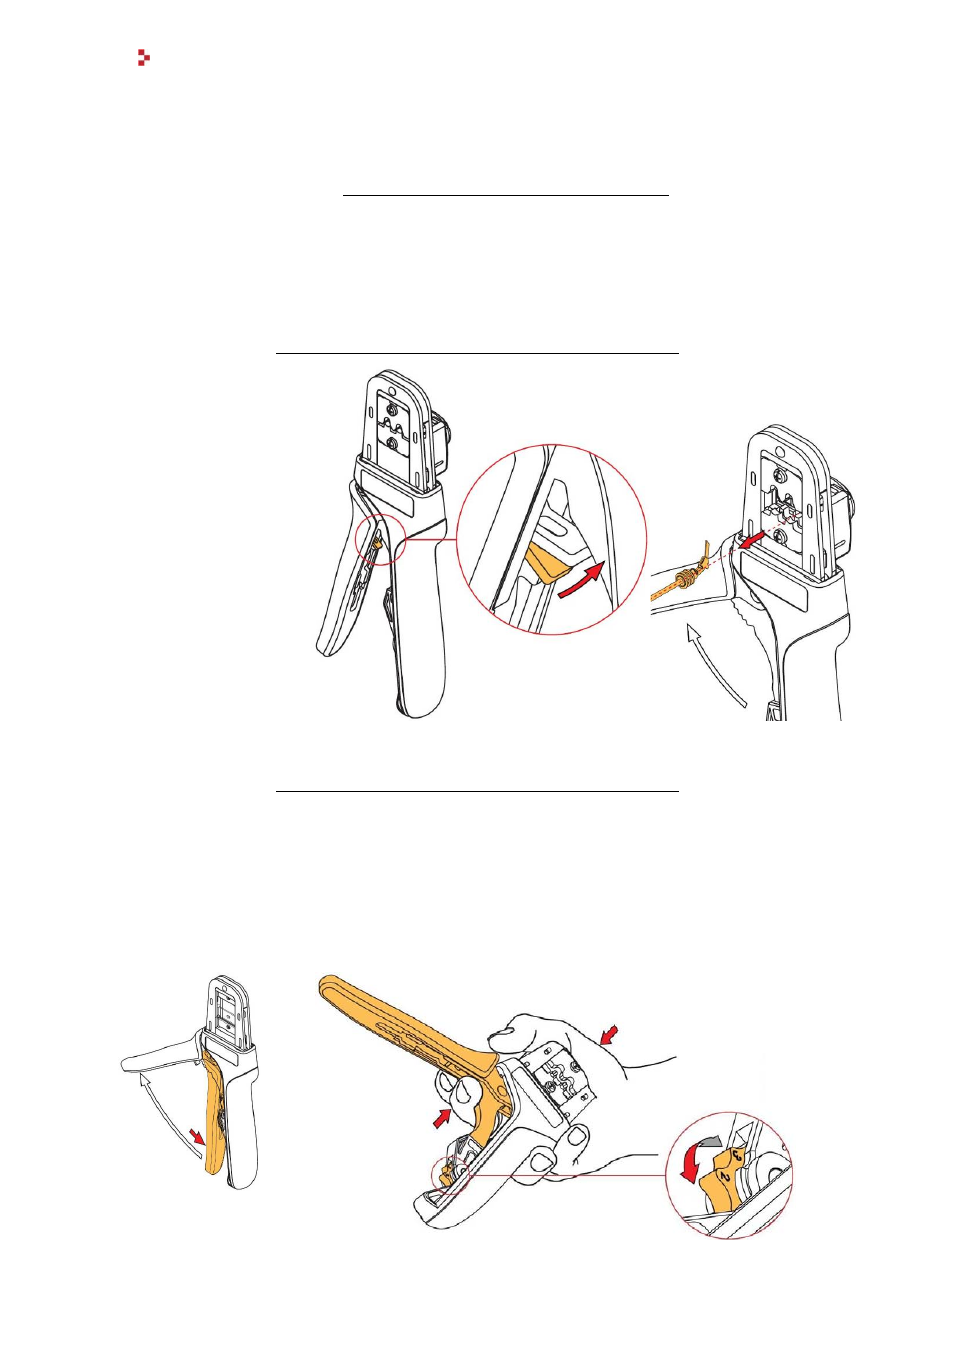
TROUBLESHOOTING – MISCRIMPS OR JAMS
Should the tool become
stuck or jammed in a
partially closed position,
Do Not
force the handles
open or closed
. There is
a ratchet release lever
located inside the
movable handle.
Pressing up on this lever
will release the ratchet,
and the handles should
then easily open. The
jam or miscrimp can then
be removed.
TROUBLESHOOTING – LOW PULL-OFF FORCE
This tool is supplied as new, set to the right preload force necessary to crimp the contacts.
However, over time, this force may fall off slightly. The tool can be adjusted to cater for this
wear, and raise the preload force to give correct crimps.
If you need to carry out this procedure, Harwin recommend that you crimp a number of samples
before and during adjustment, until the pull-off force achieved is up to your standards.
.
Ensure that the crimp tool
is at the fully open
position
Hold the hand tool as shown in the above figure, and
squeeze the link bar in towards the top of the tool. This
releases the preload adjustment wheel.