Assembling the crimp into the housing, Removing the crimp from the housing – Harwin Z80-258 User Manual
Page 2
IS-28 Issue: 3 Date: 01.12.08 C/Note: 10212
Page 2 of 2
ASSEMBLING THE CRIMP INTO THE HOUSING
Having crimped the contact to wire using either hand crimp tool Z80-255 or suitable crimping
press, the completed crimp can now be inserted into the appropriate Trio-Tek crimp housing. For
larger wire sizes, no other tooling should be required for this operation; the crimps can be pushed
in by hand. Crimps are assembled into the mould with the retaining tang towards the outer edge
of the housing. With thinner wires, it may be helpful to push onto the back of the crimp with the
Extraction Tool.
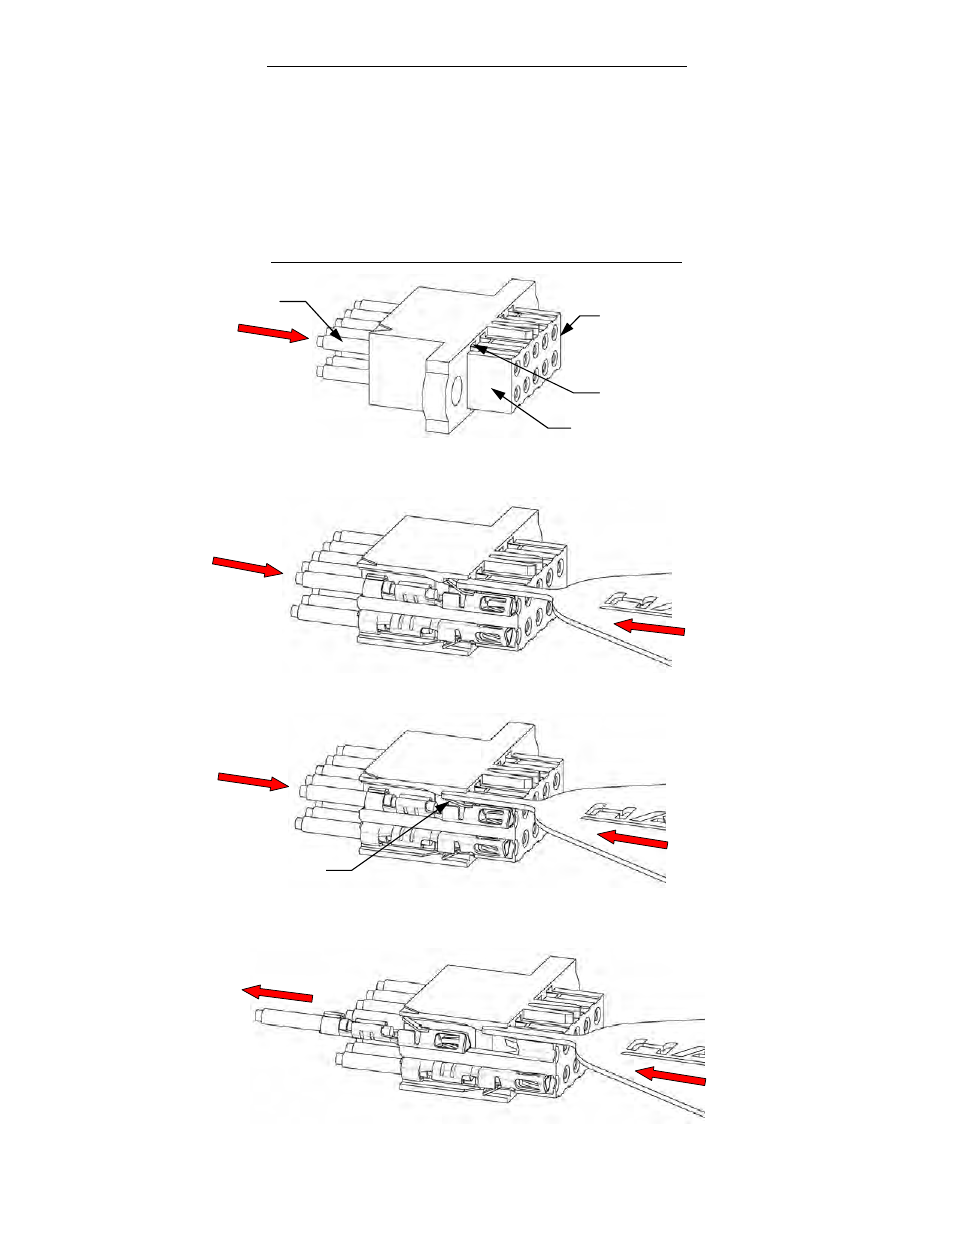
REMOVING THE CRIMP FROM THE HOUSING
Push the contact and wire forward into the housing in the direction as shown,
taking the load off of the contact latching feature on the contact.
Slide the probe down the side of the mating section of the crimp housing,
into the latching window of the crimp to be removed.
Push the tool to depth.
Do not forcefully insert, insert on an angle, or insert with a twisting action.
It may damage the tool or the housing
Whilst keeping the tool in place, gently pull the wire and contact in the direction
shown, to remove them from the housing.
Wire
Housing
Contact latching
feature
Latching window
Mating section