Harwin Z80-280 User Manual
Page 2
IS-25 Issue: 4 Date: 19.06.12 C/Note: 11759
Page 2 of 3
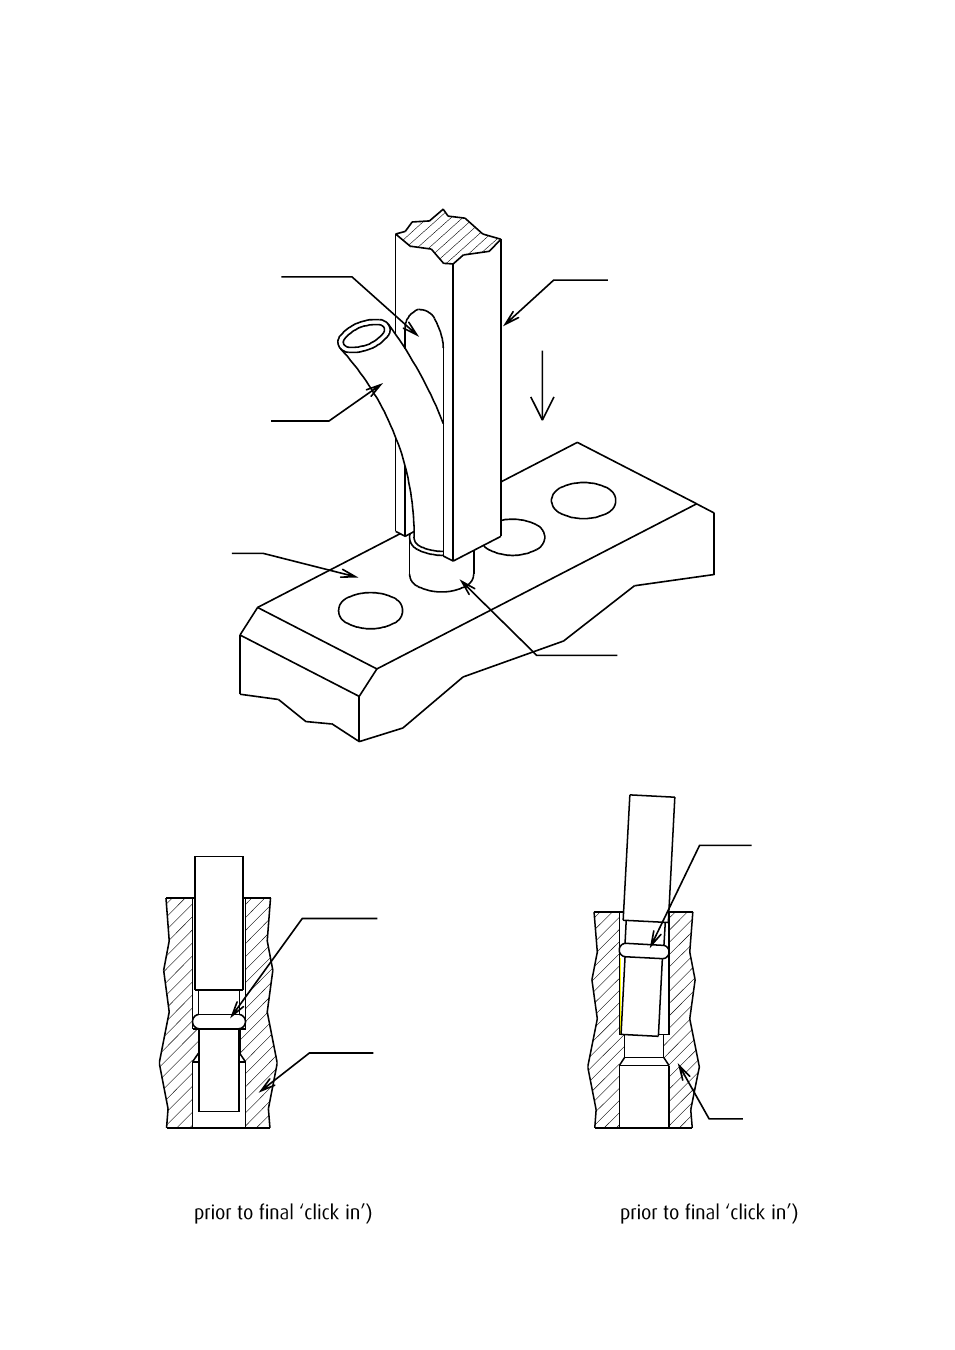
7. Repeat steps 4 to 6 until the moulding is populated as required. Care should be taken not to
damage any contacts. It is recommended that the moulding be supported by a small fixture
or a hard flat surface. Do not support the mould on any latches fitted, or pressure exerted on
inserting the contacts will bend the latches.
Figure 1
Figure 2
Figure 3
(Correct contact position
(Incorrect contact position
-
-
Note: Female contact shown
Insertion Tool
Partially
Inserted
Contact
Moulding
(back face)
Cable
Groove
Cable
Contact
Moulding
Contact
Moulding