Quick start guide for tempo hd, Standard (3.5")hard drive installation steps – Sonnet Technologies Tempo HD (With or Without Drive) Mac Version User Manual
Page 4
Standard (3.5") Hard Drive Installation Preparation
Before installing additional hard drives into your system, familiarize yourself
with the parts to be installed. We also strongly recommend that you read the
section in your computer’s user manual that addresses hard drive installation.
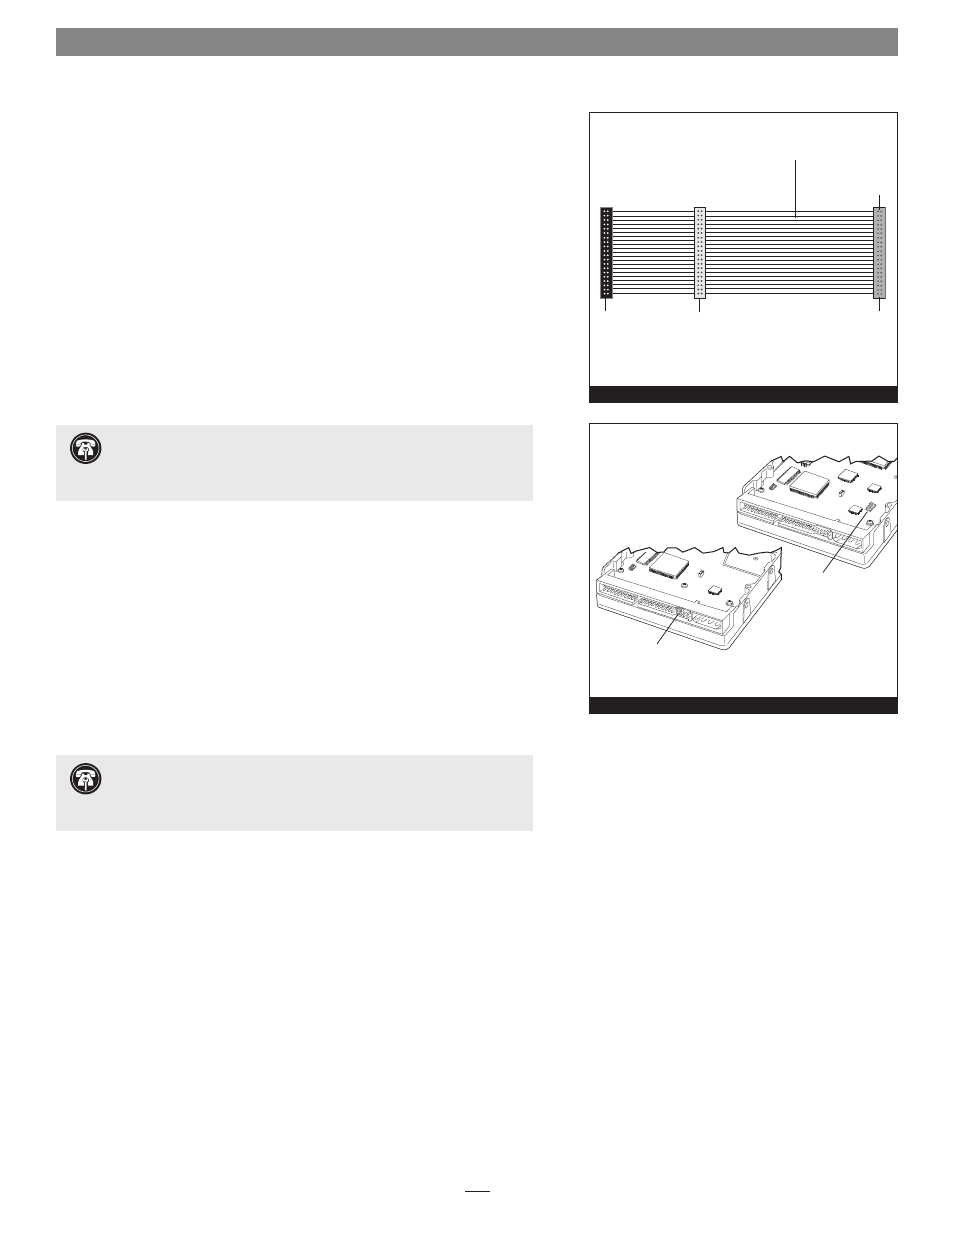
1. Identify the connectors on an Ultra ATA cable (sold separately) as shown
in
Figure 4; the host connector plugs into the Tempo HD controller card,
while the master and slave connectors plug into the hard drives.
2. Remove the hard drive from its packaging.
3. Locate the jumper block on the hard drive. Figure 5 shows the two most
common jumper block locations.
Standard (3.5")Hard Drive Installation Steps
This section covers the installation and configuration one or two standard
(3.5”) hard drives into your system.
1. Shut down your computer, if it is not already off.
2. Open your computer to access the expansion card area (PCI slots) and
drive bay(s); refer to your computer’s user manual for specific information.
3. Configure the hard drives’ jumpers as follows:
• When installing
one drive, you must set its jumpers to the single setting
when available, or the master setting when not.
• When connecting
two drives, you must set the jumpers on one drive to
the master setting, and to the slave setting on the other.
4. Install the hard drives into your computer’s expansion bays. (Depending
on your computer model, drive mounting brackets/carriers or drive
mounting sleds may be required to install your hard drives. Refer to your
computer’s user manual.)
jumper block
jumper block
Figure 5
.
Support Note:
Refer to the hard drive user’s manual for jumper
setting information specific to your drives. Alternately, you may find
jumper setting information printed on your hard drives’ labels. Make sure the
drives are oriented the same way as the illustration before moving jumpers.
Support Note:
Most hard drives are factory preset for use as a single
or master drive. To change the setting, you will need to reconfigure the
hard drives’ jumpers. Be sure the jumpers are configured properly, otherwise,
your computer may not boot, or your new drives may not be recognized.
host
connector
(blue)
connects to
Tempo HD
slave
connector
(gray)
master
connector
(black)
40-pin/80-wire Ultra ATA cable
Figure 4
Quick Start Guide for Tempo HD