Installation, Ransburg, Micropak input power – Ransburg MicroPak Controller A11789 User Manual
Page 10
MICROPAK INPUT
POWER
For non-conduit installations, plug the detach-
able AC line cord into the receptacle on the
rear of the MicroPak Controller. Plug the other
end of the line cord into a properly grounded
120 VAC outlet.
>
Always double check that the control
unit is unplugged from its AC outlet before
working with any internal wiring.
W A R N I N G
!
>
In general, conduit must be used for
approved AC installation, however, if national
and local codes permit, the AC power may
be supplied via the factory suppliedline cord.
NOTE
For installations where it is required to run the
AC input wiring in conduit, perform the following:
1. Ensure the AC line cord is unplugged and re-
move the top cover from the controller (see Fig-
ure 9).
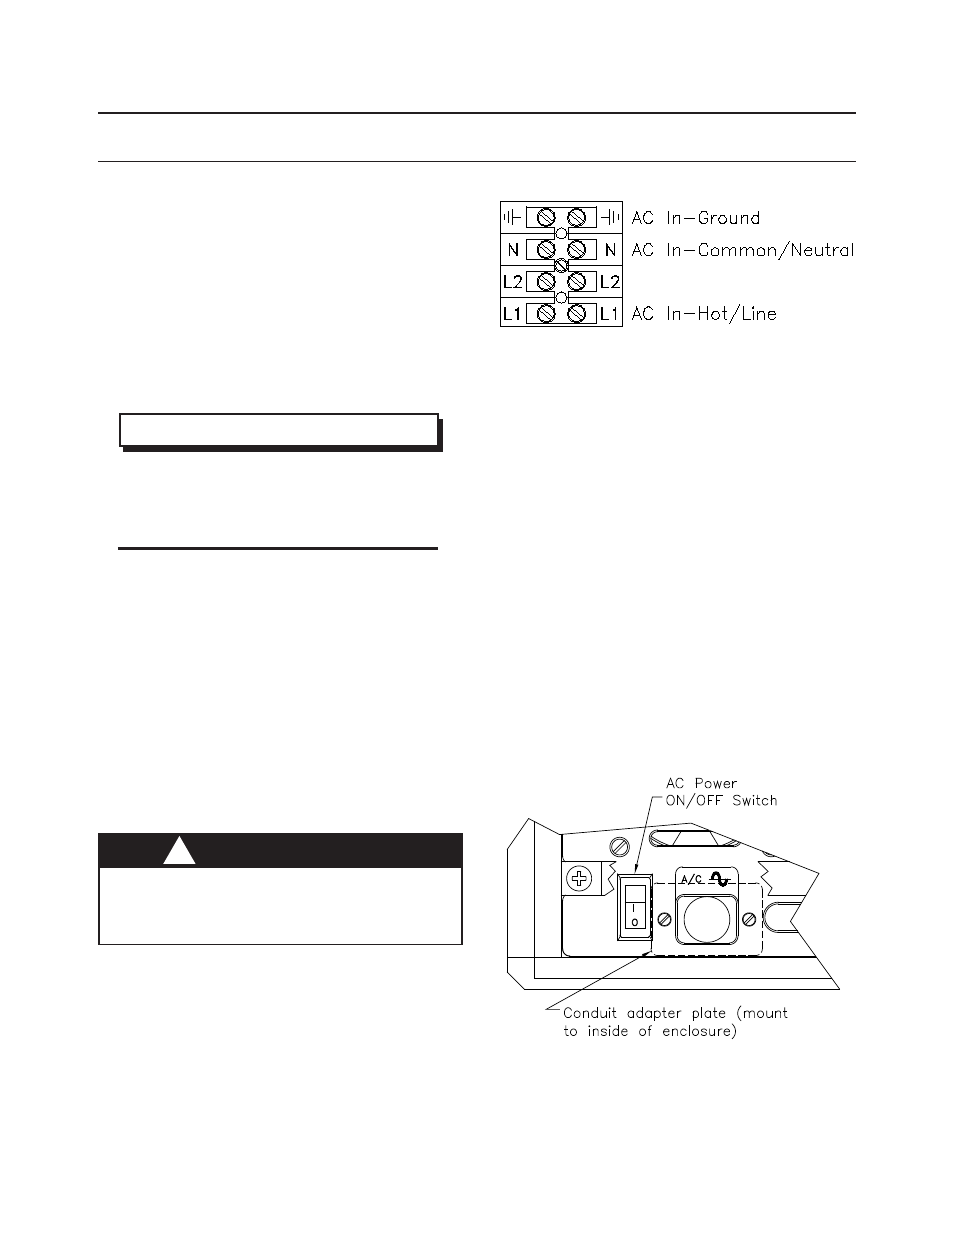
2. Remove the AC Inlet Receptacle wiring from
1TB-L1, 1TB-N, and 1TB-Ground (see Figure 1
for AC input wiring locations).
3. Remove the mounting hardware from the AC
Inlet Receptacle and remove it from the rear of
the control unit.
4. Install the Conduit Adapter Plate (supplied)
(76453) in the hole where the AC Inlet Recepta-
cle was removed (see Figure 2).
5. Install the AC line cord through the Conduit
Adapter Plate using conduit and wire to 1TB as
follows:
Hot/Line
to 1TB-L1
Neutral/common to 1TB-N
Ground
to 1TB-Ground
6. Reinstall top cover on controller.
Figure 1: Terminal Block 1 (1TB)
Figure 2: Installation of Conduit Adapter Plate
INSTALLATION
MicroPak Controller - Installation
8
Ransburg
CP-06-01.1