Gentec-EO FLASH User Manual
Page 11
Revision 1.5
7
FLASH Series Instruction Manual
Gentec Electro-Optics Inc. All rights reserved
WARNING:
WHEN ‘’HOT’’ APPEAR ON THE SCREEN TURN OFF THE LASER BEAM IMMEDIATELY
TO PREVENT DAMAGING THE DETECTOR
Be careful not to exceed the maximum levels and densities stated in the specifications.
The handle on the flash is for carrying purposes only. It is not recommended for the
user to hold the Flash during measurements. Extreme caution must be taken during
laser power measurement.
Gentec-EO is not responsible for any damage or injury caused by misuse.
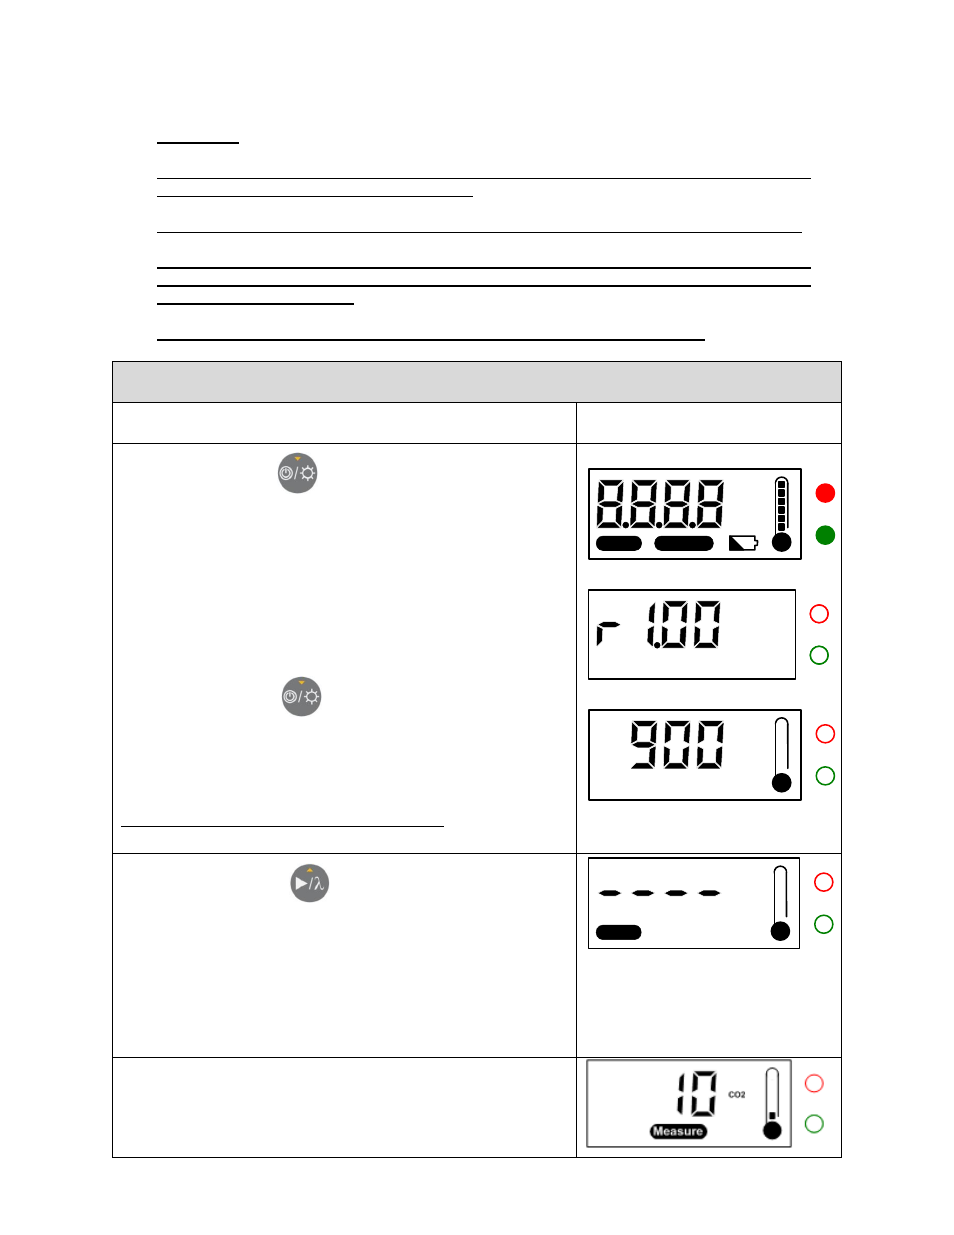
2.1 Activation of the device and measuring the power of a laser
(1)
Place the FLASH on the measurement surface.
(2)
Press the button
once, to turn the FLASH on.
State 2.1 : The FLASH turns on and does a lamp test (all
segments of the LCD, the backlight and the 2 LEDs are ON).
State 2.2 : Displays the software revision number. The 2
LEDs and backlight are OFF.
State 2.3 : Displays the last measurement taken. The 2
LEDs and backlight are still OFF.
If you hold the button
during the startup, the FLASH will
display the software revision number until the button is released.
It is recommended to leave the FLASH stabilize for 30 seconds
after startup before starting a new measure.
Do not turn the FLASH on with the laser on.
State 2.1
CO2
YAG
W
!
Measure
Ready
Other
State 2.2
State 2.3
CO2
W
(3)
Press the button
once, to reset the FLASH and
start a new measure.
The FLASH displays the icon « Ready » and «
----
» waiting
to detect an increase in temperature (the laser signal). The
2 LEDs are OFF.
Note : The only way to exit this mode is to make a measure or to
shut down the device (see step (6)).
CO2
W
Ready
(4)
When the FLASH detects an increase in temperature
(the laser signal), it automatically starts the measure,
displays the icon « Measure » and a countdown of the
number
of
seconds
remaining
to
complete
the