Mounting bracket kit assembly, Wheel & pillar assembly, continued – Fairbanks 1155 SERIES Portable Utility SCALE WITH THE FB2255 User Manual
Page 13
Section 2: Assembly
02/13
13
51315 Rev. 1
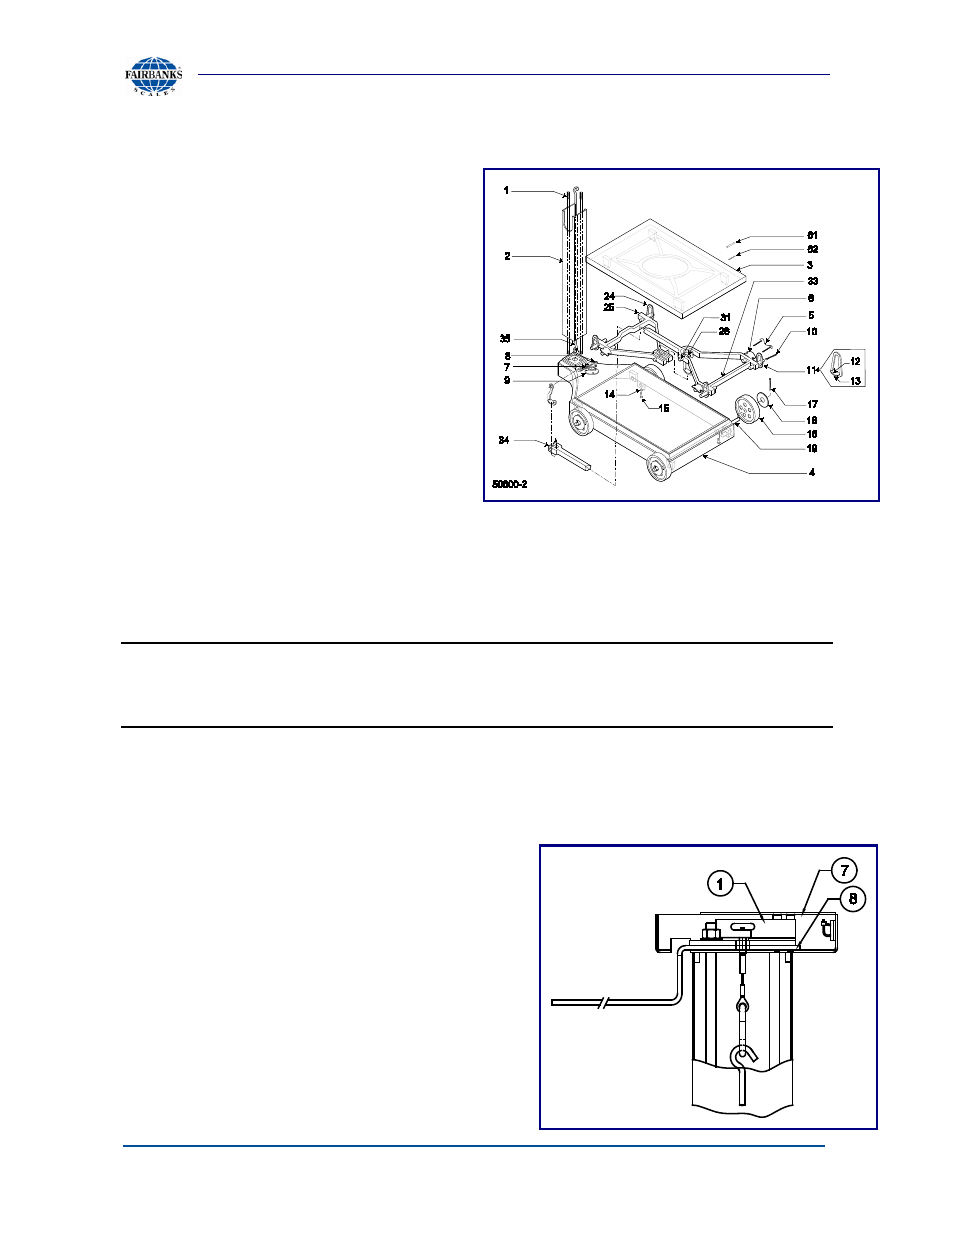
2.2. WHEEL & PILLAR
ASSEMBLY, CONTINUED
11. Screw the two (2) pillar rods (
#1
)
into the two (2) tapped holes of the
base.
12. Place the pillar (
#2
) over the pillar
rods.
─ The cutouts face to the left and
right of the platform
13. Insert the steelyard rod (
#35
) down
through the pillar.
─ The bent hook is on top, and the
loose swivel hook is on the
bottom.
2.3. MOUNTING BRACKET KIT ASSEMBLY
NOTE:
The Adapter is partially assembled and packed with bubble-wrap. The
ADAPTER BRACKET (
#7
), STIFFENER PLATE (
#8
),
and
LOAD CELL
MOUNTING PLATE (#1)
are in correct orientation within the box.
1. Lift the entire assembly out of the box and remove the bubble-wrap.
2. Allowing the small cable to go through the hole and the load cell plate (
#1
), set it
flush on top of the stiffener plate (
#8
).
3. With the slot in the back (as viewed from the
platform), place the assembly on over the
two pillar rods so it rests on top of the
pillar.
─ Ensure that the assembly is setting flush
and aligned.
─ Looking up from the bottom of the
assembly is two (2) small studs in
opposite corners on the inside of the
pillar.
4. Fasten the two (2) pillar rods to the top of