Elite Screens ezFrame2 Series User Manual
Page 5
Rev.041114-JA
www.elitescreens.com
5
(5)
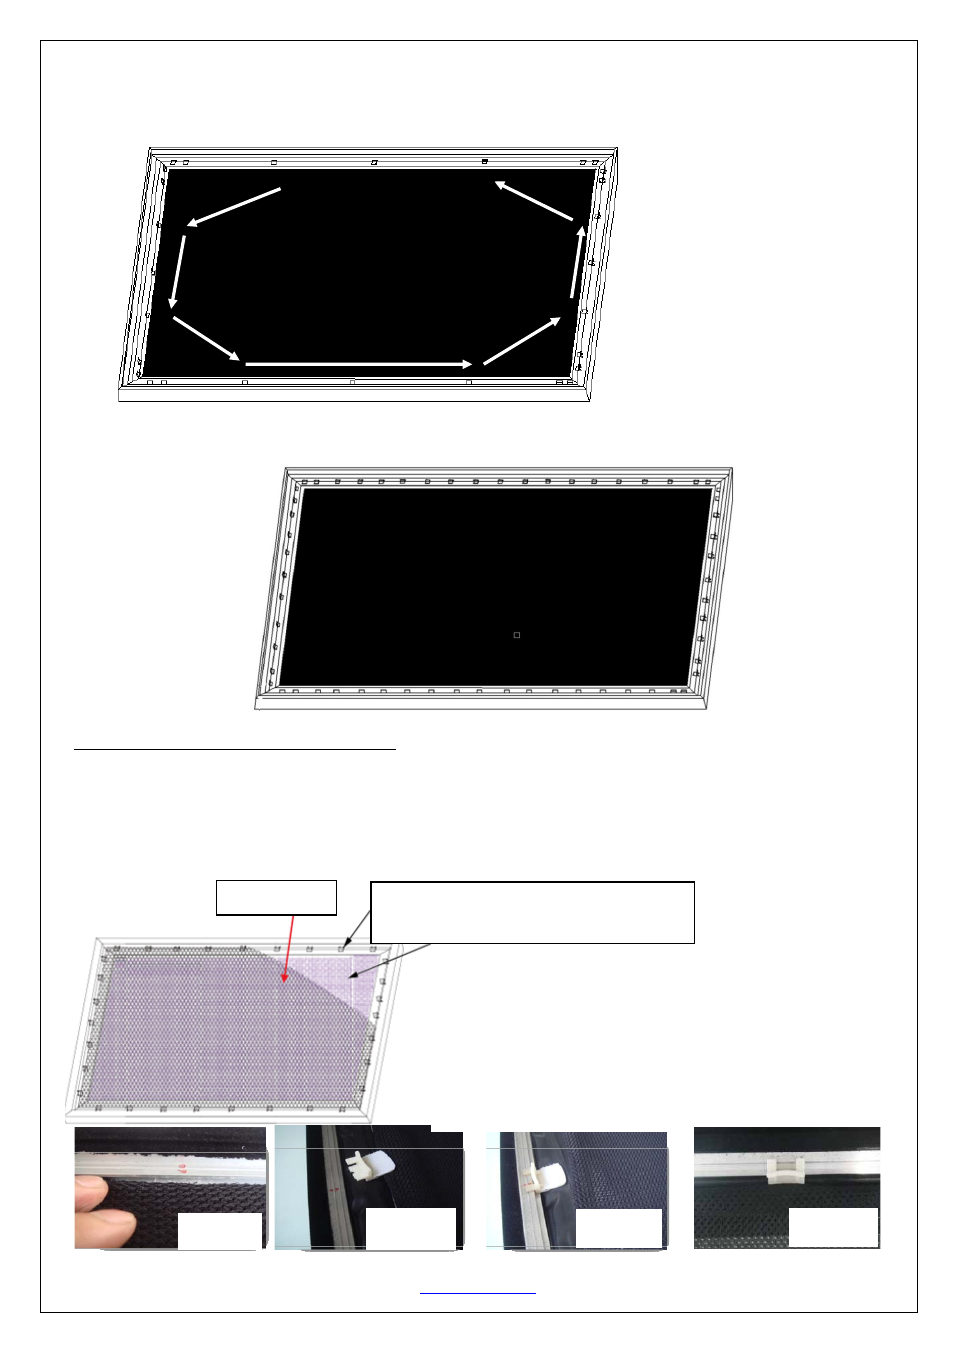
Next, fasten a fix plate on the center of each frame side in the following order
I→J→K→L→M→N→O→P as shown in Fig.10.
(6) Fasten the remainder of the fix plates in the empty locations in the red markings to complete attaching the screen
material. (Fig.11)
Black backing for AcousticPro models
This procedure only applies to AcousticPro models. Disregard this section if your Fixed Frame does not include an
acoustically transparent screen material. The purpose of the black backing material is to block out any light
penetration that may reflect off of anything mounted behind the screen, which can cause distortion to the projected
image.
Interval markings reveal the best points for inserting the fix plates
(Fig. 12). The prongs on the fix plates insert to the lip on the back
of the frame creating a friction hold that will firmly keep the
material and black backing in place (Fig. 13-14).After the material
has been installed, the backing will lie over the back of the white
(Acoustic) material and then be held in place by the Velcro on the
fix plates (Fig 15).
(Fig. 12)
(Fig. 14)
(Fig. 13)
(Fig. 15)
(Fig.11)
The black backing is held in place by the Velcro that is on the fix plates.
Black backing
Fix plates secure the Acoustic material and
the black backing behind it.
I
J
K
L
M
N
O
P
(Fig.10)