Attaching the screen material to the frame, Fig.3) – Elite Screens ezFrame2 Series User Manual
Page 3
Rev.041114-JA
www.elitescreens.com
3
Push
Push
( fig.2)
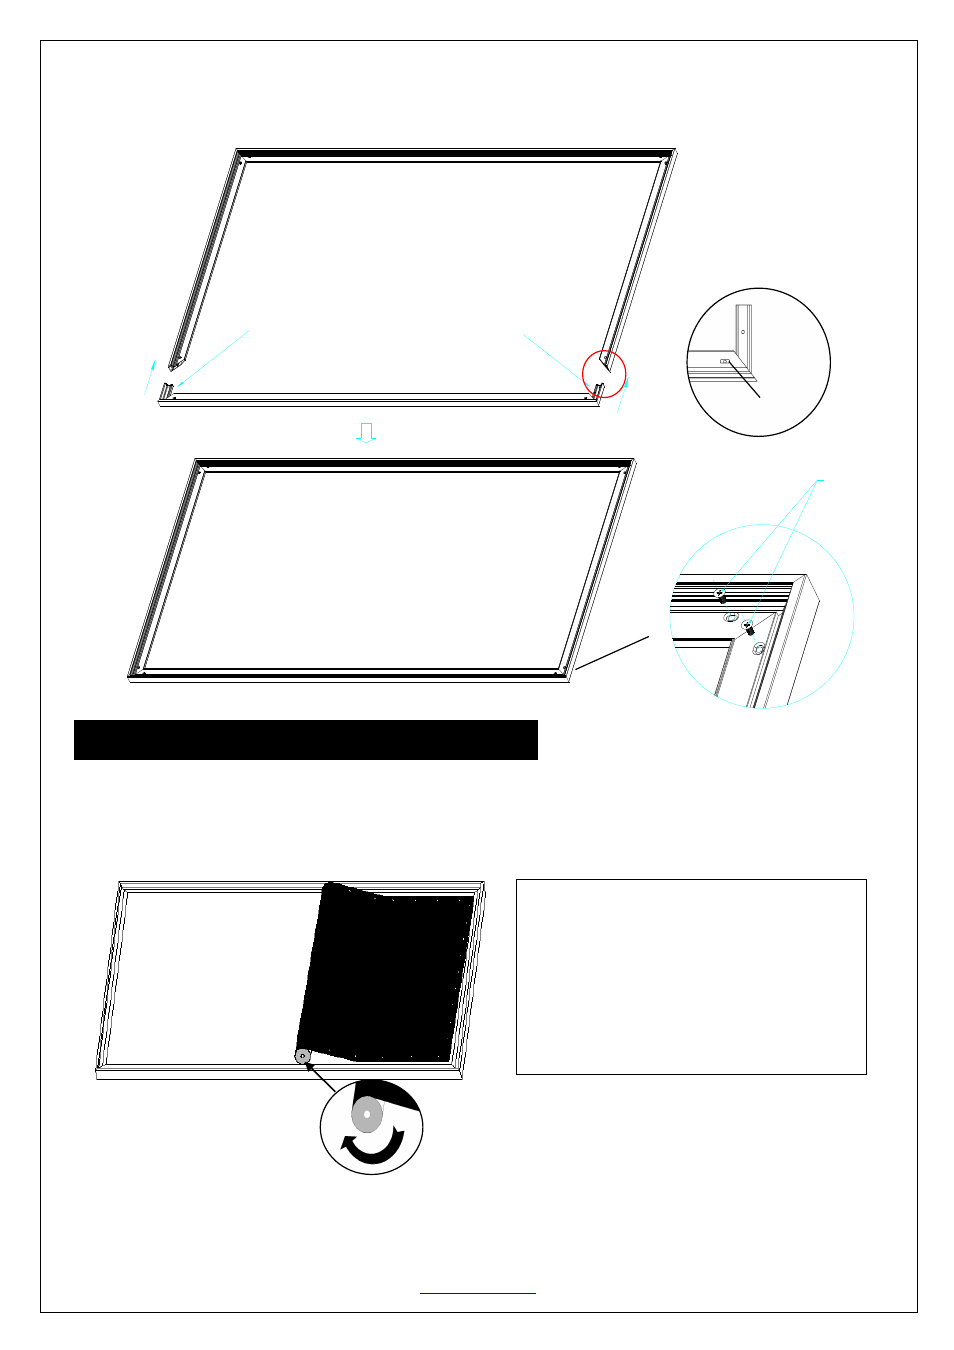
Insert the exposed ends of the joint connectors
into the short (vertical) frame and align the four
corners so that they meet at perfect right angles
4.
Join all four frame parts together following the steps shown below. (Fig.2)
Note:
When
assembled,
please
push
simultaneously
the
two
ends
of
the
long
frames.
Attaching the screen material to the frame
1. Make sure the screen material and frame are both lying face down on a clean, dry, and non-abrasive surface.
2. Carefully unroll the material inside the frame. (Fig.3)
Please note the material will be noticeably smaller than the frame, as the material must be stretched to create a
sufficient amount of tension for perfect material flatness.
3. Attach the fix plates.
(1)
Stretch the material to the corner and insert the screen material’s edge in the groove of the frame. While
one hand holds the material in place the other hand snaps in the push plate (Fig.4-Fig.5).
M5×15 screws
Screw
( fig.3)
Notes:
• Make note of the label to help distinguish
the back and front side.
• Unroll the screen material face down
• Keep the screen material as close as
possible to the frame and do not allow it to
scratch against any part of the frame.
(Fig.3)