Unit set-up, Unit set-up and take-down unit take-down – Server SE-xxx EXPRESS User Manual
Page 3
UNIT SET-UP
ALWAYS CLEAN UNIT THOROUGHLY BEFORE FIRST USE.
SEE SAFETY GUIDELINES, UNIT TAKE-DOWN, PUMP
DISASSEMBLY, CLEANING, AND PUMP ASSEMBLY.
1
SET PORTION CONTROL IF NECESSARY.
SEE PORTION CONTROL.
2
ASSEMBLE PUMP. SEE PUMP ASSEMBLY.
3
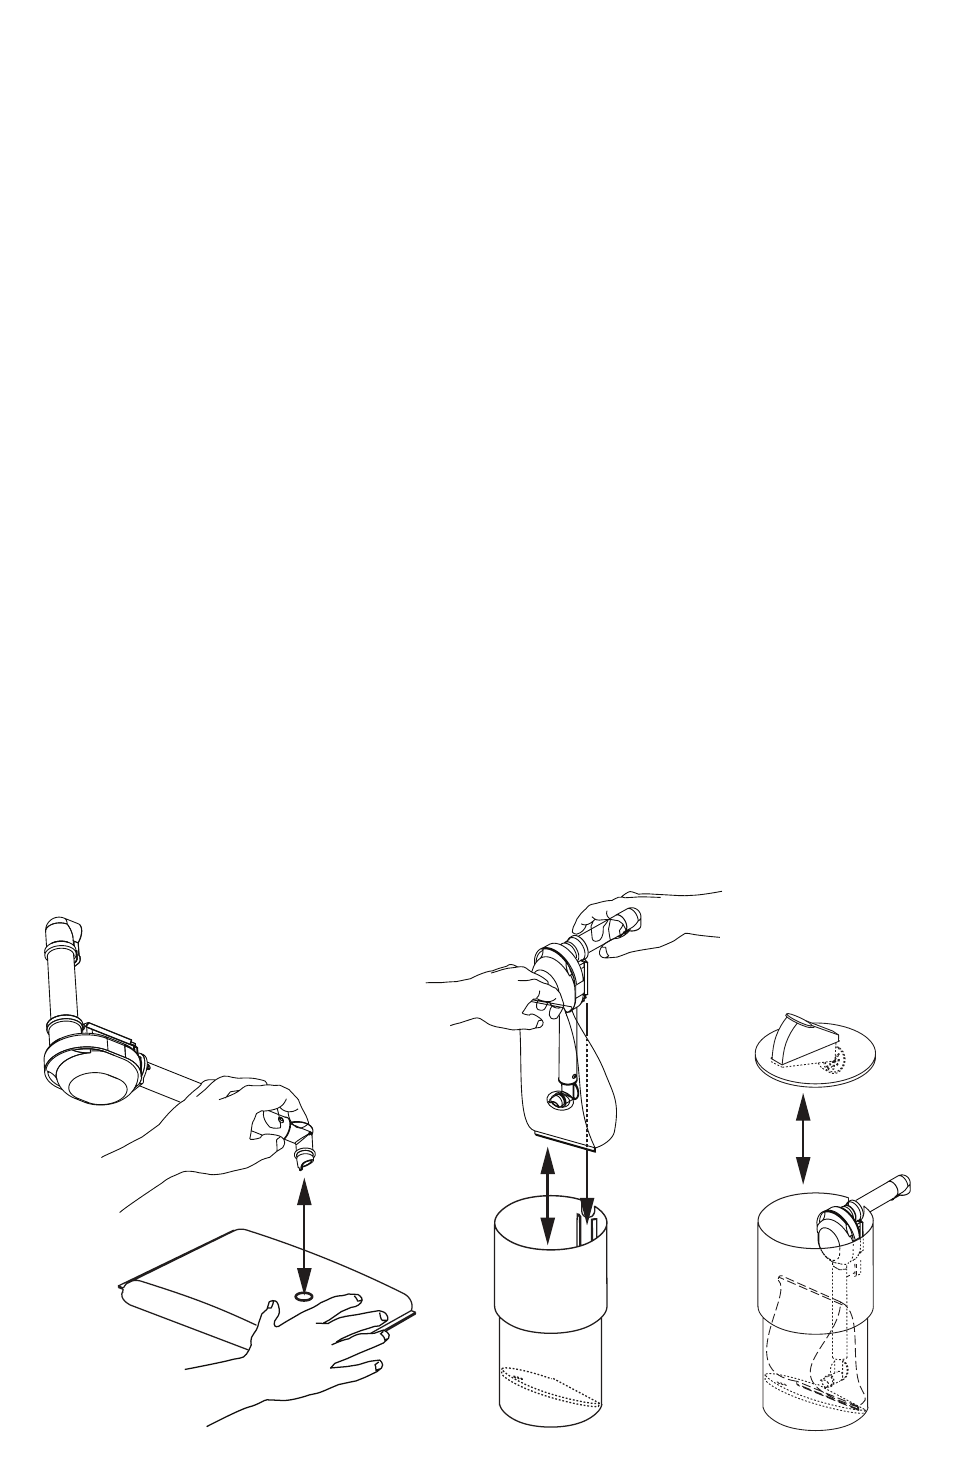
ATTACH PUMP TO PRODUCT POUCH.
• Place product pouch on a counter top with pouch
fitment circle facing upward.
• Remove cap from product pouch.
• Position pump connector directly over center of
pouch fitment circle.
• Press pump connector down to pierce through
film in pouch fitment circle.
• Pump connector will be fully engaged into pouch
fitment when outer top surface of pouch fitment
circle touches pump connector rim.
4
PRIME PUMP.
• Apply light pressure on end of product pouch
while repeatedly compressing pump dome.
Continue to repeat this process until pump is full
of product.
5
INSTALL PUMP AND PRODUCT POUCH
COMBINATION INTO SHROUD.
• Align pump guides into retaining slot on inside
wall of shroud.
6
INSTALL LID.
• Position lid with roller facing near pump dome.
UNIT SET-UP
AND TAKE-DOWN
UNIT TAKE-DOWN
1
REMOVE LID FROM UNIT.
2
REMOVE PUMP (AND ATTACHED PRODUCT POUCH
IF UNIT HAS ALREADY BEEN IN USE) FROM
SHROUD.
• If unit has already been in use, disconnect pump
from product pouch. Pull pump by connector
from product pouch fitment.
3
FLUSH AND RINSE PUMP WITH WARM WATER.
• Be sure to rinse connector and discharge fitting
thoroughly.
• Place lower end of pump into water container
and operate pump until all (if any) remaining
product is expelled and only the warm water
flows from the discharge tube. Then remove
pump from container of water to disassemble.
4
DISASSEMBLE PUMP. SEE PUMP DISASSEMBLY.