Node address setup – Fulton Caliber (CAL) SOLA Gateways User Manual
Page 15
__________________________________________________________
_____________________________________________________________________________________
Questions? Call (315) 298-5121 or visit us online at
www.fulton.com
©The Fulton Companies 2013
Supplement SOLA-IOM-2013-0220
have 1.4v at the 3 pin connector you should have something close to that at the ModSync
terminal blocks.)
-
Verify that your computer has connected to the ProtoNode. By Right Clicking on the Local
Area Connection and Selecting “Status” you can see whether or not your computer has
connected to the ProtoNode. If not double check your settings (
step 2 on Page 8
.)
-
Verify all dipswitch settings on the ProtoNode module. Use Addendums 1, 2 and 3 as a
guide. *If any dipswitches are changed you will have to restart the ProtoNode before they
take effect.
-
If you have connected, but all information to the BMS has a value of zero, check the BMS
settings on the BMS screen at the ModSync. Standard settings are Node 2, Baud 19200,
RS485. *If you change any of those settings at the ModSync make sure you press the
“ModSync Reset” button to allow those changes to take place. You will know the ModSync is
resetting when the screen goes blank for a few seconds.
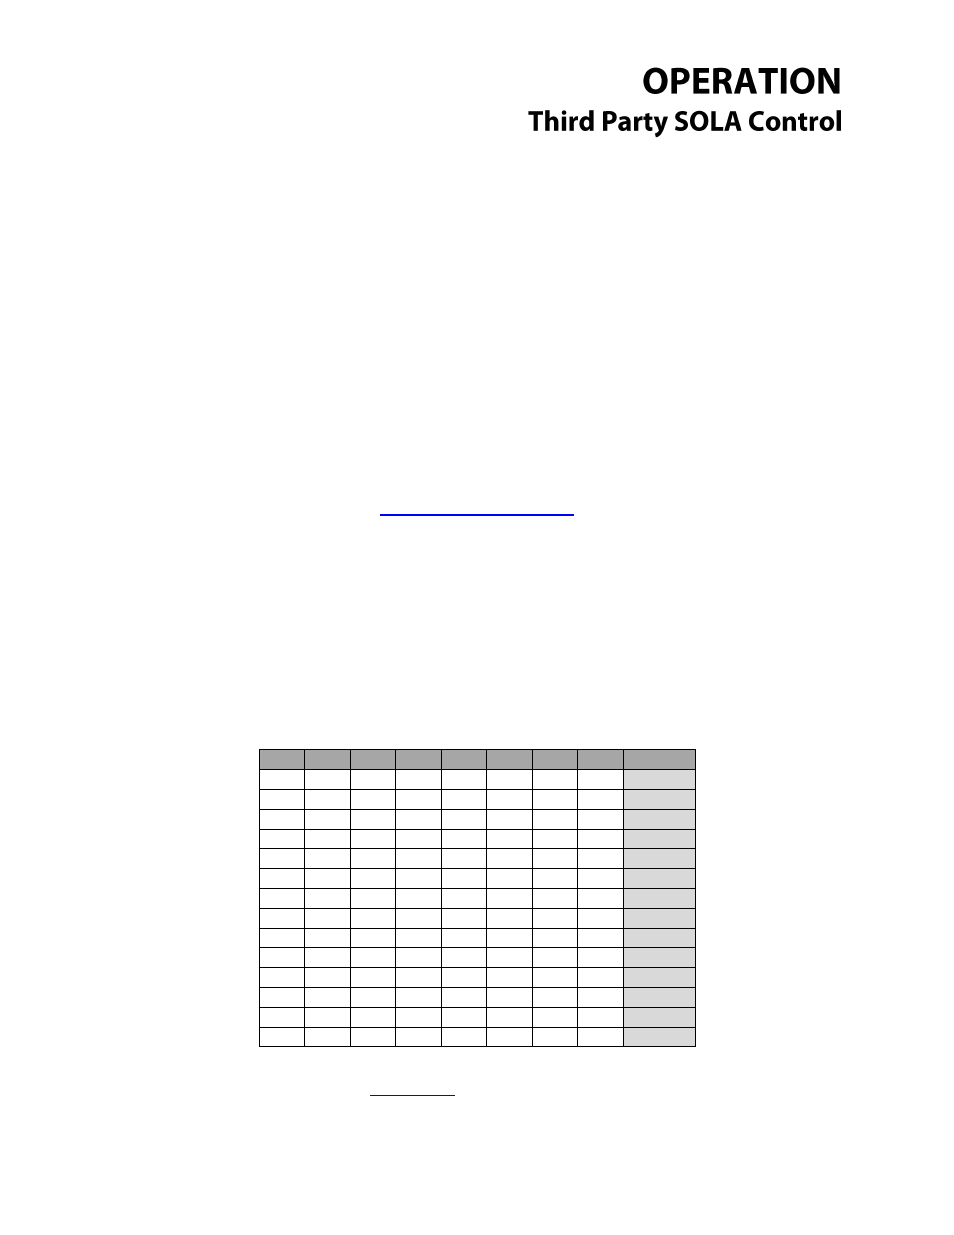
Node Address Setup
Please note that any changes made to ANY of the dipswitches require the ProtoNode to be restarted.
For this reason it is suggested that the all the dipswitches be configured BEFORE powering up the
ProtoNode. Restarting the ProtoNode on a Lonworks network may require the ProtoNode to be re-
commissioned into the network.
A7
A6
A5
A4
A3
A2
A1
A0
Address
Off
Off
Off
Off
Off
Off
Off
Off
0
Off
Off
Off
Off
Off
Off
Off
On
1
Off
Off
Off
Off
Off
Off
On
Off
2
Off
Off
Off
Off
Off
Off
On
On
3
Off
Off
Off
Off
Off
On
Off
Off
4
Off
Off
Off
Off
Off
On
Off
On
5
Off
Off
Off
Off
Off
On
On
Off
6
Off
Off
Off
Off
Off
On
On
On
7
Off
Off
Off
Off
On
Off
Off
Off
8
Off
Off
Off
Off
On
Off
Off
On
9
Off
Off
Off
Off
On
Off
On
Off
10
Off
Off
Off
Off
On
Off
On
On
11
Off
Off
Off
Off
On
On
Off
Off
12
Off
Off
Off
Off
On
On
Off
On
13