Perrycraft DynaSport Roof Racks User Manual
Page 2
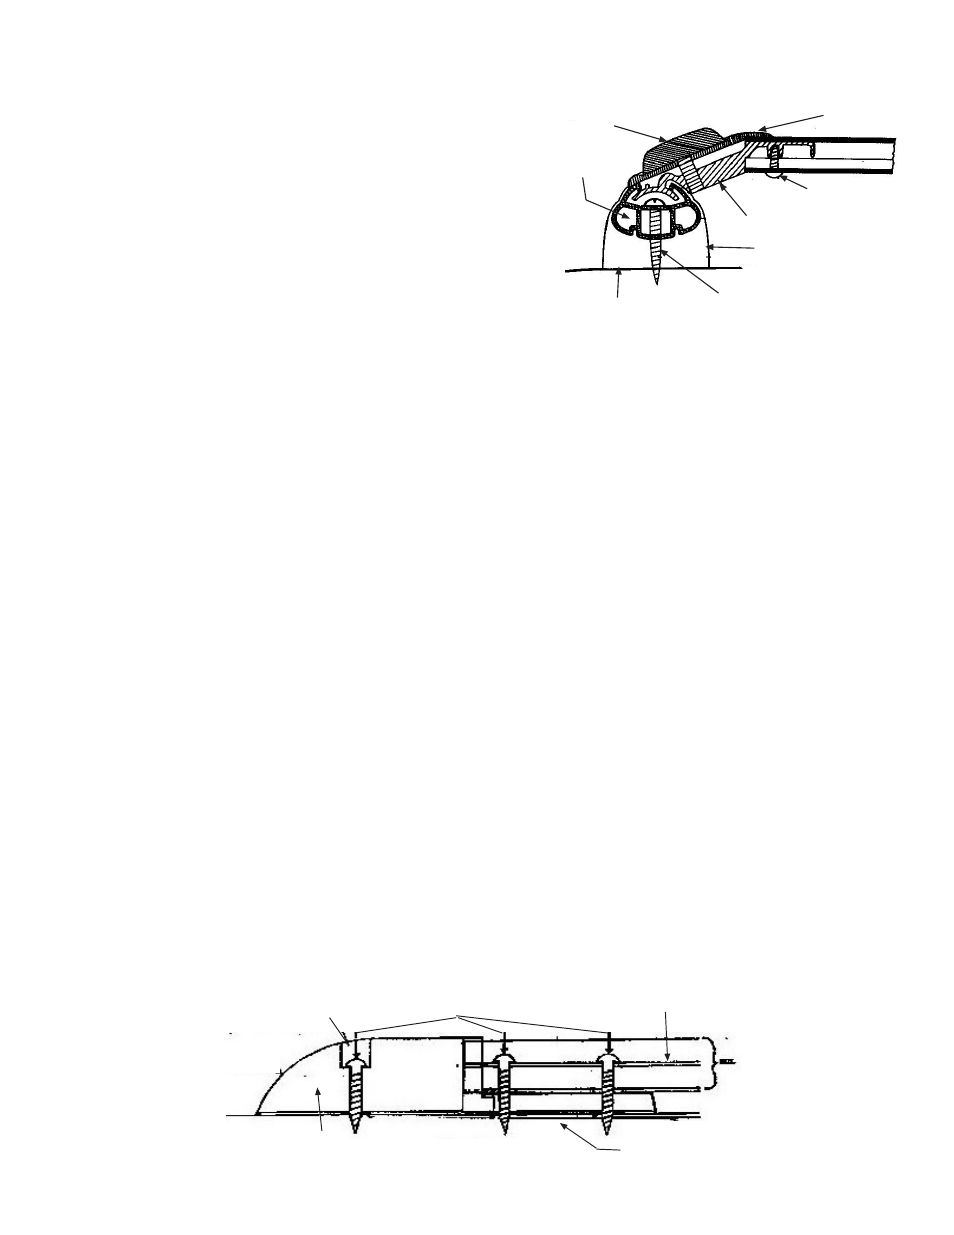
Crossbar
Adjustment Knob
Crossbar Connector Cover
Crossbar Connector
#8 x 1/2
Blunt-End Screw
Side Rail
End Support
#10 x 1 1/2 Pan Head
Screw, Waxed
Vehicle Roof Panel
INDS-RR (Page 2 of 2) 120917
2) Using illustration to right as a guide,
Insert crossbar connector assemblies
into ends of crossbars and secure with
#8 x 1/2" blunt end pan head screws
through holes in underside of crossbars.
3) Slide crossbar connectors into top of side
rails and tighten adjustment knobs sufficiently
to hold crossbars in place approximately ten
inches from the end of rails, but loose enough
to allow rails to swivel to conform to roof contour.
4) Using illustration below as a guide, place rail end supports on ends of rails, pressing
into slots on bottom of rails as shown. If supplied with kit, align rail center support
posts with remaining pre-drilled holes in rails and press into slots in bottom of
rails.
5) Place rack in desired position on vehicle roof and mark mounting hole locations. Place
self-adhesive roof slats in position, and mark location. Do not remove tape liner
from roof slats at this time!
6) Remove rack and slats. Clean roof surface where slats will be located with an adhesive
prep solution (Pro-bond, Tite-R-Bond or alcohol) to ensure proper bonding of slats to
roof. Peel adhesive liner from bottom of slats, place in position and press firmly in
place. Adhesive should be allowed to cure for a minimum of 24 hours before washing
vehicle.
7) Drill pilot holes for rack using 1/8" drill bit, being careful not to penetrate interior
headliner. Apply a coat of primer or rust inhibitor to bare metal edges of each hole.
8) Reposition rack on roof and secure using #10x1-1/2" pan head waxed screws (Do not
remove wax); 3 fasteners per each end support, 1 fastener per each center support
post (if post included). Use caution when tightening fasteners to avoid stripping pilot
hole in roof.
9) Position alignment tabs on screw hole caps with grooves in recessed screw openings
in rail end supports and press caps into place.
10) To adjust crossbar position, rotate adjustment knobs 1 to 2 turns counter-clockwise.
Slide crossbars to desired position and secure in place by rotating knob clockwise until
tightened securely.
10 x 1 1/2
Pan-head Screws
Screw Hole
Plug
End Support
Side Rail
Vehicle Roof Panel