Chapter 3, Machine disassembly and replacement, Disassembly procedure – Acer AL1912 User Manual
Page 38
38
Chapter 3
Machine Disassembly and Replacement
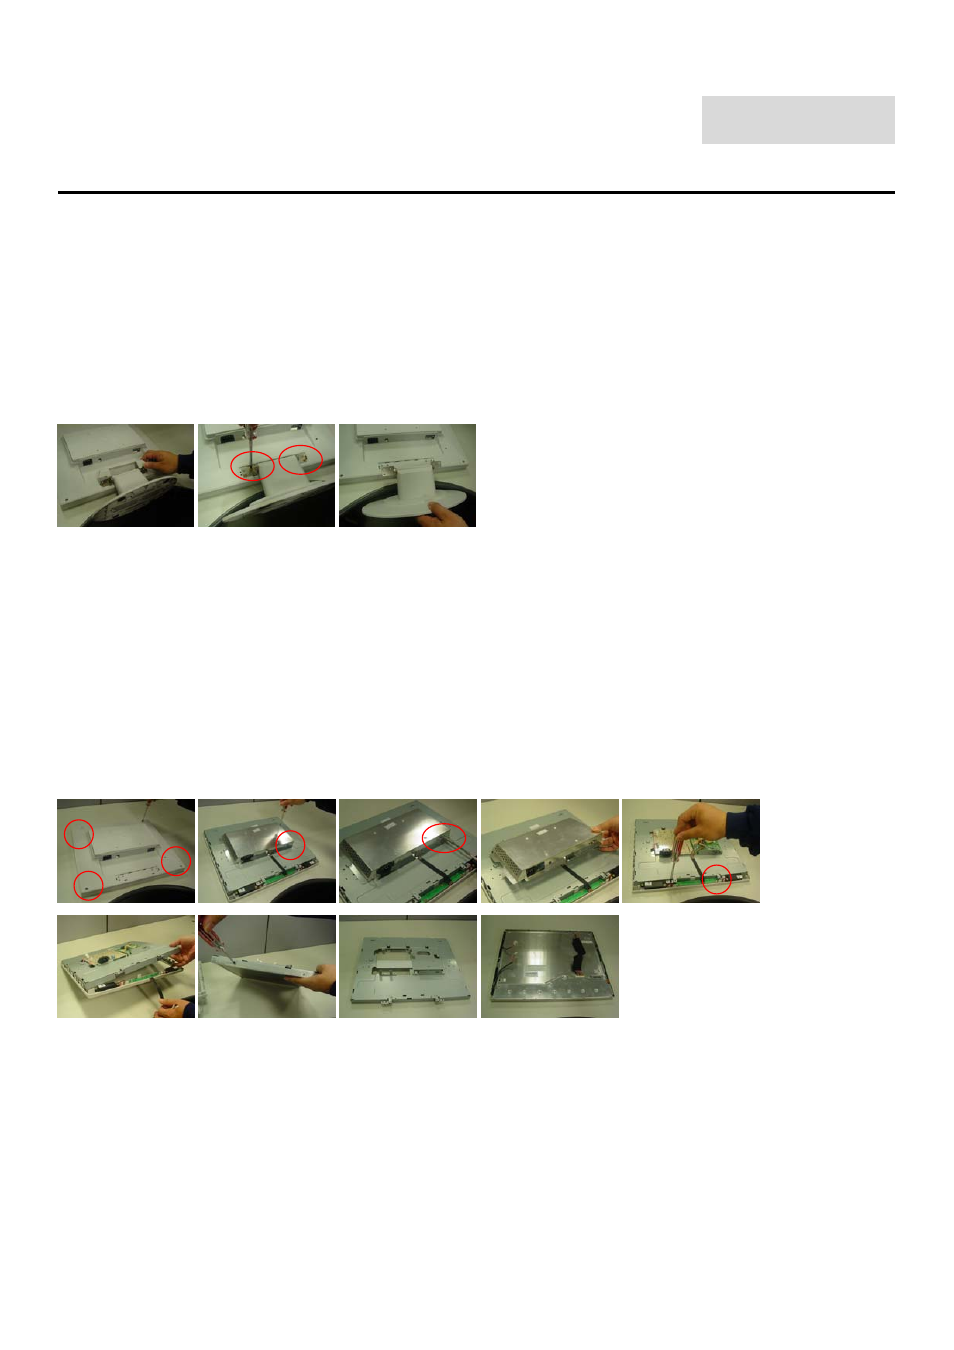
Disassembly Procedure
Disassemble the base
1. Remove the neck cover.
2. Remove the four screws to release the hinge.
3. Remove the base
Disassemble the chassis
1. Remove the four screws to release the back cover.
2. Remove the two screws to release the EMI cover from chassis.
3. Remove the two screws from VGA connector.
4. Then take the chassis.
5. Remove the two screws from bezel.
6. To separate the chassis and bezel.
7. Remove the four screws from chassis and release the panel.
See also other documents in the category Acer Monitors:
- S240HL (2 pages)
- S242HL (27 pages)
- P226HQV (2 pages)
- P216H (23 pages)
- S212HL (28 pages)
- S211HL (2 pages)
- S211HL (27 pages)
- P186HV (2 pages)
- P186HV (23 pages)
- P196HQV (23 pages)
- P186H (2 pages)
- X163W (23 pages)
- X163W (3 pages)
- V223W (28 pages)
- V233H (26 pages)
- P235H (24 pages)
- P201W (2 pages)
- AL1917X (11 pages)
- 3230 (100 pages)
- AL1713bm (11 pages)
- ADEY (24 pages)
- X233HZ (26 pages)
- X233HZ (3 pages)
- X243HQ (51 pages)
- AL1751 (20 pages)
- AL2021 (130 pages)
- AL1917C (10 pages)
- 41L1500-786-1A (20 pages)
- AL2032 (9 pages)
- X243W (21 pages)
- AL2017 (11 pages)
- 41L1700-786-7A (20 pages)
- AL1917T (16 pages)
- X263W (24 pages)
- AL1703 (9 pages)
- AL1731 (3 pages)
- al200 (19 pages)
- AL1911 (10 pages)
- AF 707 (5 pages)
- AL1712 (10 pages)
- AC 711 (7 pages)
- AL1502 (17 pages)
- AL1932 (10 pages)
- X223W (2 pages)
- X223W (26 pages)