Mallory Ignition Lakewood LIFT BARS 21700 User Manual
Page 3
3. Remove lower shock absorber nut and lock
washer. Compress shock slightly to facilitate
removal of shock stud from axle housing
bracket.
Caution:
Shock absorbers are pressurized with gas,
use care when removing stud from bracket.
Carefully release shock allowing it to
extend all the way out.
4. Remove stabilizer bar from axle housing only
and let hang until new traction bars are
installed.
5. Remove factory lower control arm. DO NOT
discard the front bolts and nuts, they will be
reused.
Note:
If vehicle is equipped with emergency brake
cable bracket mounted to the factory
control arm bracket, let cable and bracket
hang temporarily.
6. Place outer traction bar bracket into position on
the side of existing factory control arm bracket
located on the axle housing (upper part of
bracket will be spaced approximately 1” away
from the factory mounting bracket).
Note:
There are right and left-hand
inner/outer brackets.
Refer to photo # 1 for identification.
Install upper axle housing clamp and align
the clamp bolt holes with the lower bracket.
(See photo # 2)
. Install the 7/16-14 x 1-3/4”
hex head bolts (supplied). Thread on the 7/16-14
self-locking hex nuts and tighten only snug.
Use the supplied flat washers between the bolt
heads/hex nuts and bracket clamp surface.
7. Place inner traction bar bracket into position
on the side of the factory control arm bracket.
Align mounting holes for shock absorber
stud. Re-attach shock absorber stud to mount
hole and fasten with hex nut and lock washer
previously removed. DO NOT tighten securely
at this time
(see photo #3)
.
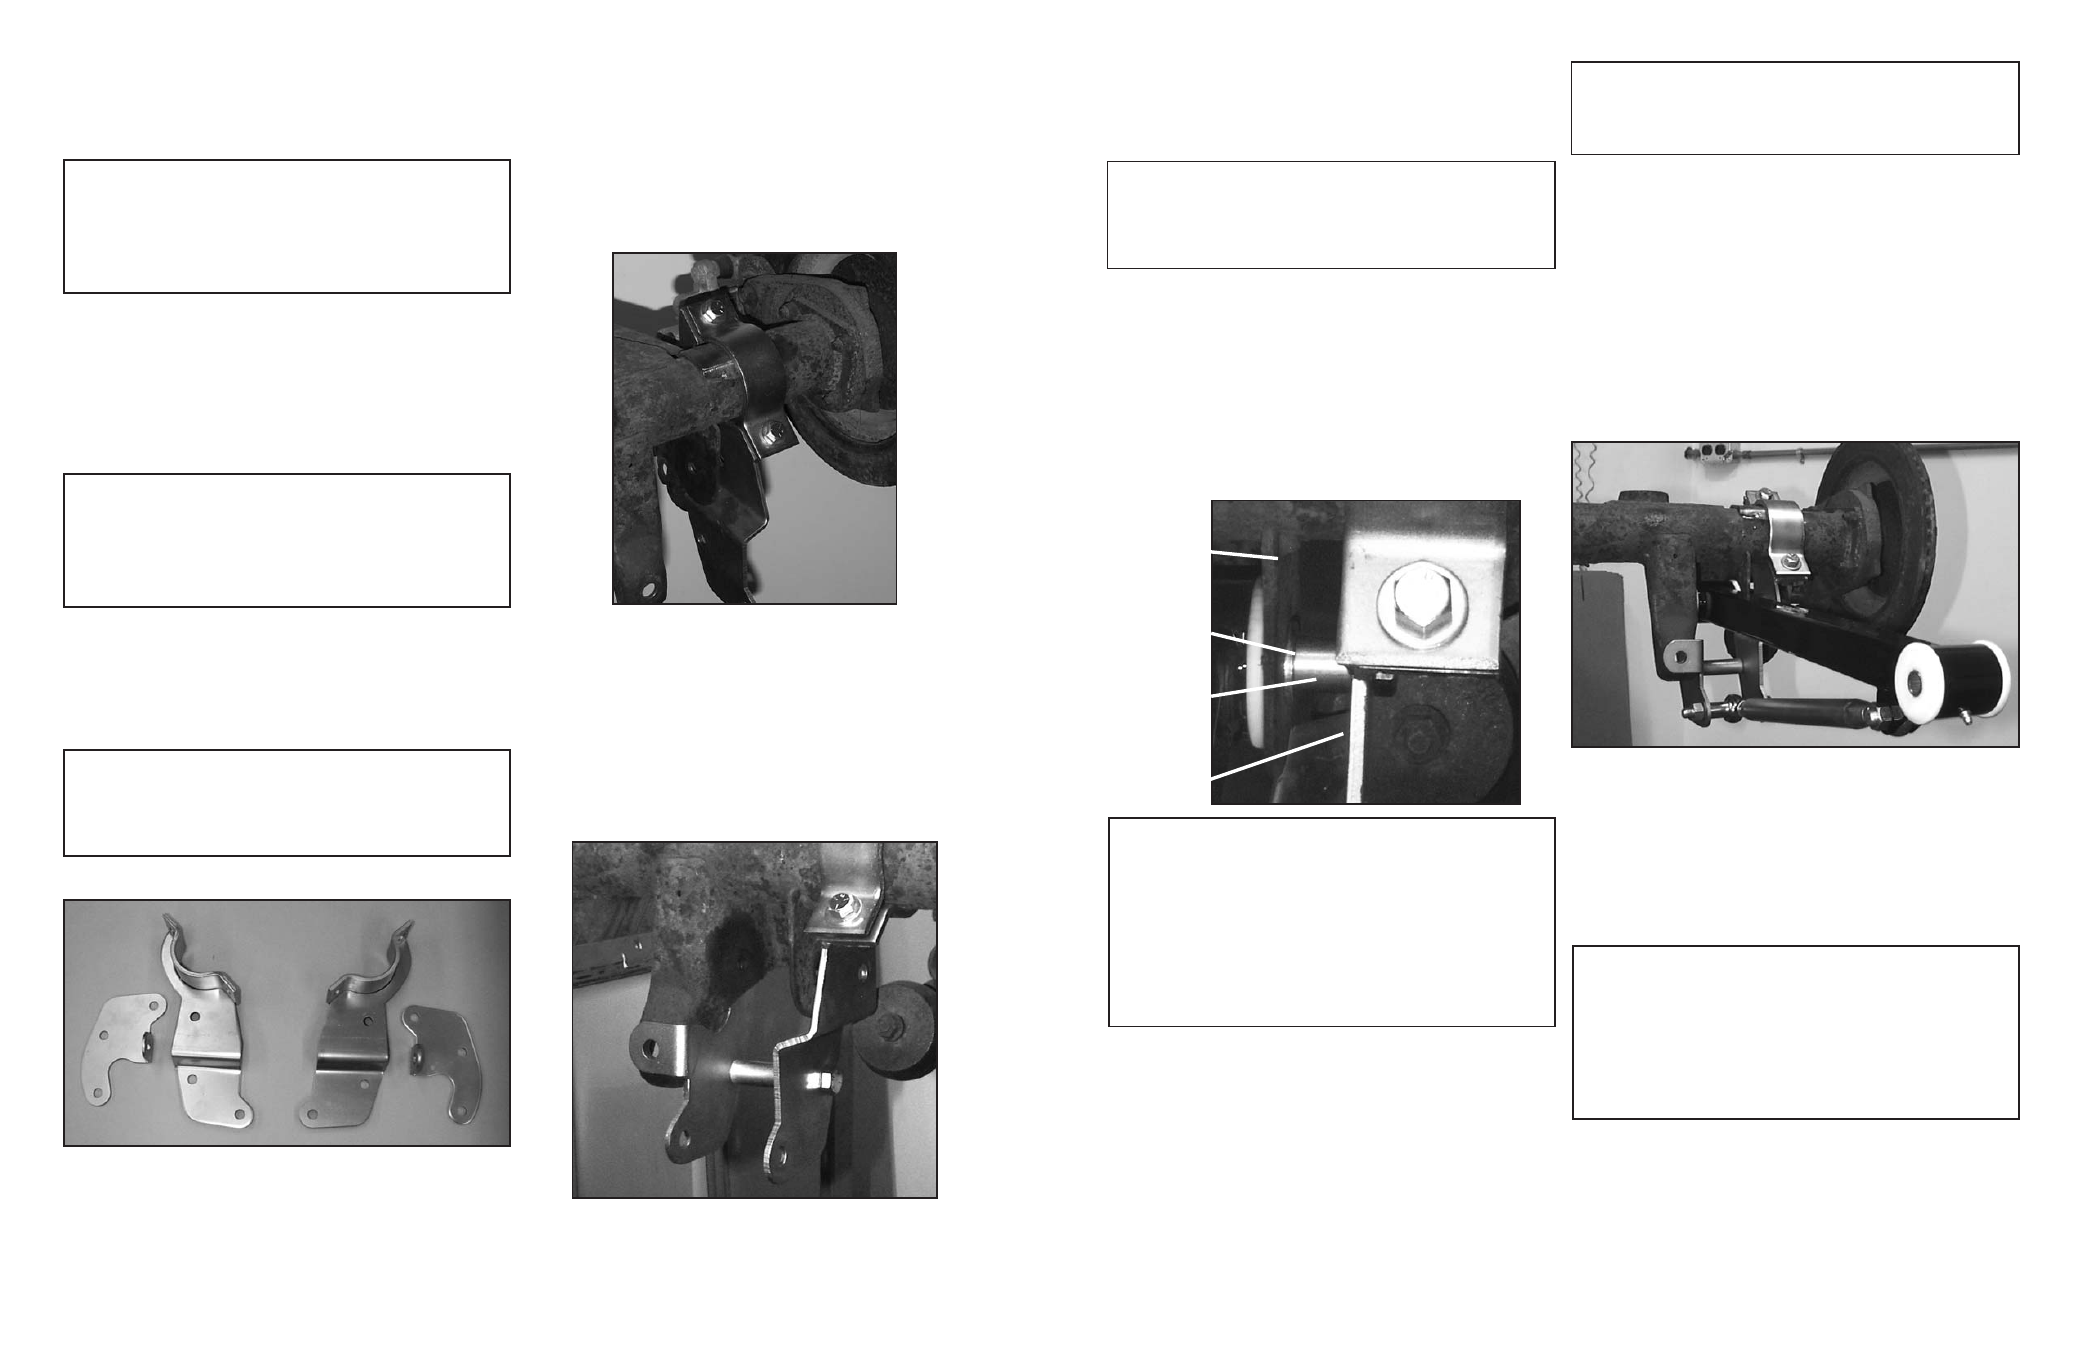
PHOTO #1
PHOTO #3
PHOTO #2
Right Hand Side
Left Hand Side
Left Hand Driver’s Side Shown – Front View
Left Hand Driver’s Side Shown – Front View
8. Install the front end of the Lakewood
Traction Bar to the front chassis mount using
the mounting hardware previously removed. DO
NOT tighten securely at this time.
Note:
The traction bar should be installed with the load
control strut bracket facing down and positioned
toward the front.
9. Swing the rear of the bar up into the stock
factory mounting brackets. Align the holes in
the new mounting brackets with the existing
holes in the factory mounting brackets. Place
and align the 3/4” spacer and flatwasher
(supplied) between the factory outer bracket
and new outer bracket before installing the
mounting bolt
(see photo #4)
.
Note:
If vehicle is equipped with emergency brake
cable bracket (previously removed),
DO NOT use the flatwasher. Use the spacer as
instructed above and position the cable
bracket over the new inner bracket and the
factory outer axle bracket. Cable bracket
will need to be spread apart slightly
in order to fit properly (see photo #4)
.
Install the new metric 12mm x 1.75 x 120mm
hex head bolt (supplied). Thread on the new
metric hex nut (supplied) and tighten only
snug at this time.
10. Attach the load control strut link to the bracket
on the traction bar using the
1/2-20 x 1-1/2” hex head bolt and self
locking hex nut (supplied). Tighten securely.
Note:
Either end of the strut link may be connected
to the traction bar.
Attach other end of strut link to lower holes
of new brackets on axle housing using a 15/16”
spacer (supplied) on each side of the ball rod
end (adjust load control strut to either shorten
or lengthen in order to align mounting holes
keeping the same amount of thread exposed
on each end of the strut). Fasten to the brackets
using the 1/2-20 x 4” hex head bolt and self
locking hex nut (supplied). Tighten only snug
at this time
(see photo #5).
11. Position the long spacer tube between the new
brackets and align with the remaining holes
below the traction bar mount. Install the
1/2-20 x 4” hex head bolt (supplied) through
the bracket and spacer and thread on the self
locking hex nut
(as seen in photo #6)
.
Tighten securely.
Note:
If vehicle is equipped with emergency brake
cable bracket, use flat washers supplied
between 15/16” spacer and bracket and the
long spacer and bracket. If the vehicle does not
use emergency brake bracket DO NOT use the
flat washers supplied (see photo #6).
12. Securely tighten all traction bar mounting
bracket hardware at this time. Tighten front
and rear traction bar mounting bolts to
80 ft./lb. torque.
PHOTO #4
PHOTO #5
Flat
Washer
Spacer
Factory
Outer
Bracket
New
Outer
Bracket