Adjusting the ppvs – Magnum Venus Plastech Flex Molding Process PPVS - VACUUM SENSOR User Manual
Page 21
PPVS (Red) Vacuum Sensor Manual
Rev. 03/2013
Page | 21
Connects into the MPG leak signal.
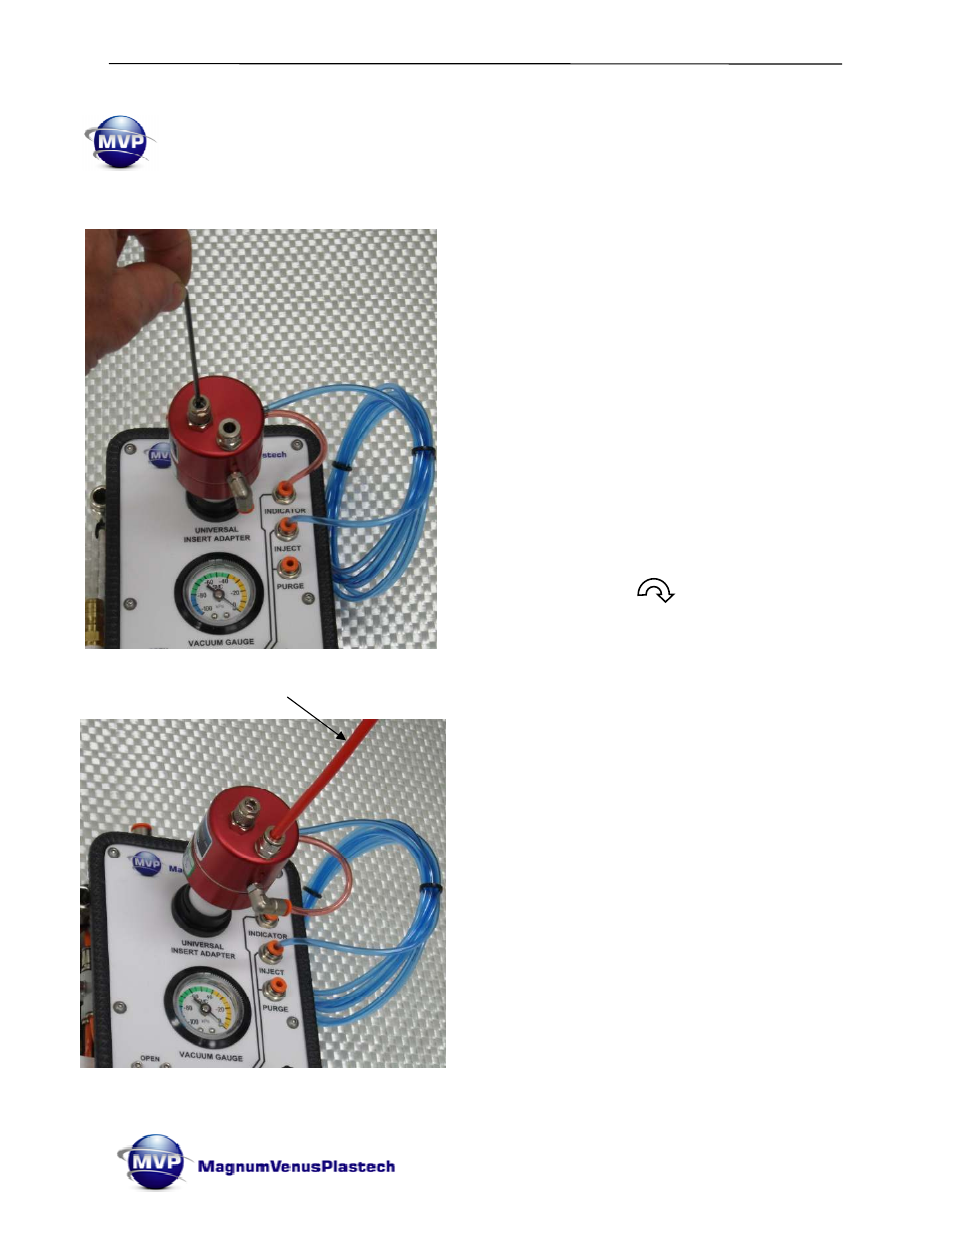
Adjusting the PPVS:
Testing and Adjusting using the Calibration Box:
1. Option #1 - connect the INJECT Output
on the control box to the PPVS supply
port using 4 mm tube.
2. Connect the PPVS signal line to the
pneumatic Indicator on the control box.
3. Using the Vacuum Level Control adjust the
vacuum level Up/Down to determine the
vacuum pressure that the valve activates &
deactivates at. The indicator will signal red
when the valve is active.
4. To Adjust/Change the vacuum pressure at
which the valve activates use the 2.5 mm
Allen Key provided. Turn the adjustment
screw Clockwise to switch closer to
atmosphere (nearer to zero) and
Anticlockwise to switch down to -300mb
(higher vacuum pressure).
Option #2 – Test with Unit connected – for
SSB or Innovator units the 4mm pipe may be
left connected as designed and a 6mm pipe
connected between the Leak Signal on top of
the PPVS and the machine’s MPG. The
machine can then be put on re-circulation and
observed to stop when the PPVS signals at
the chosen switch point.
1. Connect the INJECT Output to the PPVS
supply port using 4 mm tube.
2. Then “Tee” the PPVS Leak Signal port
on the top of the PPVS into the MPG
signal using 4 or 6 mm tube.
3. Using the Vacuum Level Control adjust
the vacuum pressure Up/Down. The Unit will stop when the PPVS activates the leak port.