Connections – Magnum Venus Plastech Flex Molding Process PPVS - VACUUM SENSOR User Manual
Page 20
PPVS (Red) Vacuum Sensor Manual
Rev. 03/2013
Page | 20
Connections:
Connect an air supply (On signal) to the PPVS supply port to activate the Valve. This air
supply can be from a machine On signal or valve control box.
Connect the Leak Port on the top of the PPVS valve into the MPG circuit. When the
PPVS is active the Leak Port will signal the MPG to stop/slowdown the Injection Machine.
PPVS Valve on SSB Units: Connect the PPVS Air Supply / On Port to the “Autosprue
signal” port on the right side of the Machine chassis. This port will become active when
the Machine start button is engaged – activating the PPVS and can be tied to the Injection
Valve as well (turning both on).
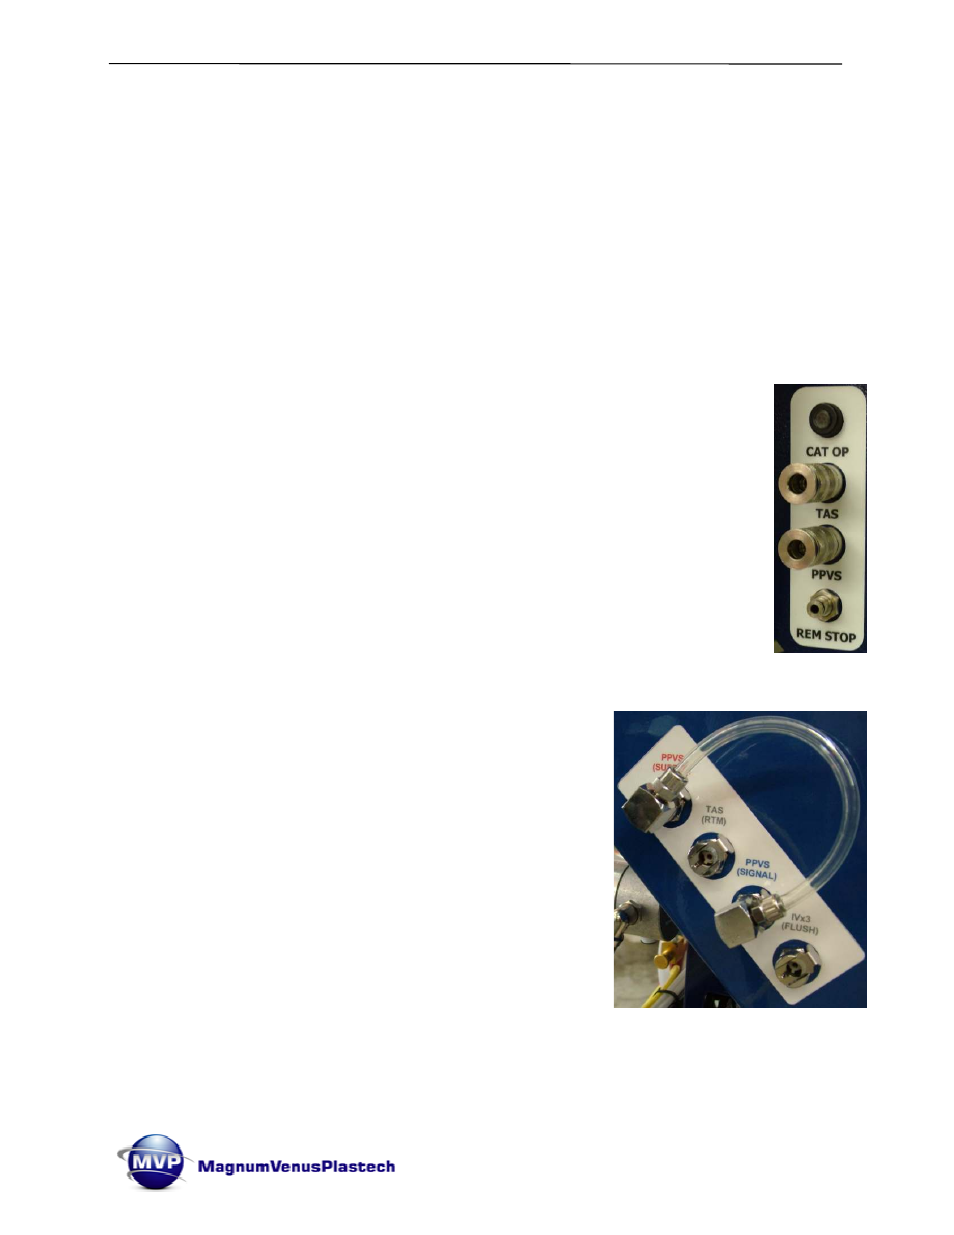
PPVS Valve on Innovator Units: Connect the PPVS Air Supply / On Port to
the “TAS” port on the side of the Innovator control box (see photo right). This
port will become active when the Machine Inject button is engaged –
activating the PPVS and can be tied to the Injection Valve (TAS) as well
(turning both on). Connect the Leak Port on the top of the PPVS to the
“PPVS” port on the side of the Innovator control box or tie it into the MPG
signal line on the MPG.
PPVS Valve on Innovator II Units (USA): Connect the
PPVS Air Supply / On Port to the “TAS supply” or “PPVS
supply” port on the side of the Innovator II control box (see
photo right). These ports will become active when the
Machine Inject button is engaged – activating the PPVS.
Connect the Leak Port on the top of the PPVS into the
MPG line at the MPG valve at the dispense head.
Note the “PPVS signal” port on the side of the
Innovator II control box will not work correctly for this
PPVS (RED) as it requires a positive air signal and is
not design for the Leak Port.