Maintenance – Liquid Controls Mechanical Eliminators User Manual
Page 19
19
MaInTenanCe
To replace the reed strips & float assemblies
1. Remove the 4 screws and washers at the base of the air
eliminator. Pull the air eliminator off the strainer.
2. Remove the baffle plate and the baffle cup (aluminum
air eliminators only) from the housing. If the air eliminator
has a lock nut and a bushing on the bottom of the guide
post, remove them.
3. Remove the cover screws from the air eliminator cover
with a 1/2 inch wrench or socket, and pull the cover, vent
plate and seal ring from the housing.
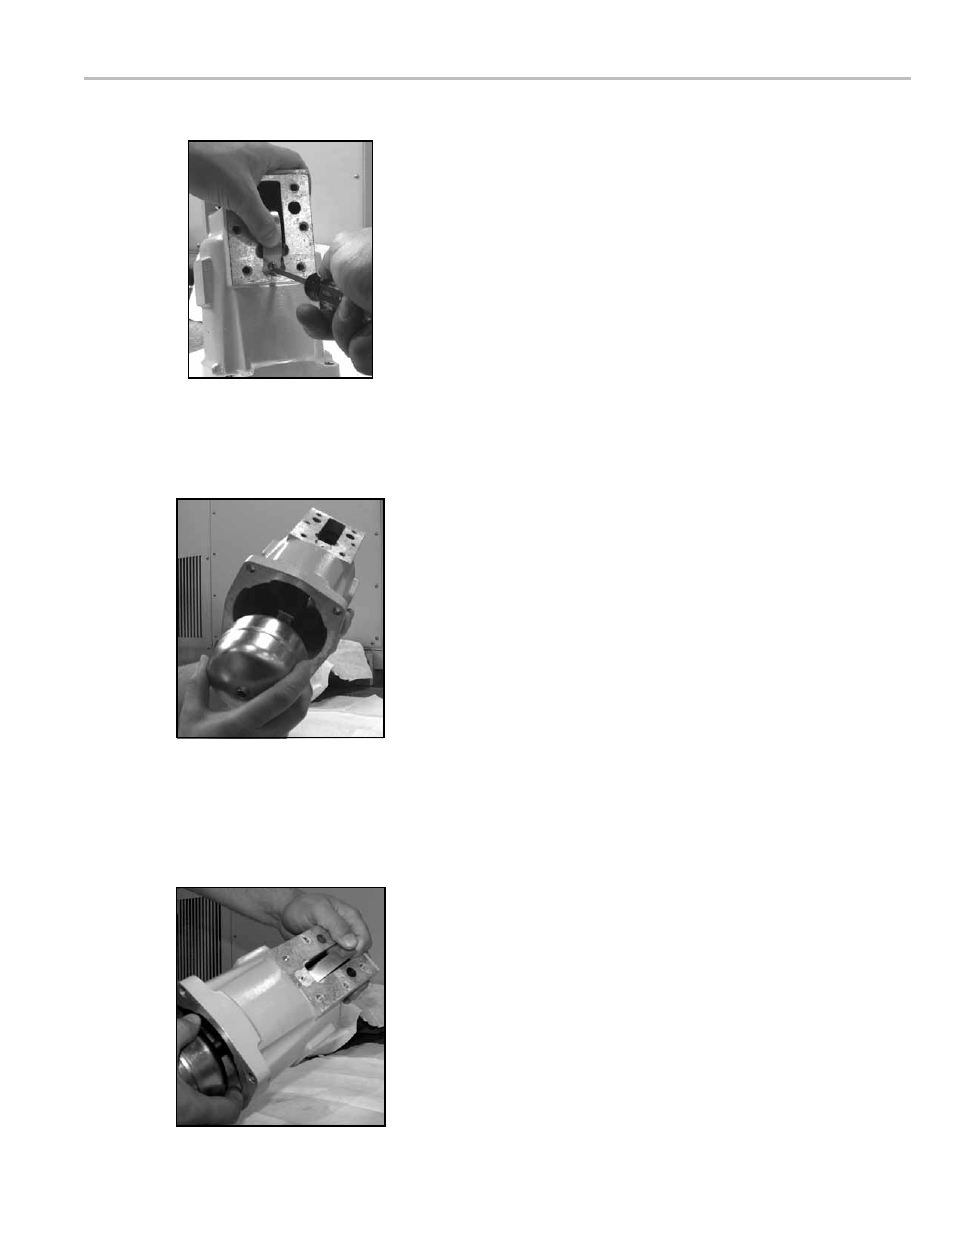
4. To remove a reed strip that is still intact, hold down the
reed strip and unscrew the reed screw (shown on the
top right). Gently allow the reed strip to straighten. Reed
strips violently snap back if they are not held down while
removing the reed screw. Failure to hold down the reed
strip could result in injury and is the cause of many lost
screws.
5. Pull the float, along with the attached reed strips, out from
the bottom of the air eliminator (shown on the right). If
the float is heavy and full of product, replace it with a new
float assembly.
6. If one of the reed strips is broken, remove it and replace
with a new reed strip.
7. Begin reassembly. Push the float, along with the attached
reed strips, up into the air eliminator cavity. Pull the reed
strips out of the side slots (shown on the right). Hold the
reed strips down and screw them down with the reed
screws. If the air eliminator had a lock nut and a bushing
on the bottom of the guide post, replace them.
8. Replace the valve plate, cover gasket, and cover. Tighten
the cover screws to a torque of 17.5 - 20.5 ft-lbs.