Rf off, Battery installation, Remote control operation – Lectrosonics SM User Manual
Page 8
SM
Quickly pressing both the AUDIO and FREQ buttons
from a power off condition plac
es the unit in Standby Mode. In
this mode, the screen displays
rF OFF
“rf OFF” to inform the user that
Standby Screen
the unit is not transmitting.
Holding the FREQ button in Standby Mode displays the
current operating frequency of the transmitter. The op
erating frequency can be changed by holding the FREQ
button and pressing either the Up or Down button.
Release the FREQ button, then press and hold it again
to toggle the display between frequency in MHz and the
hex code corresponding to the equivalent Lectrosonics
Frequency Switch Setting.
Holding the AUDIO button in Standby Mode displays
the current audio input level setting. This level can be
changed by holding the AUDIO button and pressing
either the Up or Down button.
Quickly pressing both the FREQ and AUDIO buttons
simultaneiously when the unit is in Standby Mode pow
ers off the transmitter.
Remote Control Operation
Note: A remote control (Lectrosonics model RM)
is available to change certain settings on the SM
in situations where the controls would be difficult
to access, for example, when the transmitter has
been placed underneath an elaborate costume.
The RM is not included with the SM.
The SM transmitter may be configured to respond to
signals from the remote control or to ignore them. This
setting is accessed by holding down the the Down ar
row button while powering the transmitter on. Use the
arrow keys to toggle between “rc on” (remote control on)
and “rc oFF” (remote control off) - the default setting.
If a remote control signal is detected but the transmitter
is set to “rc oFF”, the message “rc oFF” will be dis
played briefly on the transmitter’s LCD, to confirm that a
valid signal was received, but that the transmitter is not
configured to respond to it.
Functions available from the remote control are:
• Audio Level
• Frequency
• Lock/Unlock Buttons
• Sleep/Wake (power saving mode)
In sleep mode, the SM uses one fifth the normal
amount of current. For example, in sleep mode it will
drain the battery as much in five hours as it would do
in one hour of normal operation. Sleep mode can only
be invoked with the remote control, and can only be
revoked with the remote control or by removing the bat
tery. When in sleep mode, the PWR LED blinks green
occasinally to indicate that the SM is asleep and not
turned off.
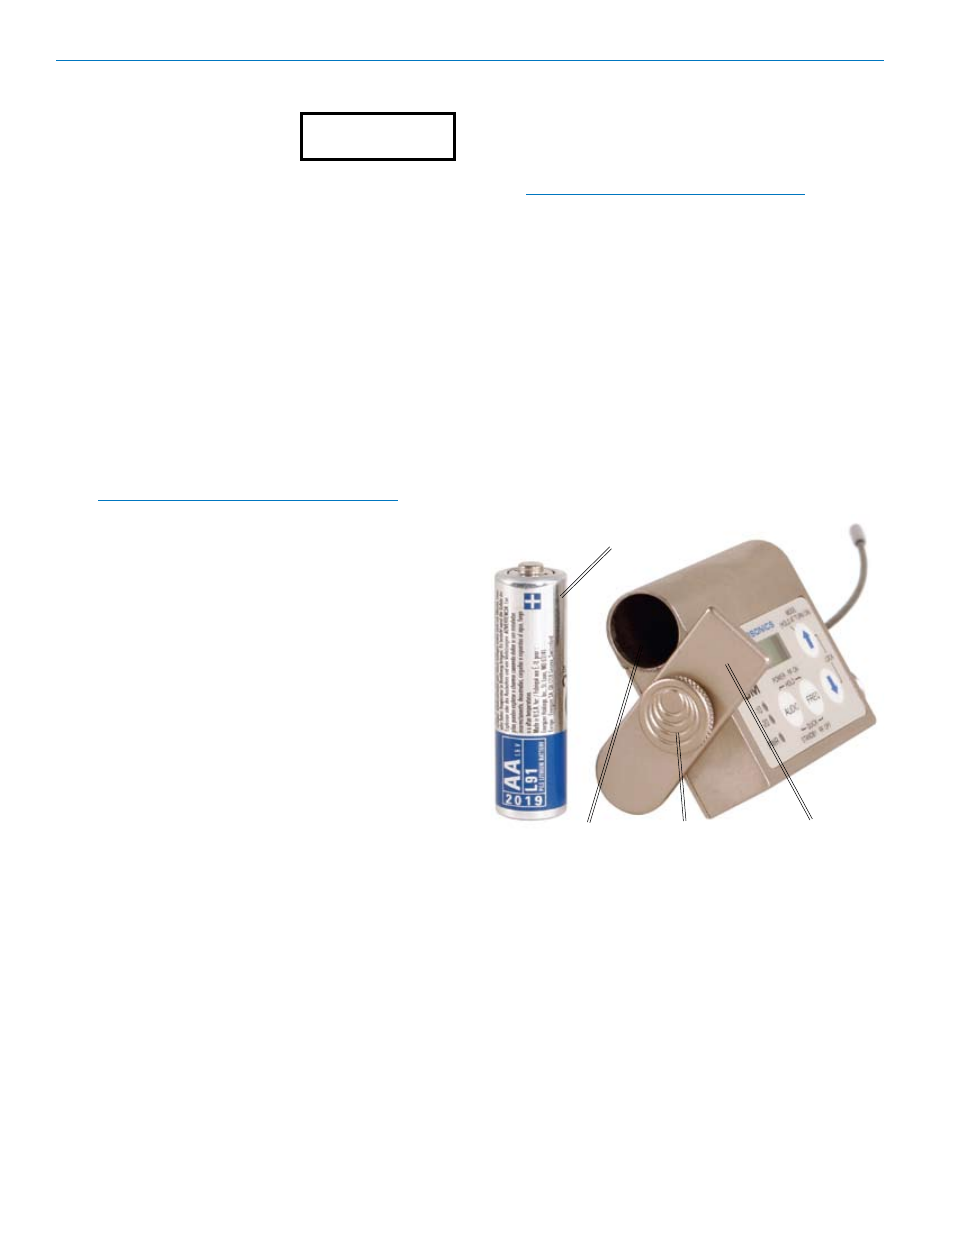
Battery Installation
The transmitter is powered by a standard AA 1.5 volt
battery. We recommend using lithium battery for lon
gest life. Lithium batteries provide over 4.5 hours of
operation at room temperature.
Note: Standard zinc-carbon batteries marked
“heavy-duty” or “long-lasting” are not adequate.
The battery status circuitry is designed for the voltage
drop over the life of lithium batteries.
To install a new battery:
1. Turn the Battery Cover Plate Thumbscrew coun
terclockwise, open the battery compartment and
remove any old battery.
2. Insert the new battery into the SM housing. Take
note of the polarity marked on the case showing the
location of the positive (+) and negative (-) termi
nals. The positive (+) battery terminal goes into the
transmitter first.
3. Replace the Battery Cover Plate and tighten the
Battery Cover Plate Thumbscrew.
AA Battery
Battery
Battery
Battery
Compartment
Cover Plate
Cover Plate
Thumbscrew
LECTROSONICS, INC.
8