Alliance-pro – IQinVision Alliance-pro Backbox User Manual
Page 6
6
D. When attaching an Outdoor Alliance-pro or Alliance-mx Back Box to the Alliance
Wall Mount:
a. Remove four screws and sealing washers from the Wall Mount, and position
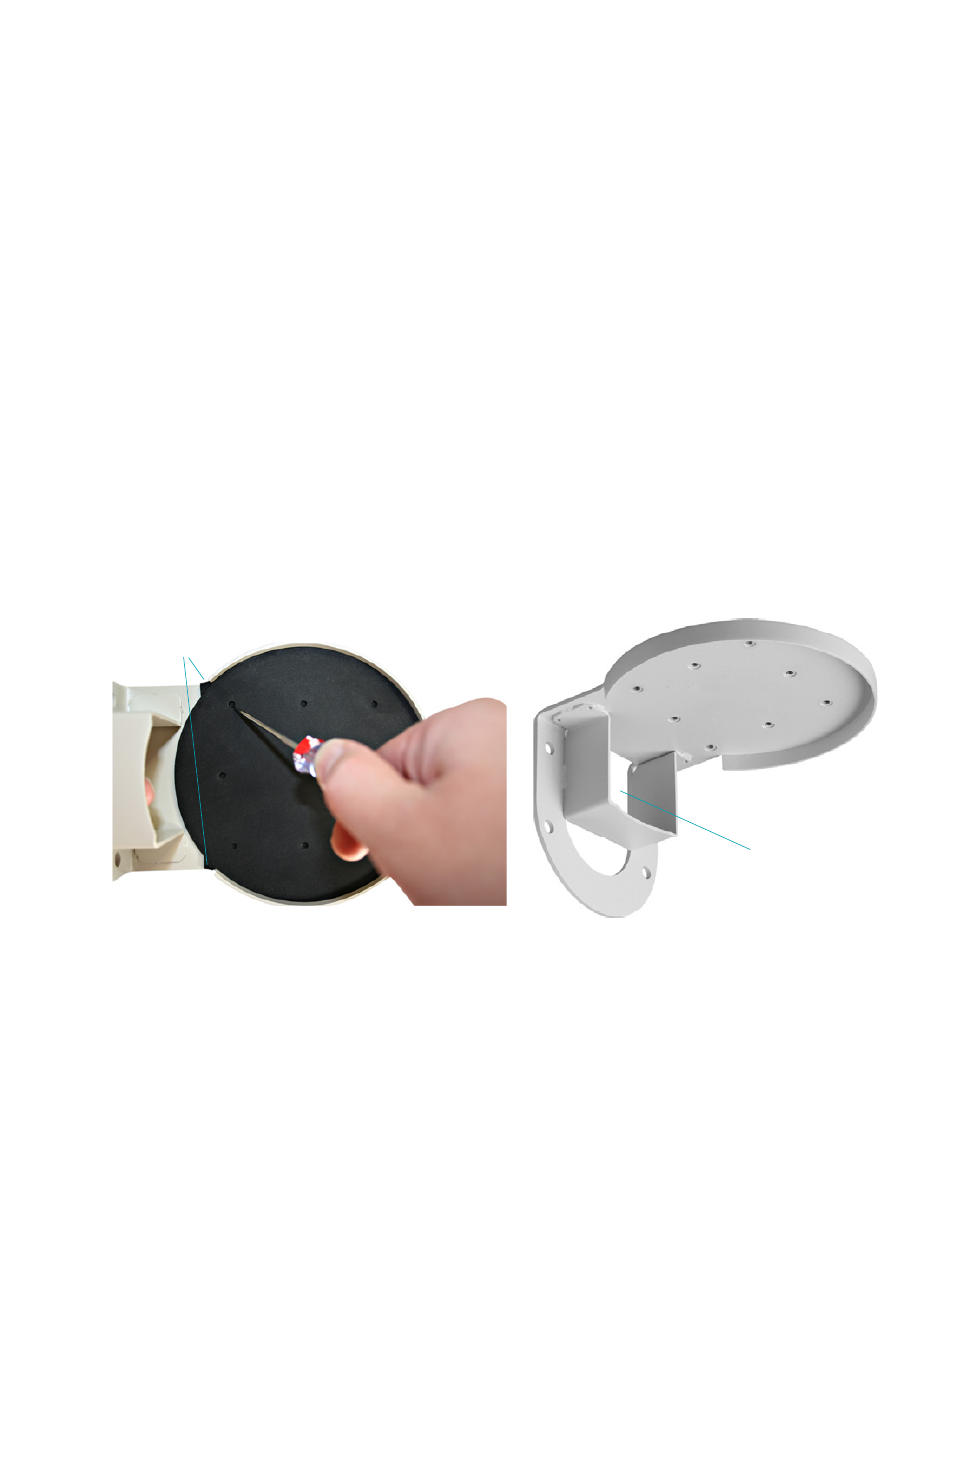
the supplied gasket between the Alliance Wall Mount and the Alliance-pro or
Alliance-mx. The gasket is keyed for proper placement between the Alliance
Wall Mount and the Alliance-pro Back Box or Alliance-mx. It will be necessary to
pierce a hole in the gasket with an Awl tool (not supplied). See Figure 4.4
b. Feed the cables from the wall side through the cable shroud portion of the
Alliance-pro Wall Mount as shown in Figure 4.5.
c. Guide the cables through the side ¾” conduit hole of the Alliance-pro Back
Box, or the Alliance-mx. When using a ¾” threaded Heyco or equivalent fitting
in the conduit hole, be sure the cables are threaded through the weather fitting
prior to feeding them into the Alliance Back Box.
d. Attach the Alliance-pro Back Box or Alliance-mx to the corresponding threaded
holes in the Alliance Wall Mount using the supplied or equivalent hardware,
being careful not to kink the connecting cables when attaching the Back Box to the
Wall Mount.
e. Go to step “5” of this installation guide.
5 Connecting the Camera and Finalizing Installation
Alliance-pro
A. Make any cabling connections between the wall/ceiling side and the IQeye
Alliance-pro camera.
B. Snap the Alliance-pro camera module into the Alliance Back Box by lining up any
one of the three (3) mounting tabs into the retaining channel and then snapping
the remaining two tabs in. Be sure to properly service loop the cabling for proper
fit and retained cable connectivity.
C. If desired, attach the supplied tether to the Dome Bubble / Trim Ring assembly.
a. Attach the tether by screwing the threaded end of the tether into the tether
mount on the underside of the trim ring assembly.
Figure 4.5
Figure 4.4
Cable Shroud
Gasket Key
Placement